


 Download code from GitHub
Chapter 1: Creating a Basic gRPC Application on ASP.NET Core
In this chapter, we will learn how to build a basic ASP.NET Core server application that uses gRPC. We will also build a basic console application that will act as a gRPC client.
The main objectives of this chapter are to introduce you to gRPC and to show you how easy it is to set up and use as a communication mechanism between separate services inside a distributed application. This would especially be relevant in a microservice architecture, where many different services act as one application with many moving components. You will see that using gRPC for communication between separate applications is almost as easy as calling methods inside the same application.
In this chapter, we will cover the following topics:
- Introduction to gRPC
- Preparing your system
- Setting up a gRPC server
- Setting up a gRPC client
- Understanding how Proto files generate C# code
- Sharing a Proto file between the client and the server
- Running a gRPC service on Mac
By the end of this chapter, you will have learned how to set up all the fundamental gRPC components on .NET and how to use them on both the client and server side. You will have also learned how to efficiently share protocol definitions between the client and the server.
Technical requirements
To follow the instructions in this chapter, you will need the following:
- A computer with either Windows, Mac, or Linux installed
- A supported IDE or code editor (Visual Studio, Visual Studio Code, or JetBrains Rider)
- .NET 5 SDK
The instructions for how to set up an SDK and IDE/code editor will be provided later in this chapter for all the supported operating systems. The code files for this chapter are available on GitHub at https://github.com/PacktPublishing/Microservices-Communication-in-.NET-Using-gRPC/tree/main/Chapter-01.
Please visit the following link to check the CiA videos: https://bit.ly/3dQ78eM
Introduction to gRPC
gRPC is a communication mechanism that was first introduced by Google, primarily to enable self-contained components within a distributed application, such as microservices, to communicate with each other easily. It was first made publicly available in 2016. Since then, it has been widely adopted by developers. Official libraries for it were written in the most popular programming languages.
gRPC stands for Google Remote Procedure Call. And, as the name suggests, its primary intention is to enable separate applications to call procedures inside each other's code remotely via the network.
Inside a single application, you would define your callable components (procedures, functions, or methods, depending on the language). By doing that, you can call them from any place within the same application. This means that you call the components of third-party libraries that you import into your application as they become part of your application once imported. But with an RPC mechanism in place, the code that calls your callable components doesn't have to be inside the same application as those components. So long as separate applications are hosted on the same network, they can be set up to call each other's endpoints in the code.
gRPC just happens to be the most widely adopted RPC mechanism. As well as being easy to set up compared to the alternatives, it's also very fast. Its communication protocol, known as Protocol Buffer, or Protobuf, enables very efficient message serialization while messages are in transit.
On top of this, gRPC runs on HTTP/2, which has many performance benefits over its predecessor, HTTP/1.1. Some of those benefits include multiplexing (working with multiple streams of data in a single request), header compression (which reduces message size), and server push (which enables messages to be sent from the server to a connected client without an explicit response from the client). gRPC utilizes these features, but it requires HTTP/2 protocol to be enabled on the network it's running on.
The key benefits of gRPC include the following:
- Highly performant due to the utilization of HTTP/2 features and a lightweight messaging mechanism.
- Multiple connection options instead of just a standard request/response mechanism available with bare HTTP.
- Easy and intuitive to set up with built-in code generators.
- Easy to write code against due to it having a strongly typed API schema that was designed to be highly readable.
- Widely adopted by developers with many existing libraries and code samples available.
- It is the de facto standard mechanism for direct communication between microservices.
- Official implementations are available on most of the popular programming languages and frameworks.
- Can enable communication between applications written in different languages.
- Has an in-built mechanism for hassle-free API versioning.
gRPC on ASP.NET Core
While gRPC has been publicly available since 2016, until 2019, it was only available on ASP.NET Core via third-party libraries, such as the Grpc.Core NuGet package. But with the release of ASP.NET Core 3.0, it was made available as one of the core components of the framework itself.
This has significantly simplified the process of setting up gRPC inside ASP.NET Core applications. As well as there being less boilerplate code to write, there is now better integration between gRPC and the .NET runtime, which improves the stability of the application.
On top of this, there are now pre-defined project templates available in Visual Studio IDE and the dotnet CLI (command-line interface) environment to allow you to initialize your projects with gRPC components that have already been enabled.
gRPC, along with existing features of ASP.NET Core, made it incredibly easy to build distributed applications by using a microservice architecture. The standard gRPC components are very easy to add to your application and the standard .NET build process will auto-generate all the relevant code for you.
As well as this, proto files, which, in gRPC, are used to define communication contracts, can be shared between the client and the server applications by using the standard library referencing mechanism of .NET, so the same proto file doesn't have to be duplicated in a separate project. Proto files can be stored in a reference library that both the client and the server applications use. Then, both of them can be updated simultaneously with the same copy of the communication contract so that no mismatches or incompatibility will accidentally be introduced.
Using gRPC in your own distributed ASP.NET Core application
We will start with the most fundamental part – step-by-step instructions on how to set up an ASP.NET Core application as a gRPC server and how to set up a .NET client that can talk to it.
Preparing your system
To be able to use gRPC on ASP.NET Core, you will need an integrated development environment (IDE) or a code editor that has full .NET support. You will also need the latest software development kit (SDK) version of .NET, which, at the time of writing, is .NET 5.
Other than these components, you don't need anything else to start developing a gRPC application for .NET. It's already included in the framework. And whenever you need an add-on library, you will be instructed on how to obtain it.
Because .NET is an OS-independent framework, you can write applications for it on either Windows, Mac, or Linux. However, your setup steps will be slightly different, so please follow the section that is relevant to your system.
Setting up your environment on Windows
On Windows, you have three main options regarding an IDE for .NET. They are listed here in order of preference, based on how many features they have and how easy they are to use:
- JetBrains Rider
- Microsoft Visual Studio
- Visual Studio Code
Rider is a fully functioning IDE. Compared to the other options, it has many additional tools. It's also easier to optimize and configure.
The downside of Rider is that it's only available as a paid-for premium, although a 30-day free trial is available for new users.
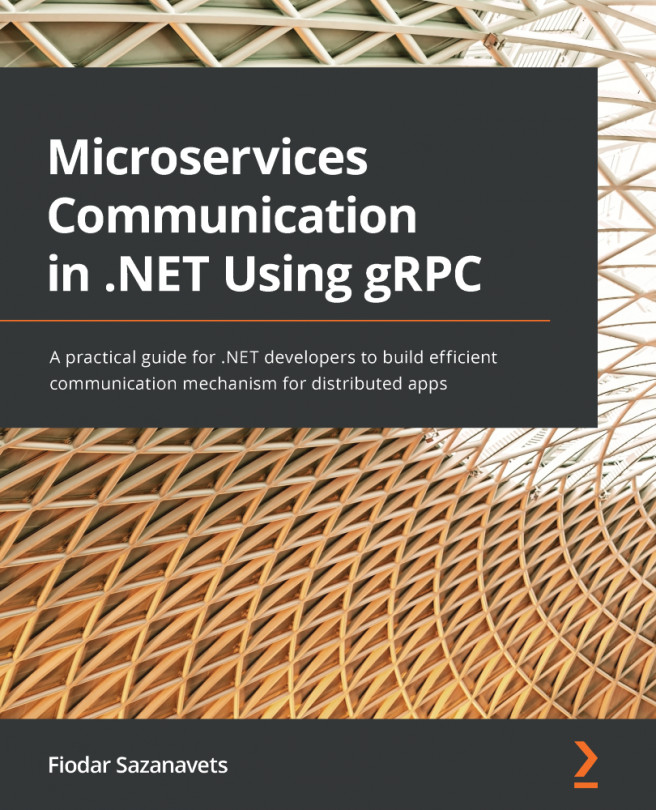
To download Rider, navigate to https://www.jetbrains.com/rider/download/ and follow the setup instructions provided:
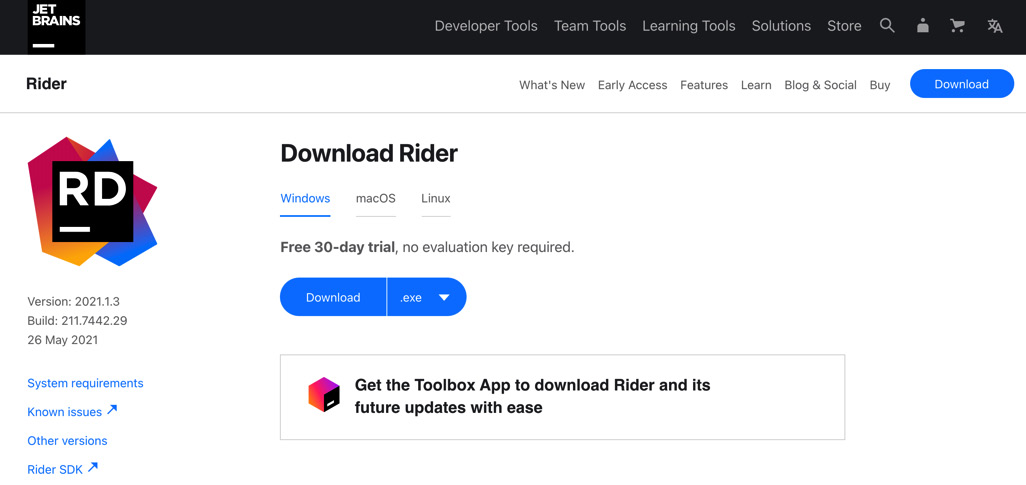
Figure 1.1 – JetBrains Rider download page
Alternatively, you can download Visual Studio. It's the official IDE for .NET from Microsoft. And, unlike Rider, it has a free tier version known as Community Edition.
To download the latest version of Visual Studio (Visual Studio 2019, at the time of writing), go to https://visualstudio.microsoft.com/downloads/:
Figure 1.2 – Microsoft Visual Studio download page
Lastly, there is Visual Studio Code, which, despite sounding similar to Visual Studio, is a completely different product. While Visual Studio is a fully-fledged IDE, Visual Studio Code is merely a code editor.
However, despite being just a code editor, it's still a powerful tool that you can develop your code in. And it's highly configurable, so you will be able to use it to write code in many different languages, not just the ones that are specific to .NET.
The advantage of Visual Studio Code over either Visual Studio or Rider is that it's lightning-fast. Because it's just an editor that lacks many tools that IDEs have, it has far fewer things to load and run in the background.
The disadvantage of using Visual Studio Code over either Visual Studio or Rider is that, as a code editor, it lacks some basic features that are typically embedded into an IDE. For example, you will not be able to compile your project without integrating the editor with some add-on tool or using the CLI.
Visual Studio Code can be obtained via https://code.visualstudio.com/download:
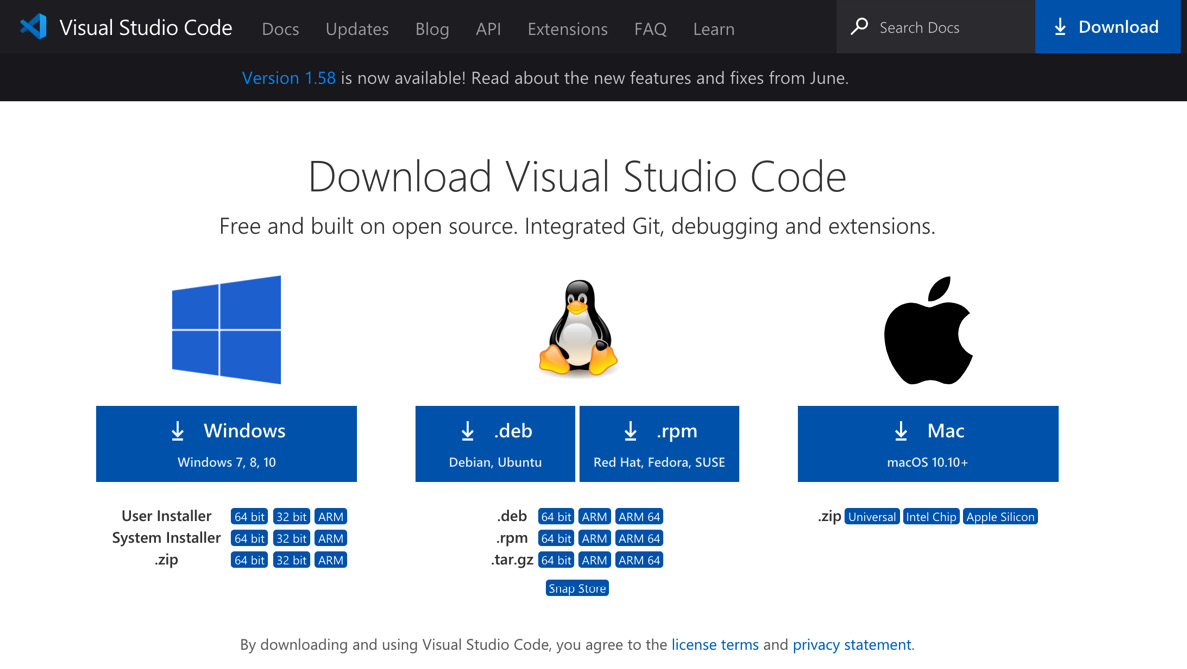
Figure 1.3 – Visual Studio Code download page
Once you have downloaded your preferred IDE, you can proceed with its installation.
Setting up your environment on Mac
On Mac, you have three main options regarding an IDE for .NET. They are listed here in their order of preference, based on how many features they have and how easy they are to use:
- JetBrains Rider
- Microsoft Visual Studio for Mac
- Visual Studio Code
Rider is a fully functioning IDE. Compared to the alternative options, it has many additional tools. It's also easier to optimize and configure.
The downside of Rider is that it's only available as a paid-for premium, although a 30-day free trial is available for new users.
To download Rider, navigate to https://www.jetbrains.com/rider/download/ and follow the setup instructions provided.
Alternatively, you can download Visual Studio for Mac. It's the official IDE for .NET from Microsoft. And, unlike Rider, it can be downloaded for free.
To download the latest version of Visual Studio for Mac, go to https://visualstudio.microsoft.com/vs/mac.
Lastly, there is Visual Studio Code, which, despite sounding similar to Visual Studio for Mac, is a completely different product. While Visual Studio for Mac is a fully-fledged IDE, Visual Studio Code is merely a code editor.
However, despite being just a code editor, it's still a powerful tool for developing your code. And it's highly configurable, so you will be able to use it to write code in many different languages, not just the ones that are specific to .NET.
The advantage of Visual Studio Code over either Visual Studio for Mac or Rider is that it's lightning-fast. Because it's just an editor that lacks many tools that IDEs have, it has far fewer things to load and run in the background.
The disadvantage of using Visual Studio Code over either Visual Studio for Mac or Rider is that, as a code editor, it lacks some basic features that are embedded into an IDE. For example, you will not be able to compile your project without integrating the editor with some add-on tool or using the CLI.
Visual Studio Code can be obtained via https://code.visualstudio.com/download.
Setting up your environment on Linux
On Linux, you have two main options regarding an IDE for .NET. They are listed here in their order of preference, based on how many features they have and how easy they are to use:
- JetBrains Rider
- Visual Studio Code
Rider is a fully functioning IDE. Compared to the alternative options, it has many additional tools. It's also easier to optimize and configure.
The downside of Rider is that it's only available as a paid-for premium, although a 30-day free trial is available for new users.
To download Rider, navigate to https://www.jetbrains.com/rider/download/ and follow the setup instructions provided.
Lastly, there is Visual Studio Code, which is a highly configurable code editor, so you will be able to use it to write code in many different languages, not just the ones that are specific to .NET.
The advantage of Visual Studio Code over Rider is that it's lightning-fast. Because it's just an editor that lacks many tools that IDEs have, it has far fewer things to load and run in the background.
The disadvantage of using Visual Studio Code over Rider is that, as a code editor, it lacks some basic features that are embedded into an IDE. For example, you will not be able to compile your project without integrating the editor without some add-on tool or using the CLI.
Visual Studio Code can be obtained via https://code.visualstudio.com/download.
With this, our IDE setup is complete.
Downloading the .NET SDK (all operating systems)
Lastly, to write .NET applications, you will need to download the .NET platform.
There are two versions of it: runtime and SDK. As a developer, you will need the SDK. The runtime is only suitable for running .NET applications that have already been compiled; it cannot be used to write application code and compile applications.
The .NET SDK can be obtained via the following link. Please use the latest full release version. Further instructions are available at https://dotnet.microsoft.com/download/dotnet.
Now that your environment has been set up, you can start building an ASP.NET Core application with basic gRPC capabilities.
Setting up a gRPC server
Now that your environment has been set up, you are ready to create your gRPC server application.
There are several ways to proceed. Regardless of whether you've chosen to use the IDE or CLI, you will be able to use the gRPC project template to initialize your application code, with all the gRPC capabilities already pre-defined. However, in real-life scenarios, you may want to add gRPC capabilities to an existing hosted web service. Therefore, we will go through the process of creating a bare-bones ASP.NET Core application and then add gRPC capabilities to it.
Initializing an ASP.NET Core project via an IDE
If you are using an IDE (Rider, Visual Studio, or Visual Studio for Mac), the process of initializing a new ASP.NET Core project is the same. When you launch the IDE, you will be presented with the option to create a new project. Click on this option and, from the list of templates, choose Web App.
This template will be called slightly differently, depending on what IDE you are using. For example, on Visual Studio for Windows, multiple templates represent an ASP.NET Core web application. For this project, any of them would be suitable. However, since you will only be using basic ASP.NET Core features, you should choose the most basic template. On the Windows version of Visual Studio, it is called ASP.NET Core Web App:
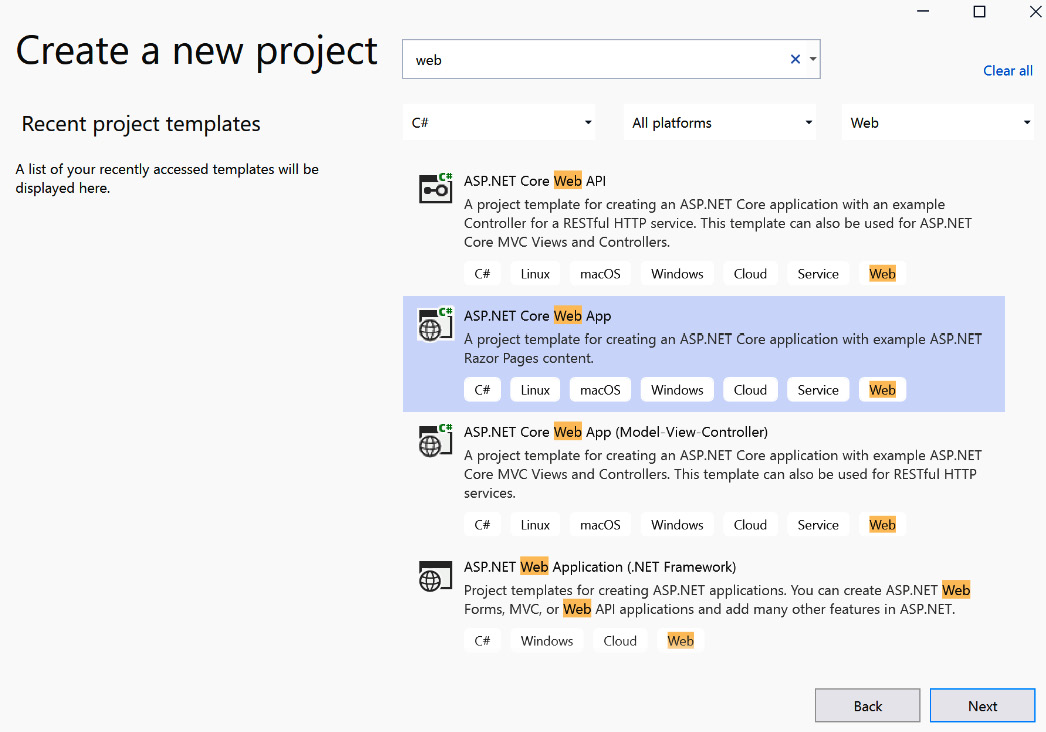
Figure 1.4 – Web App project template in Visual Studio 2019
JetBrains Rider will have a similar project template name with some variations, depending on the version. However, if you are using Visual Studio for Mac, the project template that you need will be called Web Application:
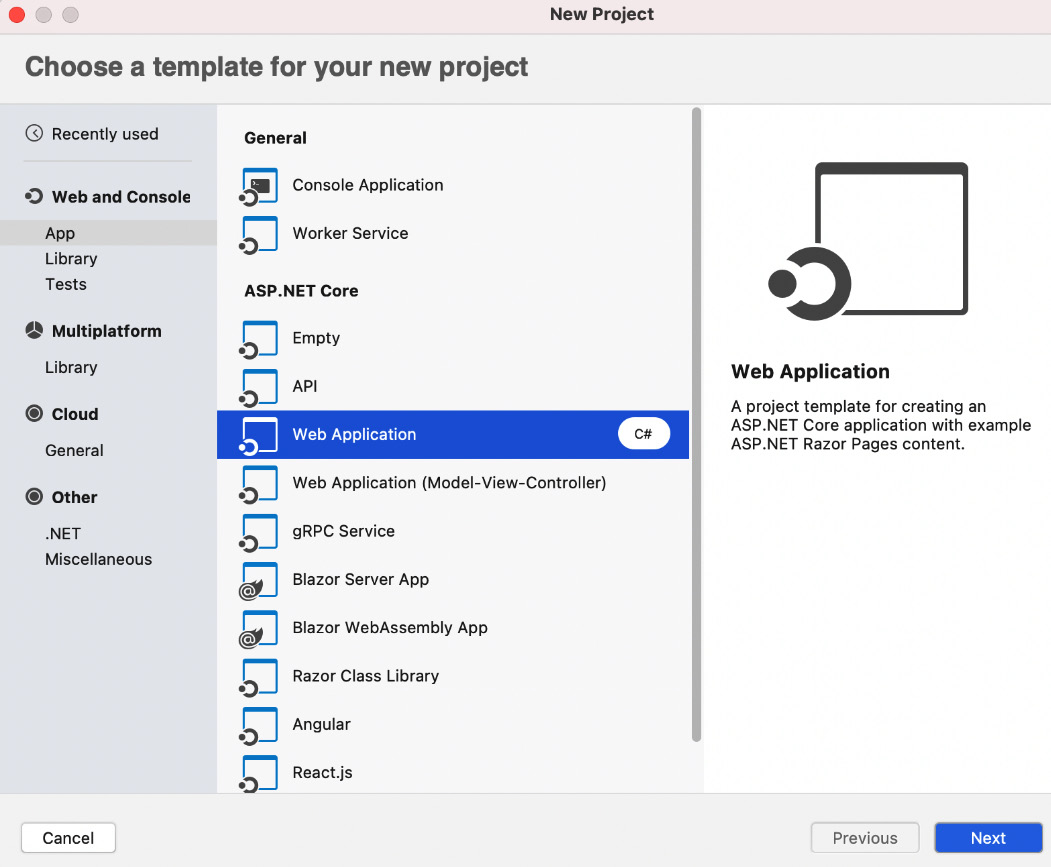
Figure 1.5 – Web Application template on Visual Studio for Mac
Once you select the template, you will be asked for the project's name. I have called mine BasicGrpcService. You can give yours any name, but for the convenience of following the instructions, you should give your project the same name:
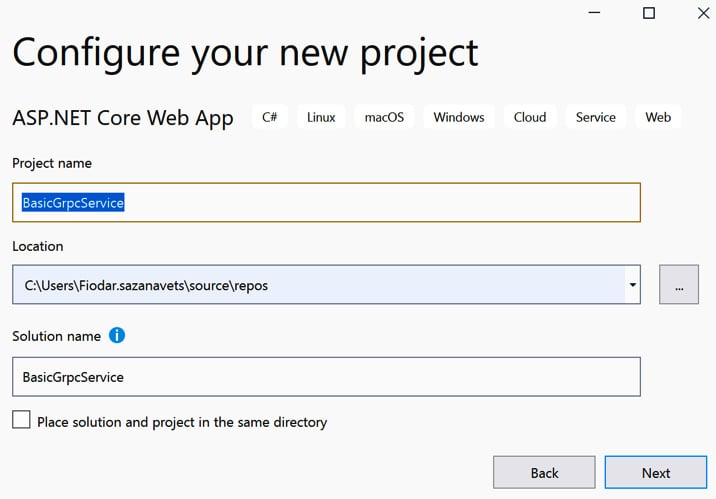
Figure 1.6 – Naming your project
When you're asked which framework version you would like to use, select the latest one, which, at the time of writing, is .NET 5.
Also, if you are asked for the authentication type, select None. If you have the Configure for HTTPS option, make sure that it's selected. Leave the remaining settings as-is and click on Create:

Figure 1.7 – Runtime selection and ensuring HTTPS is enabled
At this point, a solution should have been created with an ASP.NET Core project inside it.
Initializing an ASP.NET Core project via the dotnet CLI
If you don't have access to an IDE or if you prefer to work with the command line, you can create the project via the dotnet CLI, which will be available on any system that has the .NET 5 SDK installed. To do so, navigate to the folder that you want to place your project in and execute the following command:
dotnet new webapp -o BasicGrpcService
Finally, since you have selected to enable HTTPS (which is recommended for gRPC), you will need to install and trust the development HTTPS certificate for .NET.
If you are using a Mac, then you will not be able to configure the HTTPS on gRPC endpoints, so you will need to enable HTTP too. The instructions on how to do so are available in the Running a gRPC service on Mac section.
If you are using an IDE, such as Visual Studio or Rider, the process of installing and trusting the development certificate will happen automatically. You will receive a prompt when you launch your application via the IDE for the first time. Otherwise, you can configure the certificate via a CLI command.
To do so on Windows or Mac, you can execute the following command inside your project folder:
dotnet dev-certs https --trust
On Linux, this command may not work, as different Linux distributions have completely different mechanisms for trusting self-signed HTTPS certificates. If you are using Linux, you will need to obtain this information from the documentation that's specific to the distribution you are using.
Congratulations! You now have a functioning ASP.NET Core application that you can start adding gRPC server components to.
Adding gRPC server components to an ASP.NET Core project
Because you have initially chosen a basic ASP.NET Core application template, your project file (BasicGrpcService.csproj) should only contain the most basic markup, such as this:
<Project Sdk="Microsoft.NET.Sdk.Web">
  <PropertyGroup>
    <TargetFramework>net5.0</TargetFramework>
  </PropertyGroup>
</Project>
Now, we will need to modify it to add gRPC components. First, we will run the following command from the project folder to install the required NuGet package:
dotnet add BasicGrpcService.csproj package Grpc.AspNetCore
Here, we have added a NuGet package reference to the Grpc.AspNetCore library. This library adds all the necessary components to enable gRPC inside an ASP.NET Core application.
There is also another element that you may not be familiar with if you haven't used gRPC inside an ASP.NET Core application before. It's called Protobuf and its role is to tell the application which protocol buffer files are available for writing code against. This element will ensure that the right code snippets are generated inside your application.
You will need to add the following markup snippet to the BasicGrpcService.csproj file to enable this:
<ItemGroup>
  <Protobuf Include="Protos\greeter.proto"
    GrpcServices="Server" />
</ItemGroup>
Your file will look similar to this:
<Project Sdk="Microsoft.NET.Sdk.Web">
  <PropertyGroup>
    <TargetFramework>net5.0</TargetFramework>
  </PropertyGroup>
  <ItemGroup>
    <Protobuf Include="Protos\greeter.proto"
      GrpcServices="Server" />
  </ItemGroup>
  <ItemGroup>
    <PackageReference Include="Grpc.AspNetCore"
      Version="2.34.0" />
  </ItemGroup>
</Project>
Please note that the Protobuf element has the GrpcServices attribute set to Server. We've done this to tell our compiler that we only expect our application to act as a server while using the greeter.proto file from inside the Protos folder. This will ensure that only server-related classes will be generated by the compiler.
You can choose the Client role as well. In this case, it's only the client-side components that will be generated from our proto file. But since we are building the server-side application right now, it's certainly not the right role to choose.
Also, you can choose to omit the GrpcServices attribute completely. In this case, you will be able to generate both server-side and client-side components for your code.
Next, we will need to add a proto file that defines the communication mechanism between the client and the server. To do so, create a Protos folder inside your project folder and place the greeter.proto file inside it with the following content:
syntax = "proto3";
option csharp_namespace = "BasicGrpcService";
 package greeter;

// The greetings manager service definition.
service GreetingsManager {
  // Request the service to generate a greeting message.
  rpc GenerateGreeting (GreetingRequest) returns
    (GreetingResponse);
}

// The request message definition containing the name to be
  addressed in the greeting message.
message GreetingRequest {
  string name = 1;
}

// The response message definition containing the greeting   text.
message GreetingResponse {
  string greetingMessage = 1;
}
This is a very bare-bones proto file. It's the equivalent of a Hello World application as it's only there to demonstrate the very basic functionality to a complete beginner.
We will cover the format of the proto file in more detail later. For now, let's go through the basics by using this example.
The first element is syntax. In our case, its value is set to proto3. There were several iterations of the gRPC communication protocol and the current one is the third iteration. Due to this, we have explicitly specified it here, as some applications may otherwise assume that this file represents an older version of the protocol.
Then, we have the csharp_namespace option. This option is specific to the C# language as it's the language that we will be working with. It tells our compiler what namespace it should use while generating classes based on these proto definitions. So, the server and client classes that are based on the service elements of the proto file will be under the namespace defined here.
Next, we have the package element. package in Protobuf is conceptually similar to C# namespaces, but it's intended for Protobuf rather than the code that gets generated from it. package allows one proto definition to reference other definitions, just like the C# class can reference external libraries by using namespaces.
Next, we have the service definition. A single proto file can have lots of these. But essentially, a single proto service represents a single client or server class in the code.
Inside the server, rpc definitions represent remotely called procedures, which are equivalent to C# methods. Each of those definitions has a unique name, a single message definition as its parameter (the request message), and a single message definition as its return object (the response message).
The RPC definition must always have a single request and a single response. You cannot have RPC without putting anything into the parameters or its return statement. Nor can you specify multiple message definitions in either of those places.
However, there are ways of sending or returning empty messages in gRPC calls. Even though a message definition must be specified, it doesn't need to have any fields.
Likewise, there are multiple ways of sending or receiving multiple messages. First, both the client and the server can stream messages, which will enable the system to send or receive multiple messages of the same schema rather than one. Also, each message can have other messages as data types in its fields. It can also use collections, which allows it to put multiple messages of the same kind into a single field.
Messages are defined by the message keyword in a proto file. The closest equivalent in C# is basic classes or structs that are used for data transfer.
Each message can have zero or any number of data fields. Each data field is defined by its data type (which we will cover in more detail in Chapter 3, Protobuf – the Communication Protocol of gRPC), unique name, and unique sequence number. For example, this is the only data field that we will use inside GreetingRequest:
string name = 1;
The sequence number at the end must start with 1 and be unique for each field. These sequence numbers simplify the process of API versioning in gRPC, which we will cover in more detail in Chapter 3, Protobuf – the Communication Protocol of gRPC.
Finally, our example contains multiple comments, which, just like in C#, start with //. They are completely ignored by the compiler.
Adding some code to use gRPC components
Now, we are ready to start modifying our application so that it can use the gRPC components that we have added.
First, you will need to create a Services folder inside your project folder. Then, we must add a file to it and name it GreetingsManagerService.cs. Then, we must put the following content into this file:
using System.Threading.Tasks;
using Grpc.Core;
namespace BasicGrpcService
{
     public class GreetingsManagerService :
       GreetingsManager.GreetingsManagerBase
    {
        public override Task<GreetingResponse>
          GenerateGreeting(GreetingRequest request,
            ServerCallContext context)
        {
            return Task.FromResult(new GreetingResponse
            {
                GreetingMessage = "Hello " + request.Name
            });
        }
    }
}
Please note that, at this stage, you may receive a compiler error. If you do, it will persist until you build the application. But don't worry about it for now.
This class represents the server-side logic that is defined by the GreetingsManager service, which we specified in the greeter.proto file. The basic code placeholders are auto-generated from the proto file and, in our case, are placed in the GreetingsManager.GreetingsManagerBase class, which our class extends. Then, we just need to override the methods from this class to apply our custom logic.
The override of the GenerateGreeting task is the representation of the GenerateGreeting RPC, which is defined inside the GreetingsManagerer service in the greeter.proto file. However, you may have noticed that it doesn't match the definition. Yes – as the proto file has specified, it accepts a parameter of the GreetingRequest type and returns an object of the GreetingResponse type. However, it also has an additional input parameter of the ServerCallContext type.
Well, this parameter is nothing but a collection of metadata that was populated by the client sending the request. It contains information such as the username and connection state. It plays a similar role to HttpContext, which is used by the HTTP endpoints (MVC, REST API, and so on) of ASP.NET Core.
This code is very simple. When a client calls this method, the Name property of the GreetingRequest input parameter is read. This value is inserted at the end of the Hello text. So, for example, if the name is John, the output would be Hello John. Then, this value is inserted into the GreetingMessage property of a newly initialized instance of the GreetingResponse object, which is returned to the calling client.
Next, we will need to modify our Startup class to register the GreetingsManagererService class as a valid gRPC endpoint. To do so, first, add the following line inside the ConfigureServices method. If you are using .NET 6 project template, there will be no Startup class. And neither will there be ConfigureServices method. So, you will just need to apply the following code to the main body of Program.cs class, replacing services with builder.Services. And it will need to be placed before the Build event:
services.AddGrpc();
Next, add the following code inside the call to app.UseEndpoints, inside the Configure method:
endpoints.MapGrpcService<GreetingsManagerService>();
Finally, inside your Properties folder in the root of your project folder, locate the profiles element and replace its content with the following:
"profiles": {
    "BasicGrpcService": {
      "commandName": "Project",
      "dotnetRunMessages": "true",
      "launchBrowser": false,
      "applicationUrl":
        "http://localhost:5000;https://localhost:5001",
      "environmentVariables": {
        "ASPNETCORE_ENVIRONMENT": "Development"
      }
    }
  }
That's it – our gRPC server has been fully configured. Now, you can launch your application and see if it works correctly. If it does, you should see some console output, and the application shouldn't throw any visible errors:
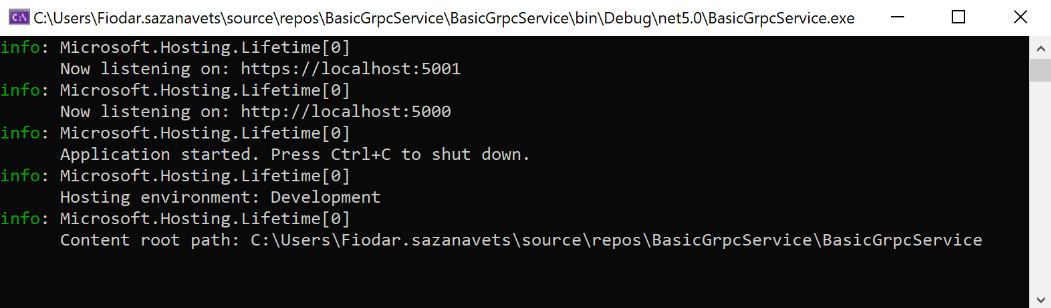
Figure 1.8 – Console output from the gRPC server
With this, we have set up our gRPC server. Now, let's move on to the next step and set up a gRPC client that can talk to it.
Setting up a gRPC client
Now, we will add a basic gRPC client that will be able to communicate with our service via gRPC. This will be a basic console application. The process will consist of the following steps:
- Initialize the console application project.
- Add some gRPC client dependencies to the project.
- Add some code to connect to the gRPC client.
Once you've followed these steps, your basic console application will be able to send requests to the gRPC server and receive responses from it.
Initializing the project for the client application
If you are using an IDE, you can add a new project to your solution. The template that you will need is called Console Application or Console Project, depending on which IDE you're using. However, you need to make sure that you don't choose the .NET Framework version of the template, which will be clearly labeled. Likewise, make sure that you select the C# template as the IDE may present you with options for other languages too:

Figure 1.9 – Console Application template on Visual Studio 2019
As console application is a very basic application type; there won't be any complex setup options to select while creating the project. You can leave all the default options selected. Let's call our new project BasicGrpcClient.
If you are using a code editor and CLI instead of a fully-fledged IDE, you can create the project by executing a dotnet CLI command. Please ensure that you execute this command from the folder where the BasicGrpcService project folder is located. It will create the new project folder at the same level inside of your filesystem that your original project folder is located at. The command will be as follows:
dotnet new console -o BasicGrpcClient
Adding gRPC client components to the application
Now, to make your console application act as a gRPC client, you will need to add some NuGet references to your project. You can do so by executing the following commands inside your BasicGrpcClient project folder:
dotnet add BasicGrpcClient.csproj package Grpc.Net.Client
dotnet add BasicGrpcClient.csproj package Google.Protobuf
dotnet add BasicGrpcClient.csproj package Grpc.Tools
Once the packages have been installed, the content of your BasicGrpcClient.csproj file should be similar to this:
<Project Sdk="Microsoft.NET.Sdk">
  <PropertyGroup>
    <OutputType>Exe</OutputType>
    <TargetFramework>net5.0</TargetFramework>
  </PropertyGroup>
  <ItemGroup>
    <PackageReference Include="Google.Protobuf"
      Version="3.17.3" />
    <PackageReference Include="Grpc.Net.Client"
      Version="2.38.0" />
    <PackageReference Include="Grpc.Tools" Version="2.38.1">
      <IncludeAssets>runtime; build; native; contentfiles;
        analyzers; buildtransitive</IncludeAssets>
      <PrivateAssets>all</PrivateAssets>
    </PackageReference>
  </ItemGroup>
</Project>
Next, we will need to add the following section to the project file, which references the proto file we will be using to communicate with the server:
  <ItemGroup>
    <Protobuf Include="Protos\greeter.proto"
      GrpcServices="Client"
      />
  </ItemGroup>
This will make our project file look like this:
<Project Sdk="Microsoft.NET.Sdk">
  <PropertyGroup>
    <OutputType>Exe</OutputType>
    <TargetFramework>net5.0</TargetFramework>
  </PropertyGroup>
  <ItemGroup>
    <PackageReference Include="Google.Protobuf"
      Version="3.17.3" />
    <PackageReference Include="Grpc.Net.Client"
      Version="2.38.0" />
    <PackageReference Include="Grpc.Tools" Version="2.38.1">
      <IncludeAssets>runtime; build; native; contentfiles;
        analyzers; buildtransitive</IncludeAssets>
      <PrivateAssets>all</PrivateAssets>
    </PackageReference>
  </ItemGroup>
  <ItemGroup>
    <Protobuf Include="Protos\greeter.proto"
      GrpcServices="Client" />
  </ItemGroup>
</Project>
This is similar to what we've done with the server application. But this time, we are telling our application to only generate code for the client components. This is why we have set the GrpcServices attribute to Client.
Because we will be connecting to the server we created previously, we need a proto file with package, service, rpc, and message definitions that are identical to what we had in our server-side proto file. However, our C# namespace can be different.
Therefore, what you'll need to do next is create a Protos folder inside your BasicGrpsClient project folder. Then, you must insert the greeter.proto file into this folder and ensure it has the following content:
syntax = "proto3";
option csharp_namespace = "BasicGrpcClient";
 package greeter;

// The greetings manager service definition.
service GreetingsManager {
  // Request the service to generate a greeting message.
  rpc GenerateGreeting (GreetingRequest) returns
    (GreetingResponse);
}

// The request message definition containing the name to be
  addressed in the greeting message.
message GreetingRequest {
  string name = 1;
}

// The response message definition containing the greeting   text.
message GreetingResponse {
  string greetingMessage = 1;
}
Please note that this file is identical to the one we have in our server application project, except for the csharp_namespace element. This element is used by the gRPC tools inside your specific .NET project and it does not affect compatibility between the server and client versions of the proto file. However, the rest of the elements must be the same for the communication system to recognize that it's meant to be the same interface.
Some differences are tolerated (which we will talk about when we cover API versioning in Chapter 5, How to Apply Versioning to the gRPC API). But the fundamental structure of your standard gRPC element definitions must match.
Applying gRPC client components to the code
In your BasicGrpcClient project, locate the Program.cs class and change its content to the following:
using System;
using System.Threading.Tasks;
using Grpc.Net.Client;
namespace BasicGrpcClient
{
    class Program
    {
        static async Task Main()
        {
             // The port number(5001) must match the port of
             the gRPC server.
            using var channel =
            GrpcChannel.ForAddress("https://localhost:5001");
            var client = new
            GreetingsManager.GreetingsManagerClient(channel);
            var reply = await client.GenerateGreetingAsync(
            new GreetingRequest { Name = "BasicGrpcClient" });
            Console.WriteLine("Greeting: " + reply.
              GreetingMessage);
            Console.WriteLine("Press any key to exit...");
            Console.ReadKey();
        }
    }
}
Please note that the highlighted URL represents the HTTPS access point to the gRPC server. This will not be available if you are running your software on Mac. The workaround to this is described in the Running a gRPC service on Mac section of this chapter.
This code does the following:
- First, it initializes the gRPC channel for the hardcoded address of
https://localhost:5001. Please note that this is the same address that we defined in thelaunchSettings.jsonfile in theBasicGrpcServiceproject. But in a real commercial application, this will be configurable rather than hardcoded. - Then, it uses this channel to initialize a new instance of the gRPC client that was generated by the
GreetingsManagerservice definition in ourgreeter.protofile. - Next, it calls the
GenerateGreetingAsyncmethod of the client object with a new instance ofGreetingRequestthat has itsNameproperty set toBasicGrpcClient. Please note that it represents theGenerateGreetingrpcdefinition from the proto file, but theAsyncpart has been added to the name. This is because, in .NET, each gRPC procedure is represented by synchronous and asynchronous methods on the client side. The async version returns anawaitabletask, so the calling code can be set to do something else while we are waiting for the reply. The synchronous version, which has the same name as the originalrpcdefinition but without "Async" at the end, blocks execution of the calling code until the result has been received. - From this call, we receive an instance of
GreetingResponse. - Then, we read the value of its
GreetingMessagefield and print it in the console. - Finally, the console prompts the user to press any key to exit.
Now, you can launch both of your applications and see how they communicate with each other. It's better to launch the server application first to make sure that it has fully loaded before the client application tries to communicate with it.
The simplest way to launch both applications is to open two instances of the command-line window (cmd, PowerShell, or Terminal, depending on your operating system and your preferences). In one command-line window, navigate to the BasicGrpcService project folder and execute the following command:
dotnet run
This will build and run the server application for you. Once it's showing the output that indicates that the gRPC server is running, open the other instance of the command-line window, navigate to the BasicGrpcClient project folder, and execute the same command.
You should receive the following output, which indicates that the client was able to successfully call the method on the server via the network:

Figure 1.10 – Console output from the gRPC client application
Now, if you re-examine the code from your client and your server, you will see that it looks almost as if you are calling the code from inside the same application. And that's precisely what makes gRPC so easy to use.
In both the applications that we covered, you saw how relevant code is automatically generated from proto files. In certain scenarios, it would be useful to know how this mechanism works. This is what we will have a look at now.
Understanding how proto files generate C# code
Normally, you wouldn't need to worry about how C# classes are generated from proto files. The compiler does it all for you. But occasionally, there may be a problem with the process. Therefore, it would be useful to know how to find the generated code and what the expected output should be.
Where is auto-generated code stored?
At this point, you know that the .NET compiler generates code from the proto files. This can then be referenced from inside your application code. And you can also get it to share the same namespace as your application. But despite the ability of this code to inter-operate with your application code, it's not part of your application.
The auto-generated code is placed in the obj folder inside your project folder. The purpose of this folder is to store intermediate resources that are required to compile your application. Since auto-generated classes aren't part of your main application, but your application cannot be compiled without them, they are placed alongside other intermediate files in this folder.
More precisely, the location of those auto-generated files is as follows. This represents the path on the Windows system. For a Unix-based system, such as macOS or Linux, replace back-slashes (\) with forward-slashes (/):
{your project folder}\obj\{build configuration}\{framework
  name}\Ptotos
So, for our BasicGrpcService project, which is based on .NET 5's built-in Debug mode, the path would be as follows:
BasicGrpcService\obj\Debug\net5.0\Ptotos
For each proto file that you reference in your project, a pair of files containing C# code will be generated:
{PascalCase proto file name}.cs{PascalCase proto file name}Grpc.cs
The {PascalCase proto file name}.cs file contains a C# representation of the proto messages that your services use, while {PascalCased proto file name}Grpc.cs contains a C# representation of the services themselves, whether it's overridable base classes for the server or ready-made classes for the client.
In our example, which uses the greeter.proto file, we would end up with two files with the following names:
Greeter.csGreeterGrpc.cs
The content of those auto-generated files would be similar to the following:
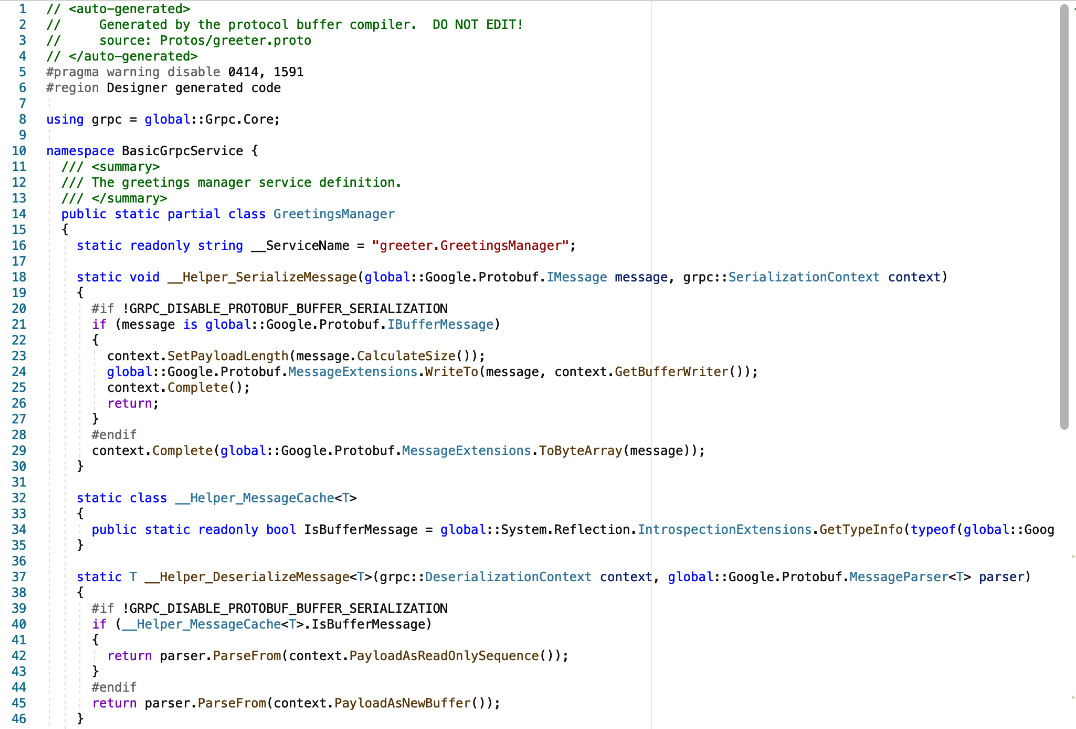
Figure 1.11 – An example of auto-generated gRPC C# code
You can examine the structure of these files if you like. Now, let's learn how making changes to the namespaces in Protobuf will affect the auto-generated code.
Modifying Protobuf namespaces
So far, we have been using the csharp_namespace option inside our proto files to set the namespaces of auto-generated code classes to the same root namespace that our application uses. But it doesn't have to be this way. You can set the namespaces in auto-generated code to absolutely anything.
You can also omit the csharp_namespace option entirely. If you do so, the namespace that will be applied to your auto-generated code will be the PascalCase version of the package name that's specified in the package element of the proto file.
In our case, since the package is called greeter, the C# namespace that's generated from it will be Greeter.
Now, go ahead and remove the csharp_namespace element from both the client and server versions of the greeter.proto file. Both copies of the files should now look as follows:
syntax = "proto3";
 package greeter;

// The greetings manager service definition.
service GreetingsManager {
  // Request the service to generate a greeting message.
  rpc GenerateGreeting (GreetingRequest) returns
    (GreetingResponse);
}

// The request message definition containing the name to be
  addressed in the greeting message.
message GreetingRequest {
  string name = 1;
}

// The response message definition containing the greeting
  text.
message GreetingResponse {
  string greetingMessage = 1;
}
Now, if you try to compile the projects, they will show errors. What you need to do is add a using statement to both the client and the server code referencing this namespace.
The content of the GreetingsManagerService.cs file inside the BasicGreeterService project should now look as follows:
using System.Threading.Tasks;
using Greeter;
using Grpc.Core;
namespace BasicGrpcService
{
     public class GreetingsManagerService :
       GreetingsManager.GreetingsManagerBase
    {
        public override Task<GreetingResponse>
          GenerateGreeting(GreetingRequest
            request, ServerCallContext context)
        {
            return Task.FromResult(new GreetingResponse
            {
                GreetingMessage = "Hello " + request.Name
            });
        }
    }
}
The content of the Program.cs file inside the BasicGreeterClient project should now look as follows:
using System;
using System.Threading.Tasks;
using Greeter;
using Grpc.Net.Client;
namespace BasicGrpcClient
{
    class Program
    {
        static async Task Main()
        {
             // The port number(5001) must match the port of
             the gRPC server.
             using var channel =
               GrpcChannel.ForAddress("https://
                 localhost:5001");
             var client = new
               GreetingsManager.
                 GreetingsManagerClient(channel);
             var reply = await client.GenerateGreetingAsync(
             new GreetingRequest { Name = "BasicGrpcClient" });
             Console.WriteLine("Greeting: " +
               reply.GreetingMessage);
             Console.WriteLine("Press any key to exit...");
             Console.ReadKey();
        }
    }
}
Now, you know how easy it is to regenerate relevant code after making changes to the Protobuf definition. At this point, you have two copies of the greeter.proto file that are identical.
At this stage, you may be wondering whether having separate copies of this file would violate the don't repeat yourself (DRY) principle, which is a commonly accepted best practice when writing software. Will any problems occur if you update one of these files while forgetting to update the other? Isn't it possible to keep a single shared copy of the file that both the client and the server use?
Fortunately, you can share the same file between multiple applications in .NET. Let's have a look at how.
Sharing a proto file between the client and the server
In .NET, if you want to share common functionality between different applications, you would put this functionality into a class library and then add this library to all the projects that need to use it. The good news is that you can do the same with proto files. To share this between applications, you can just add it to a class library and then add the class library as a reference.
Let's do this with our client and server projects.
Creating a shared class library
Inside the folder that holds both the BasicGrpcService and BasicGrpcClient project folders, create a new class library project and call it GrpcDependencies.
If you are using an IDE, you can add a project by choosing the Class Library template. Please ensure that .NET 5 is selected as the framework. Otherwise, keep all other options as-is.
If you prefer to use a CLI, you can execute the following command inside the folder hosting your existing projects to create a class library:
dotnet new classlib -o GrpcDependencies
Please note that, with a class library that is shared between projects, it would be more convenient to manage them if you have all these projects, including the class library itself, added to a solution.
If you have been using an IDE up to this point with all the default options selected, unless specified otherwise, you probably have the solution set up and all of your projects will already be a part of it.
If this is what your setup already looks like, you can skip to the next section. Otherwise, you can execute the following command inside the folder that hosts all your project folders to create a solution file:
dotnet new sln
This will create a file with the .sln extension that has the same name as the folder that hosts it.
Now, you can add all your projects to the folder by executing the following commands:
dotnet sln add GrpcDependencies/GrpcDependencies.csproj
dotnet sln add BasicGrpcService/BasicGrpcService.csproj
dotnet sln add BasicGrpcClient/BasicGrpcClient.csproj
You should now have a solution set up and all projects added to it. If you choose the build solution option, all the projects will be built together. You no longer have to build them individually.
Adding shared gRPC components to the class library
Since you now have a shared library for storing proto files, you no longer need to store a copy of the greeter.proto file in every project that uses it. You just need to store one copy in the class library itself.
So, copy the entire proto folder from either the BasicGrpcService or BasicGrpcClient folder into the GrpcDependencies folder.
Next, we will need to add the right NuGet dependencies to our GrpcDependencies class library. The dependencies that we used to reference our client and server projects will only need to be referenced in the class library, so our dependency tree will be kept clean.
To add the required dependencies, execute the following CLI commands inside the GrpcDependencies folder:
dotnet add GrpcDependencies.csproj package Grpc.Net.Client
dotnet add GrpcDependencies.csproj package Google.Protobuf
dotnet add GrpcDependencies.csproj package Grpc.Tools
dotnet add GrpcDependencies.csproj package Grpc.AspNetCore
Please note that these are the standard NuGet packages that are used by both the gRPC client and server. Because our shared class library will be used by both types of applications, we need both sets of dependencies.
Now, add a proto reference to your GrpcDependencies.csproj file. We will amend the GrpcServices element to this as we need to be able to build both the client and server gRPC components from the class library. Therefore, the markup block that we need to add to the project file will look like this:
  <ItemGroup>
    <Protobuf Include="Protos\greeter.proto" />
  </ItemGroup>
Finally, remove any other greet.proto file references from your project file, which could have been auto-generated when you copied the file into the project folder.
Now, the content of your GrpcDependencies.csproj file should look similar to this:
<Project Sdk="Microsoft.NET.Sdk">
  <PropertyGroup>
    <TargetFramework>net5.0</TargetFramework>
  </PropertyGroup>
  <ItemGroup>
    <PackageReference Include="Google.Protobuf"
      Version="3.17.3" />
    <PackageReference Include="Grpc.Net.Client"
      Version="2.38.0" />
    <PackageReference Include="Grpc.Tools" Version="2.38.1">
      <IncludeAssets>runtime; build; native; contentfiles;
        analyzers; buildtransitive</IncludeAssets>
      <PrivateAssets>all</PrivateAssets>
    </PackageReference>
    <PackageReference Include="Grpc.AspNetCore"
      Version="2.34.0" />
  </ItemGroup>
  <ItemGroup>
    <Protobuf Include="Protos\greeter.proto" />
  </ItemGroup>
</Project>
Now, we are ready to use this class library in our applications.
Sharing gRPC dependencies between different projects
First, you will need to reference the newly created class library from both the BasicGrpcService.csproj and BasicGrpcClient.csproj files. To do so, add the following section to both of the files:
  <ItemGroup>
    <ProjectReference
      Include="..\GrpcDependencies\GrpcDependencies.csproj" />
  </ItemGroup>
Now, you can remove all the gRPC-related NuGet dependencies from both of those files. All of them are present in the shared class library, so when you reference the class library, all of those dependencies will be implicitly referenced too.
After cleaning up your project files, the BasicGrpcService.csproj file should look similar to this:
<Project Sdk="Microsoft.NET.Sdk.Web">
  <PropertyGroup>
    <TargetFramework>net5.0</TargetFramework>
  </PropertyGroup>
  <ItemGroup>
    <ProjectReference
      Include="..\GrpcDependencies\GrpcDependencies.csproj" />
  </ItemGroup>
</Project>
The content of the BasicGrpcClient.csproj file should be very similar and look like this:
<Project Sdk="Microsoft.NET.Sdk">
  <PropertyGroup>
    <OutputType>Exe</OutputType>
    <TargetFramework>net5.0</TargetFramework>
  </PropertyGroup>
  <ItemGroup>
    <ProjectReference
      Include="..\GrpcDependencies\GrpcDependencies.csproj" />
  </ItemGroup>
</Project>
Please note that the only differences between the two project files are the SDK type and the output type, which represent different types of applications.
Now, to verify that all the dependencies have been set up successfully, build your solution and ensure there aren't any build errors. If it builds successfully, launch your BasicGrpcService project, followed by the BasicGrpcClient project, to ensure that everything still works correctly.
The applications are expected to produce the same output that they did previously. However, this time, a single copy of the proto file will be shared between them, so you no longer run the risk of making two copies of the file incompatible while updating them.
Another important thing to note is that, just like any other class library, a library containing proto files can be published as a NuGet package.
Running a gRPC service on Mac
At the time of writing, you cannot apply TLS while running gRPC Server on Mac. This is because of missing Application Layer Protocol Negotiation (ALPN) support on the operating system. So, to make it work, you need to enable HTTP access to the server instead of HTTPS.
Configuring server-side components
First, you need to enable an unencrypted endpoint HTTP/2 endpoint inside your application. To do so, open the Program.cs file inside your gRPC server project. Then, add the following using statement on top of it:
using Microsoft.AspNetCore.Server.Kestrel.Core;
Then, inside the Main method (which is the entry point into the application), add the following block of code inside the call to the ConfigureWebHostingDefaults method:
webBuilder.ConfigureKestrel(options =>
{
    options.ListenLocalhost(<port number>, o => o.Protocols =
    HttpProtocols.Http2);
});
Replace <port number> with the actual port number of the HTTP endpoint, which can be found under the applicationUrl key in the launchSettings.json file, which is located in the Properties folder of the project.
Once you've done this, your application will be ready to accept insecure HTTP/2 requests on the specified port number.
Modifying the client-side configuration
Because TLS doesn't work on the server, you won't be able to send requests to it via the HTTPS endpoint. So, while creating the GrpcChannel object in the client application, you will need to pass the HTTP URL into it. The specific URL can be found under the applicationUrl key in the launchSettings.json file, which is located in the Properties folder of the gRPC server project.
Summary
In this chapter, we learned how to set up both the gRPC client and the server. We did so by manually adding gRPC capabilities to our .NET projects instead of creating new projects from the gRPC template. For our server, we started with a standard ASP.NET Core project template, while our client used the most basic Console Application template.
We had a look at how the gRPC compiler generates code from Protobuf files and how that auto-generated code is affected by changes that are made to the content of those files.
Finally, we covered the process of sharing the same proto file between different applications via a shared class library so that you, as a developer, would not accidentally apply incompatible Protobuf definitions to your client and the server.
In the next chapter, we will have a more detailed look at the use cases of gRPC. Although it's a great communication protocol, it has its limitations, and it's not the best solution for every situation. So, you will learn when it's best to use gRPC and when alternative solutions might be better.
Questions
Answer the following questions to test your knowledge of this chapter:
- Please select the false statement:
A. In Protobuf, a service is defined by the
servicekeyword, while its methods are defined by therpckeyword.B. You cannot have a Protobuf message definition without any fields.
C. A Protobuf message can have collections of objects and can use other message definitions as field types.
D. You have to specify a request object in a response object inside a gRPC method definition and you can only use a single object type in each of those.
- Which platforms can you run a .NET implementation of gRPC on?
A. Windows, Linux, and macOS
B. Windows and macOS only
C. Unix-based (macOS and Linux) only
D. Windows only
- How do you enable server-side gRPC components in .NET applications?
A. So long as you reference the
Grpc.AspNetCoreNuGet package, it will be automatically enabled for you.B. You just need to add a proto file to your project; the compiler will do everything else for you.
C. You need to define a proto element inside the project file. It can be blank or you can set its
GrpcServicesattribute to eitherServerorBoth.D. You need to define a proto element inside the project file and you must set its
GrpcServicesattribute toServer. - After adding the relevant proto files to your server-side application project, what modifications do you need to make to your code?
A. You just need to override the methods from the auto-generated C# code files with your functionality.
B. You need to modify the auto-generated C# classes and add your functionality to them.
C. You need to create a new class that inherits from the auto-generated base class, add gRPC to your application services via the
ConfigureServicesmethod of theStartupclass, and then register the newly created class as one of the endpoints in your middleware.D. The system will generate all the required code for you. You just need to fill the methods with your logic.
- Can the .NET implementation of the .NET client call RPCs both synchronously and asynchronously?
A. It can only call methods synchronously.
B. It can only call methods asynchronously.
C. There is both a synchronous and asynchronous version of each method that's generated for the client to use.
D. All auto-generated methods are asynchronous, but you can change the implementation to make them synchronous.
Further reading
To learn more about the topics that were covered in this chapter, take a look at the following resources:
- The official ASP.NET Core gRPC documentation: https://docs.microsoft.com/en-us/aspnet/core/grpc/
- C# code generation documentation: https://developers.google.com/protocol-buffers/docs/reference/csharp-generated
- Troubleshooting gRPC on .NET Core: https://docs.microsoft.com/en-us/aspnet/core/grpc/troubleshoot