

PBR is, at its core, a principle that several graphic engines try to follow. Instead of being a strict set of rules that every rendering program needs to abide by, it is more of an idea—one that dictates that what we see on our screens is the result of a study on how light behaves when it interacts with certain surfaces.
As a direct consequence, the so-called PBR workflow varies from one rendering solution to the next, depending on how the creators of the software have decided to program the system. For our case, what we are going to be looking at is the implementation that Epic Games has chosen for their Unreal Engine 4 real-time renderer.
However, we are going to do so in our already established recipe process, that is, by creating real examples of materials that follow the PBR workflow rather than just talking in a general way. Let's get to it!
We don't need a lot in order to start working on this recipe—just the project we have previously created so we don't have to start from scratch. You can continue using the previous section's materials or create new ones, whatever works best for you! Something that would be helpful to have is the scene from the previous recipe open, for instance—that way we already have a 3D model in it that we can use to show our materials on.
Let's start our journey into the PBR pipeline by creating a new material and looking at the different attributes that define it:
- Right-click anywhere inside of the
Content Browserand select the material option in theCreate Basic Assetsection. Name it whatever you want—I'll go withM_PBR_Metalfor this particular instance. Double-click on the newly created material to open up the material editor. - With the
Materialeditor now open, we can start taking a look at the PBR workflow. The first material we are going to create is a metallic one, a particular type that uses most of the attributes associated to this pipeline. With that said, let's focus our attention on the following two different places—theDetailspanel and the mainMaterialnode itself:

The settings you see here are the default ones for most materials in Unreal, and they follow the PBR pipeline very closely. The first option, the Material Domain, is currently set to Surface. That tells us that the material we are creating is meant to be used on a 3D model. Blend Mode, which has a value of Opaque, indicates that it is not a translucent material like glass. Finally, the shading model is set to Default Lit, which is the default one for most materials.
This configuration is the default one for most common materials, and the one that we'll need to use to define materials such as metal, plastic, wood, or concrete, to name a few.
- With that bit of theory out of the way, let's create a
Constant3Vectornode anywhere in the graph and plug it into theBase Colorinput pin of our material. We've used theBase Colorattribute in the previous recipe, and as we saw, this is the node where the overall color of a material should be plugged into. - The next item we will be creating is a
Constant. You can do so by holding the 1 key on your keyboard and clicking anywhere within the material editor graph. Give it a value of1and plug it into theMetallicattribute of our material.
The Metallic attribute defines whether we are creating a metal or a non-metal material. We should use a value of 1 to define metallic surfaces and a value of 0 for non-metals—or we can leave this attribute unconnected, which would be the same as using a zero. Values between 0 and 1 should only be used in special circumstances, such as when dealing with metals that have been treated—corroded or painted metals and the like.
- For our next step, let's replicate what we have just done—start by creating another constant and plugging it into the
Roughnessslot. This time, let's not give it a value of1, but something like0.2instead. The final material graph should look something like this:
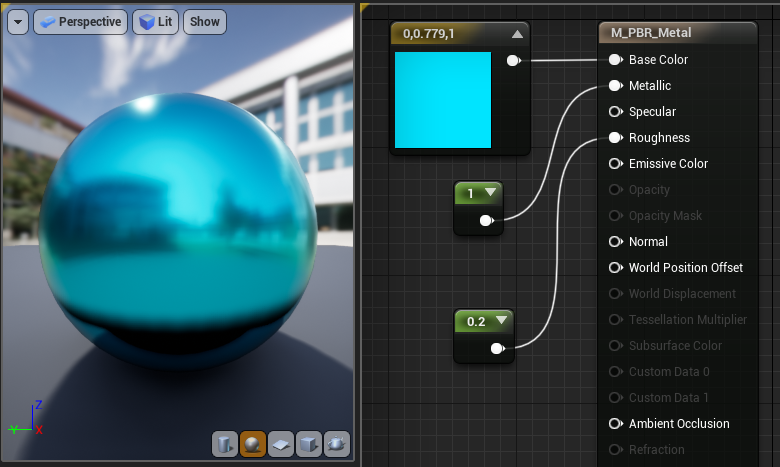
The attribute we are controlling through the previous constant defines how rough the surface of a given material should be. Higher values, such as 1, simulate the micro details that make light scatter in all directions—which means we are looking at a matte surface where reflections are not clear. Values closer to zero result in those imperfections being removed, allowing a clear reflection of the incoming light rays and a much clearer reflected image.
Through the previous steps, we have taken a look at some of the most important material attributes used to define a PBR material. We've done so by creating a metal, which can be a good example for some of the previous properties. However, it will be good to create another quick material that is not a metallic one—this is because some of the other properties of the PBR workflow, like the specular material attribute, are meant to be used in such cases.
- Create another material, which we can name
M_PBR_Wood, and open the material editor for that asset. - Let's plug something into the
Base Color materialattribute—but instead of using a plain value, let's go with an image this time. TheStarter Contentprovides multiple textures that can be used for this very purpose, so let's make use of one of those resources.
Right-click anywhere inside of the main graph for our newly created material and search for TextureSample, like in the next screenshot:
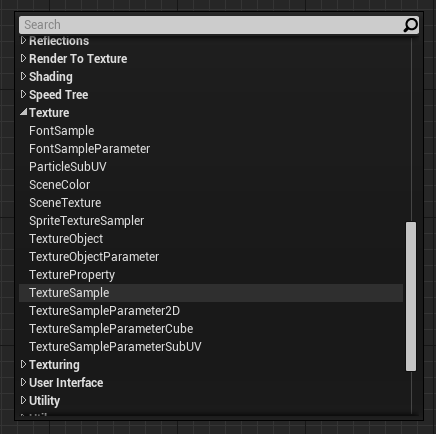
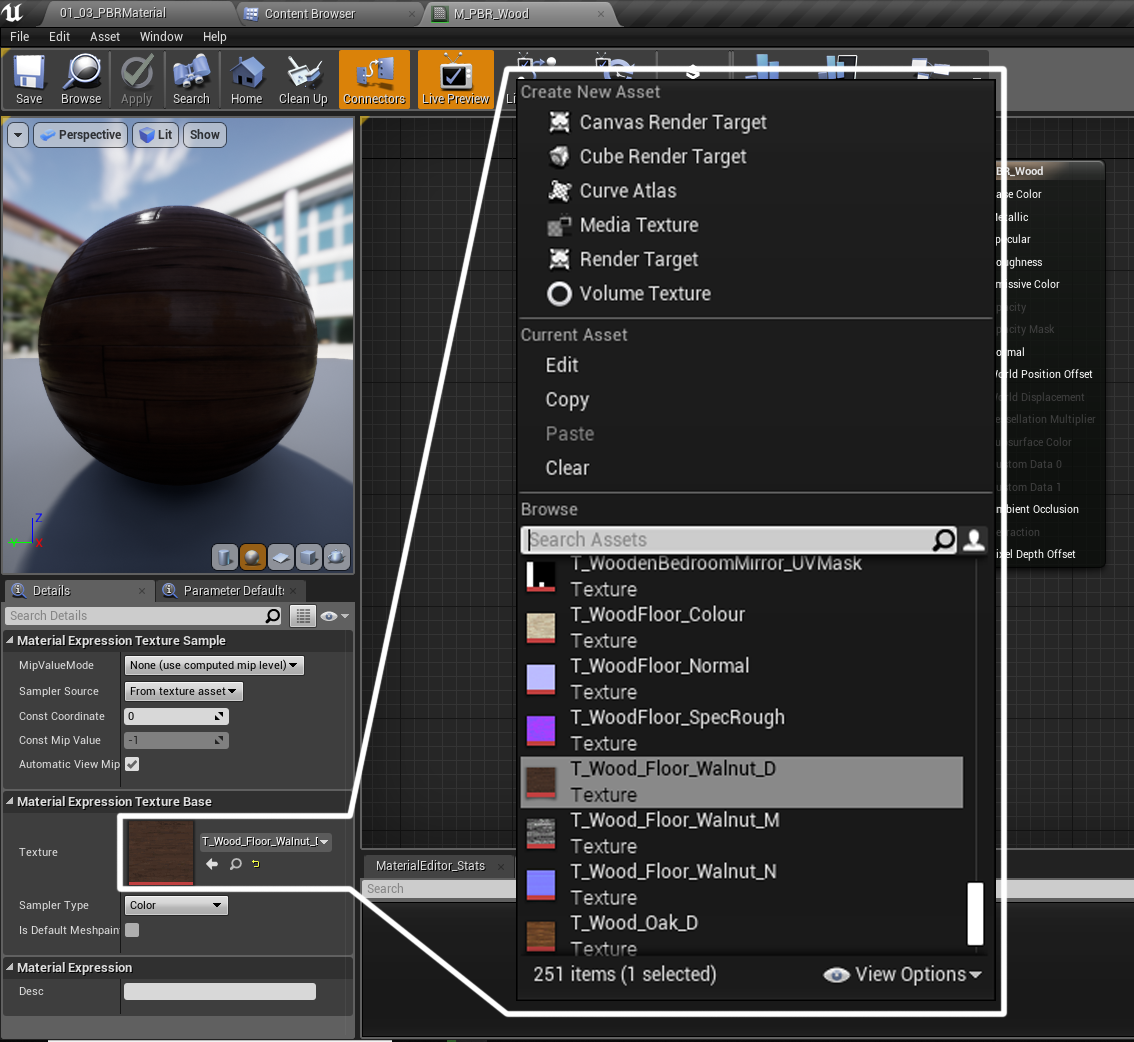
- With that new node on our graph, click on it to access the options in the
Detailspanel. Click again on the drop-down menu found in theMaterial Expression Texture Base|Textureslot and typewood. Select theT_ Wood_ Floor_ Walnut_ Dasset and connect theTexture Samplenode into theBase Color materialattribute as follows:
Note
If you want to get hold of more textures online, feel free to browse the internet for more of them. A good place where I like to search for these types of resources is www.textures.com, which allows you to download several samples a day once you create a free account.
With that done, it's time to be looking at another material attribute—the Specular parameter. Unlike roughness, this node controls how much light is being reflected by the material and not how clear those reflections are. We therefore tend to modify the specular level when we have small-scale occlusion or small shadows happening across a surface, similar to what would be happening for the texture that we chose before.
- The seams in between the wood boards are a good place to use a specular map, as those areas will reflect less light. In Unreal, such places are described with values close to
0(black). Knowing that, drag a pin from the red channel of the previously createdTexture Samplenode into theSpecularattribute of the main material node.
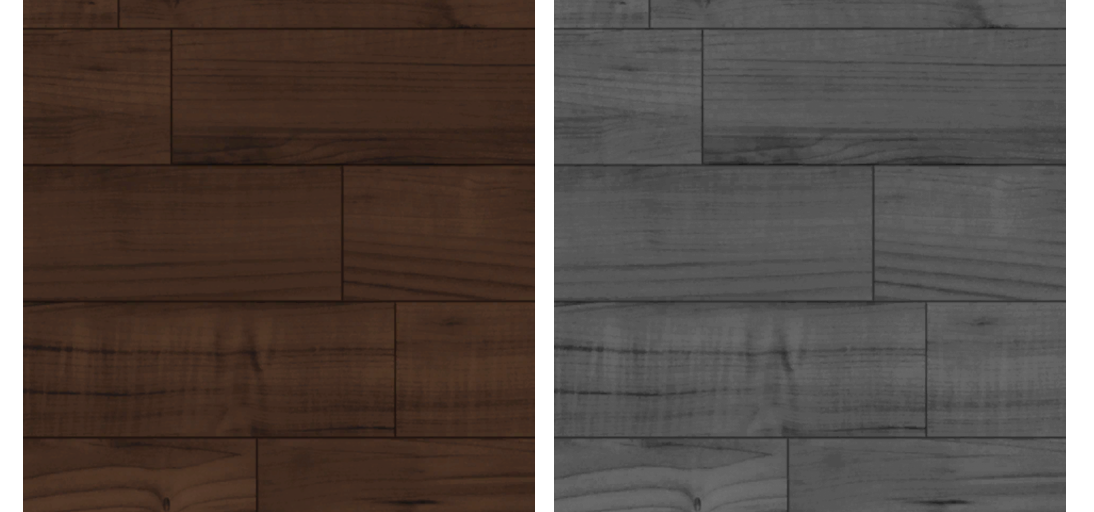
You might be wondering why we are using the red channel of the wood texture to drive the specular parameter. The simple answer is that even though we could create a custom black and white image to achieve the same effect, any of the original textures' channels are black and white values that contain the information that we are after. Because seams are going to contain darker pixels than other areas, the end result we achieve is still very similar if we use the red channel of the original texture. You can see in the next image our source asset and the red channel by its side:
- Copy the
Texture Samplenode twice, since we are going to use more textures for the roughness and the normal material attribute slots. - Just as we did previously, select the
T_ Wood_ Floor_ Walnut_ Mand theT_ Wood_ Floor_ Walnut_ Nassets on each of the new nodes. Connect the first one to theRoughnessslot and the second one to theNormalnode. Save the material and click on the button that saysApply. Your material node graph should look something like this:
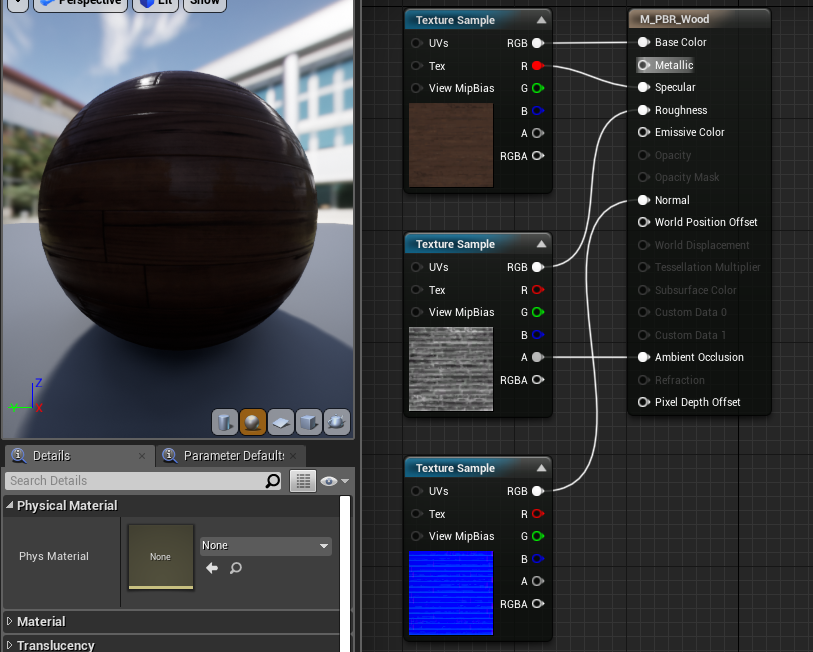
- Navigate back to the main level, and select the floor plane. In the
Detailspanel, scroll down to theMaterialssection and assign theM_PBR_Woodmaterial we have just created. Take a look at what our scene looks like now:
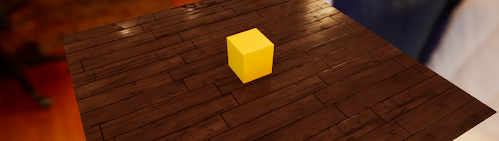
Nice job, right? The new nodes we've used, both the specular and the normal ones, contribute to the added details we can see in the preceding screenshot. The specular node diminishes the light that is being reflected in the seams between the wood planks, and the normal map modifies the direction in which the light bounces from the surface. The combined effect is that our model, a flat plane, looks as if it has much more geometrical detail than it really has.
Remember how we were talking about each renderer having its own implementation of a PBR workflow? Well, we have just taken a look at how Epic has chosen to set up theirs!
As we have already said, efficiency and speed are at the heart of any real-time application. These are two factors that have heavily influenced the path that the engineers at Epic have chosen when coding their physical approach at rendering. That being the case, the parameters that we have tweaked are the most important ones when it comes to how Unreal deals with the interaction between light and 3D models. The base color gives us the overall appearance of the material, whilst roughness indicates how sharp or blurry the reflections are. Metallic enables us to specify whether an object is made out of metal, and the specular node lets us influence how intense those reflections are. Finally, using normal maps allows for the modification of the direction in which the light gets reflected—a useful technique for adding details without actually using more polygons.
The previous parameters are quite common in real-time renderers, but not every program uses the same ones. For instance, offline suites such as VRay use other types of calculations to generate the final output—physically based in their nature, but using other techniques. This shows us that, at the end of the day, the PBR workflow that Epic uses is specific to the engine and we need to be aware of its possibilities and the limitations.
Throughout the current recipe, we have managed to take a look at some of the most important nodes that affect how the physically based rendering gets tackled in Unreal Engine 4. Base color, roughness, specularity, ambient occlusion, normal maps, and the metallic attribute all constitute the basics of the PBR workflow.
Having seen all of them, we are now ready to start looking into how to build more complex materials and effects. And even though we still need to understand some of the other areas that affect our pipeline, we can do so with the certainty that the basics are covered.