

Virtual resources in Puppet might seem complicated and confusing but, in fact, they're very simple. They're exactly like regular resources, but they don't actually take effect until they're realized (in the sense of "made real"); whereas a regular resource can only be declared once per node (so two classes can't declare the same resource, for example). A virtual resource can be realized as many times as you like.
To clarify this, let's look at a typical situation where virtual resources might come in handy.
You are responsible for two popular web applications: WordPress and Drupal. Both are web apps running on Apache, so they both require the Apache package to be installed. The definition for WordPress might look something like the following:
The definition for Drupal might look like this:
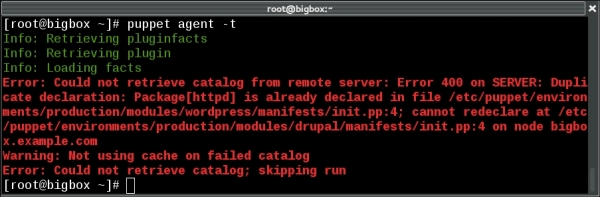
All is well until you need to consolidate both apps onto a single server:
Now Puppet will complain because you tried to define two resources with the same name: httpd.
You could remove the duplicate Apache package definition from one of the classes, but then nodes without the class including Apache would fail. You can get around this problem by putting the Apache package in its own class and then using include apache everywhere it's needed; Puppet doesn't mind you including the same class multiple times. In reality, putting Apache in its own class solves most problems but, in general, this method has the disadvantage that every potentially conflicting resource must have its own class.
To create the resource, use the realize function:
Here's how to build the example using virtual resources:
- Create the virtual module with the following contents:
class virtual { @package {'httpd': ensure => installed } @service {'httpd': ensure => running, enable => true, require => Package['httpd'] } } - Create the Drupal module with the following contents:
class drupal { include virtual realize(Package['httpd']) realize(Service['httpd']) } - Create the WordPress module with the following contents:
class wordpress { include virtual realize(Package['httpd']) realize(Service['httpd']) } - Modify your
site.ppfile as follows:node 'bigbox' { include drupal include wordpress } - Run Puppet:
bigbox# puppet agent -t Info: Caching catalog for bigbox.example.com Info: Applying configuration version '1413179615' Notice: /Stage[main]/Virtual/Package[httpd]/ensure: created Notice: /Stage[main]/Virtual/Service[httpd]/ensure: ensure changed 'stopped' to 'running' Info: /Stage[main]/Virtual/Service[httpd]: Unscheduling refresh on Service[httpd] Notice: Finished catalog run in 6.67 seconds
Every class that needs the Apache package can call realize on this virtual resource:
Puppet knows, because you made the resource virtual, that you intended to have multiple references to the same package, and didn't just accidentally create two resources with the same name. So it does the right thing.
class virtual {
@package {'httpd': ensure => installed }
@service {'httpd':
ensure => running,
enable => true,
require => Package['httpd']
}
}class drupal {
include virtual
realize(Package['httpd'])
realize(Service['httpd'])
}
class wordpress {
include virtual
realize(Package['httpd'])
realize(Service['httpd'])
}site.pp file as follows:node 'bigbox' {
include drupal
include wordpress
}Every class that needs the Apache package can call realize on this virtual resource:
Puppet knows, because you made the resource virtual, that you intended to have multiple references to the same package, and didn't just accidentally create two resources with the same name. So it does the right thing.
virtual class. All nodes can include this class and you can put all your virtual services and packages in it. None of the packages will actually be installed on a node or services started until you call realize:
realize on this virtual resource:
Users are a great example of a resource that may need to be realized by multiple classes. Consider the following situation. To simplify administration of a large number of machines, you defined classes for two kinds of users: developers and sysadmins. All machines need to include sysadmins, but only some machines need developers:
Follow these steps to create a user::virtual class:
- Create the file
modules/user/manifests/virtual.ppwith the following contents:class user::virtual { @user { 'thomas': ensure => present } @user { 'theresa': ensure => present } @user { 'josko': ensure => present } @user { 'nate': ensure => present } } - Create the file
modules/user/manifests/developers.ppwith the following contents:class user::developers { realize(User['theresa']) realize(User['nate']) } - Create the file
modules/user/manifests/sysadmins.ppwith the following contents:class user::sysadmins { realize(User['thomas']) realize(User['theresa']) realize(User['josko']) } - Modify your
nodes.ppfile as follows:node 'cookbook' { include user::virtual include user::sysadmins include user::developers } - Run Puppet:
cookbook# puppet agent -t Info: Caching catalog for cookbook.example.com Info: Applying configuration version '1413180590' Notice: /Stage[main]/User::Virtual/User[theresa]/ensure: created Notice: /Stage[main]/User::Virtual/User[nate]/ensure: created Notice: /Stage[main]/User::Virtual/User[thomas]/ensure: created Notice: /Stage[main]/User::Virtual/User[josko]/ensure: created Notice: Finished catalog run in 0.47 seconds
When we include the user::virtual class, all the users are declared as virtual resources (because we included the @ symbol):
That is to say, the resources exist in Puppet's catalog; they can be referred to by and linked with other resources, and they are in every respect identical to regular resources, except that Puppet doesn't actually create the corresponding users on the machine.
Yes, it does, and that's fine. You're explicitly allowed to realize resources multiple times, and there will be no conflict. So long as some class, somewhere, calls realize on Theresa's account, it will be created. Unrealized resources are simply discarded during catalog compilation.
When you use this pattern to manage your own users, every node should include the user::virtual class, as a part of your basic housekeeping configuration. This class will declare all users (as virtual) in your organization or site. This should also include any users who exist only to run applications or services (such as Apache, www-data, or deploy, for example). Then, you can realize them as needed on individual nodes or in specific classes.
For example, see the following code snippet:
In the previous example, only users thomas and theresa would be included.
to create a user::virtual class:
- Create the file
modules/user/manifests/virtual.ppwith the following contents:class user::virtual { @user { 'thomas': ensure => present } @user { 'theresa': ensure => present } @user { 'josko': ensure => present } @user { 'nate': ensure => present } } - Create the file
modules/user/manifests/developers.ppwith the following contents:class user::developers { realize(User['theresa']) realize(User['nate']) } - Create the file
modules/user/manifests/sysadmins.ppwith the following contents:class user::sysadmins { realize(User['thomas']) realize(User['theresa']) realize(User['josko']) } - Modify your
nodes.ppfile as follows:node 'cookbook' { include user::virtual include user::sysadmins include user::developers } - Run Puppet:
cookbook# puppet agent -t Info: Caching catalog for cookbook.example.com Info: Applying configuration version '1413180590' Notice: /Stage[main]/User::Virtual/User[theresa]/ensure: created Notice: /Stage[main]/User::Virtual/User[nate]/ensure: created Notice: /Stage[main]/User::Virtual/User[thomas]/ensure: created Notice: /Stage[main]/User::Virtual/User[josko]/ensure: created Notice: Finished catalog run in 0.47 seconds
When we include the user::virtual class, all the users are declared as virtual resources (because we included the @ symbol):
That is to say, the resources exist in Puppet's catalog; they can be referred to by and linked with other resources, and they are in every respect identical to regular resources, except that Puppet doesn't actually create the corresponding users on the machine.
Yes, it does, and that's fine. You're explicitly allowed to realize resources multiple times, and there will be no conflict. So long as some class, somewhere, calls realize on Theresa's account, it will be created. Unrealized resources are simply discarded during catalog compilation.
When you use this pattern to manage your own users, every node should include the user::virtual class, as a part of your basic housekeeping configuration. This class will declare all users (as virtual) in your organization or site. This should also include any users who exist only to run applications or services (such as Apache, www-data, or deploy, for example). Then, you can realize them as needed on individual nodes or in specific classes.
For example, see the following code snippet:
In the previous example, only users thomas and theresa would be included.
the user::virtual class, all the users are declared as virtual resources (because we included the @ symbol):
That is to say, the resources exist in Puppet's catalog; they can be referred to by and linked with other resources, and they are in every respect identical to regular resources, except that Puppet doesn't actually create the corresponding users on the machine.
Yes, it does, and that's fine. You're explicitly allowed to realize resources multiple times, and there will be no conflict. So long as some class, somewhere, calls realize on Theresa's account, it will be created. Unrealized resources are simply discarded during catalog compilation.
When you use this pattern to manage your own users, every node should include the user::virtual class, as a part of your basic housekeeping configuration. This class will declare all users (as virtual) in your organization or site. This should also include any users who exist only to run applications or services (such as Apache, www-data, or deploy, for example). Then, you can realize them as needed on individual nodes or in specific classes.
For example, see the following code snippet:
In the previous example, only users thomas and theresa would be included.
A sensible approach to access control for servers is to use named user accounts with passphrase-protected SSH keys, rather than having users share an account with a widely known password. Puppet makes this easy to manage thanks to the built-in ssh_authorized_key type.
Follow these steps to extend your virtual users' class to include SSH access:
- Create a new module
ssh_userto contain ourssh_userdefinition. Create themodules/ssh_user/manifests/init.ppfile as follows:define ssh_user($key,$keytype) { user { $name: ensure => present, } file { "/home/${name}": ensure => directory, mode => '0700', owner => $name, require => User["$name"] } file { "/home/${name}/.ssh": ensure => directory, mode => '0700', owner => "$name", require => File["/home/${name}"], } ssh_authorized_key { "${name}_key": key => $key, type => "$keytype", user => $name, require => File["/home/${name}/.ssh"], } } - Modify your
modules/user/manifests/virtual.ppfile, comment out the previous definition for userthomas, and replace it with the following:@ssh_user { 'thomas': key => 'AAAAB3NzaC1yc2E...XaWM5sX0z', keytype => 'ssh-rsa' } - Modify your
modules/user/manifests/sysadmins.ppfile as follows:class user::sysadmins { realize(Ssh_user['thomas']) } - Modify your
site.ppfile as follows:node 'cookbook' { include user::virtual include user::sysadmins } - Run Puppet:
cookbook# puppet agent -t Info: Caching catalog for cookbook.example.com Info: Applying configuration version '1413254461' Notice: /Stage[main]/User::Virtual/Ssh_user[thomas]/File[/home/thomas/.ssh]/ensure: created Notice: /Stage[main]/User::Virtual/Ssh_user[thomas]/Ssh_authorized_key[thomas_key]/ensure: created Notice: Finished catalog run in 0.11 seconds
For each user in our user::virtual class, we need to create:
Next, we need to ensure that the .ssh directory exists within the home directory of the user. We require the home directory, File["/home/${name}"], since that needs to exist before we create this subdirectory. This implies that the user already exists because the home directory required the user:
We passed the $key and $keytype variables when we defined the ssh_user resource for thomas:
Now, with everything defined, we just need to call realize on thomas for all these resources to take effect:
ssh_user to contain our ssh_user definition. Create the modules/ssh_user/manifests/init.pp file as follows:define ssh_user($key,$keytype) {
user { $name:
ensure => present,
}
file { "/home/${name}":
ensure => directory,
mode => '0700',
owner => $name,
require => User["$name"]
}
file { "/home/${name}/.ssh":
ensure => directory,
mode => '0700',
owner => "$name",
require => File["/home/${name}"],
}
ssh_authorized_key { "${name}_key":
key => $key,
type => "$keytype",
user => $name,
require => File["/home/${name}/.ssh"],
}
}modules/user/manifests/virtual.pp file, comment out the previous definition for user thomas, and replace it with the following:@ssh_user { 'thomas':
key => 'AAAAB3NzaC1yc2E...XaWM5sX0z',
keytype => 'ssh-rsa'
}- your
modules/user/manifests/sysadmins.ppfile as follows:class user::sysadmins { realize(Ssh_user['thomas']) } - Modify your
site.ppfile as follows:node 'cookbook' { include user::virtual include user::sysadmins } - Run Puppet:
cookbook# puppet agent -t Info: Caching catalog for cookbook.example.com Info: Applying configuration version '1413254461' Notice: /Stage[main]/User::Virtual/Ssh_user[thomas]/File[/home/thomas/.ssh]/ensure: created Notice: /Stage[main]/User::Virtual/Ssh_user[thomas]/Ssh_authorized_key[thomas_key]/ensure: created Notice: Finished catalog run in 0.11 seconds
For each user in our user::virtual class, we need to create:
Next, we need to ensure that the .ssh directory exists within the home directory of the user. We require the home directory, File["/home/${name}"], since that needs to exist before we create this subdirectory. This implies that the user already exists because the home directory required the user:
We passed the $key and $keytype variables when we defined the ssh_user resource for thomas:
Now, with everything defined, we just need to call realize on thomas for all these resources to take effect:
user::virtual class, we need to create:
.ssh directory
.ssh/authorized_keys file
ssh_user from anywhere (in any scope):
owner => $name:
Next, we need to ensure that the .ssh directory exists within the home directory of the user. We require the home directory, File["/home/${name}"], since that needs to exist before we create this subdirectory. This implies that the user already exists because the home directory required the user:
We passed the $key and $keytype variables when we defined the ssh_user resource for thomas:
Now, with everything defined, we just need to call realize on thomas for all these resources to take effect:
ssh_user definition to have Puppet automatically create them for new users. We'll see an example of this in the next recipe, Managing users' customization files.
Users tend to customize their shell environments, terminal colors, aliases, and so forth. This is usually achieved by a number of dotfiles in their home directory, for example, .bash_profile or .vimrc.
- Create the
admin_userdefined type (define admin_user) in themodules/admin_user/manifests/init.ppfile as follows:define admin_user ($key, $keytype, $dotfiles = false) { $username = $name user { $username: ensure => present, } file { "/home/${username}/.ssh": ensure => directory, mode => '0700', owner => $username, group => $username, require => File["/home/${username}"], } ssh_authorized_key { "${username}_key": key => $key, type => "$keytype", user => $username, require => File["/home/${username}/.ssh"], } # dotfiles if $dotfiles == false { # just create the directory file { "/home/${username}": ensure => 'directory', mode => '0700', owner => $username, group => $username, require => User["$username"] } } else { # copy in all the files in the subdirectory file { "/home/${username}": recurse => true, mode => '0700', owner => $username, group => $username, source => "puppet:///modules/admin_user/${username}", require => User["$username"] } } } - Modify the file
modules/user/manifests/sysadmins.ppas follows:class user::sysadmins { realize(Admin_user['thomas']) } - Alter the definition of
thomasinmodules/user/manifests/virtual.ppas follows:@ssh_user { 'thomas': key => 'AAAAB3NzaC1yc2E...XaWM5sX0z', keytype => 'ssh-rsa', dotfiles => true } - Create a subdirectory in the
admin_usermodule for the file of userthomas:$ mkdir -p modules/admin_user/files/thomas - Create dotfiles for the user
thomasin the directory you just created:$ echo "alias vi=vim" > modules/admin_user/files/thomas/.bashrc $ echo "set tabstop=2" > modules/admin_user/files/thomas/.vimrc
- Make sure your
site.ppfile reads as follows:node 'cookbook' { include user::virtual include user::sysadmins } - Run Puppet:
cookbook# puppet agent -t Info: Caching catalog for cookbook.example.com Info: Applying configuration version '1413266235' Notice: /Stage[main]/User::Virtual/Admin_user[thomas]/User[thomas]/ensure: created Notice: /Stage[main]/User::Virtual/Admin_user[thomas]/File[/home/thomas]/ensure: created Notice: /Stage[main]/User::Virtual/Admin_user[thomas]/File[/home/thomas/.vimrc]/ensure: defined content as '{md5}cb2af2d35b18b5ac2539057bd429d3ae' Notice: /Stage[main]/User::Virtual/Admin_user[thomas]/File[/home/thomas/.bashrc]/ensure: defined content as '{md5}033c3484e4b276e0641becc3aa268a3a' Notice: /Stage[main]/User::Virtual/Admin_user[thomas]/File[/home/thomas/.ssh]/ensure: created Notice: /Stage[main]/User::Virtual/Admin_user[thomas]/Ssh_authorized_key[thomas_key]/ensure: created Notice: Finished catalog run in 0.36 seconds
We created a new admin_user definition, which defines the home directory recursively if $dotfiles is not false (the default value):
Using the recurse option allows us to add as many dotfiles as we wish for each user without having to modify the definition of the user.
Using the recurse option allows us to add as many dotfiles as we wish for each user without having to modify the definition of the user.
source attribute of the home directory is a directory where users can place their own dotfiles. This way, each user could modify their own dotfiles and have them transferred to all the nodes in the network without our involvement.
See also
All our recipes up to this point have dealt with a single machine. It is possible with Puppet to have resources from one node affect another node. This interaction is managed with exported resources. Exported resources are just like any resource you might define for a node but instead of applying to the node on which they were created, they are exported for use by all nodes in the environment. Exported resources can be thought of as virtual resources that go one step further and exist beyond the node on which they were defined.
There are many examples that use exported resources; the most common one involves SSH host keys. Using exported resources, it is possible to have every machine that is running Puppet share their SSH host keys with the other connected nodes. The idea here is that each machine exports its own host key and then collects all the keys from the other machines. In our example, we will create two classes; first, a class that exports the SSH host key from every node. We will include this class in our base class. The second class will be a collector class, which collects the SSH host keys. We will apply this class to our Jumpboxes or SSH login servers.
To use exported resources, you will need to enable storeconfigs on your Puppet masters. It is possible to use exported resources with a masterless (decentralized) deployment; however, we will assume you are using a centralized model for this example. In Chapter 2, Puppet Infrastructure, we configured puppetdb using the puppetdb module from the forge. It is possible to use other backends if you desire; however, all of these except puppetdb are deprecated. More information is available at the following link: http://projects.puppetlabs.com/projects/puppet/wiki/Using_Stored_Configuration.
Ensure your Puppet masters are configured to use puppetdb as a storeconfigs container.
- Create the first class,
base::ssh_host, which we will include in our base class:class base::ssh_host { @@sshkey{"$::fqdn": ensure => 'present', host_aliases => ["$::hostname","$::ipaddress"], key => $::sshdsakey, type => 'dsa', } } - Remember to include this class from inside the base class definition:
class base { ... include ssh_host } - Create a definition for
jumpbox, either in a class or within the node definition forjumpbox:node 'jumpbox' { Sshkey <<| |>> } - Now run Puppet on a few nodes to create the exported resources. In my case, I ran Puppet on my Puppet server and my second example node (
node2). Finally, run Puppet onjumpboxto verify that the SSH host keys for our other nodes are collected:[root@jumpbox ~]# puppet agent -t Info: Caching catalog for jumpbox.example.com Info: Applying configuration version '1413176635' Notice: /Stage[main]/Main/Node[jumpbox]/Sshkey[node2.example.com]/ensure: created Notice: /Stage[main]/Main/Node[jumpbox]/Sshkey[puppet]/ensure: created Notice: Finished catalog run in 0.08 seconds
We created an sshkey resource for the node using the facter facts fqdn, hostname, ipaddress, and sshdsakey. We use the fqdn as the title for our exported resource because each exported resource must have a unique name. We can assume the fqdn of a node will be unique within our organization (although sometimes they may not be; Puppet can be good at finding out such things when you least expect it). We then go on to define aliases by which our node may be known. We use the hostname variable for one alias and the main IP address of the machine as the other. If you had other naming conventions for your nodes, you could include other aliases here. We assume that hosts are using DSA keys, so we use the sshdsakey variable in our definition. In a large installation, you would wrap this definition in tests to ensure the DSA keys existed. You would also use the RSA keys if they existed as well.
You could then modify jumpbox to only collect resources for production, for example, as follows:
Two important things to remember when working with exported resources: first, every resource must have a unique name across your installation. Using the fqdn domain name within the title is usually enough to keep your definitions unique. Second, any resource can be made virtual. Even defined types that you created may be exported. Exported resources can be used to achieve some fairly complex configurations that automatically adjust when machines change.
resources, you will need to enable storeconfigs on your Puppet masters. It is possible to use exported resources with a masterless (decentralized) deployment; however, we will assume you are using a centralized model for this example. In Chapter 2, Puppet Infrastructure, we configured puppetdb using the puppetdb module from the forge. It is possible to use other backends if you desire; however, all of these except puppetdb are deprecated. More information is available at the following link: http://projects.puppetlabs.com/projects/puppet/wiki/Using_Stored_Configuration.
Ensure your Puppet masters are configured to use puppetdb as a storeconfigs container.
- Create the first class,
base::ssh_host, which we will include in our base class:class base::ssh_host { @@sshkey{"$::fqdn": ensure => 'present', host_aliases => ["$::hostname","$::ipaddress"], key => $::sshdsakey, type => 'dsa', } } - Remember to include this class from inside the base class definition:
class base { ... include ssh_host } - Create a definition for
jumpbox, either in a class or within the node definition forjumpbox:node 'jumpbox' { Sshkey <<| |>> } - Now run Puppet on a few nodes to create the exported resources. In my case, I ran Puppet on my Puppet server and my second example node (
node2). Finally, run Puppet onjumpboxto verify that the SSH host keys for our other nodes are collected:[root@jumpbox ~]# puppet agent -t Info: Caching catalog for jumpbox.example.com Info: Applying configuration version '1413176635' Notice: /Stage[main]/Main/Node[jumpbox]/Sshkey[node2.example.com]/ensure: created Notice: /Stage[main]/Main/Node[jumpbox]/Sshkey[puppet]/ensure: created Notice: Finished catalog run in 0.08 seconds
We created an sshkey resource for the node using the facter facts fqdn, hostname, ipaddress, and sshdsakey. We use the fqdn as the title for our exported resource because each exported resource must have a unique name. We can assume the fqdn of a node will be unique within our organization (although sometimes they may not be; Puppet can be good at finding out such things when you least expect it). We then go on to define aliases by which our node may be known. We use the hostname variable for one alias and the main IP address of the machine as the other. If you had other naming conventions for your nodes, you could include other aliases here. We assume that hosts are using DSA keys, so we use the sshdsakey variable in our definition. In a large installation, you would wrap this definition in tests to ensure the DSA keys existed. You would also use the RSA keys if they existed as well.
You could then modify jumpbox to only collect resources for production, for example, as follows:
Two important things to remember when working with exported resources: first, every resource must have a unique name across your installation. Using the fqdn domain name within the title is usually enough to keep your definitions unique. Second, any resource can be made virtual. Even defined types that you created may be exported. Exported resources can be used to achieve some fairly complex configurations that automatically adjust when machines change.
ssh_host class to export the ssh keys of a host and ensure that it is included in our base class.
base::ssh_host, which we will include in our base class:class base::ssh_host {
@@sshkey{"$::fqdn":
ensure => 'present',
host_aliases => ["$::hostname","$::ipaddress"],
key => $::sshdsakey,
type => 'dsa',
}
}class base {
...
include ssh_host
}jumpbox, either in a class or within the node definition for jumpbox:node 'jumpbox' {
Sshkey <<| |>>
}node2). Finally, run Puppet on jumpbox to verify that the SSH host keys for our other nodes are collected:[root@jumpbox ~]# puppet agent -t Info: Caching catalog for jumpbox.example.com Info: Applying configuration version '1413176635' Notice: /Stage[main]/Main/Node[jumpbox]/Sshkey[node2.example.com]/ensure: created Notice: /Stage[main]/Main/Node[jumpbox]/Sshkey[puppet]/ensure: created Notice: Finished catalog run in 0.08 seconds
We created an sshkey resource for the node using the facter facts fqdn, hostname, ipaddress, and sshdsakey. We use the fqdn as the title for our exported resource because each exported resource must have a unique name. We can assume the fqdn of a node will be unique within our organization (although sometimes they may not be; Puppet can be good at finding out such things when you least expect it). We then go on to define aliases by which our node may be known. We use the hostname variable for one alias and the main IP address of the machine as the other. If you had other naming conventions for your nodes, you could include other aliases here. We assume that hosts are using DSA keys, so we use the sshdsakey variable in our definition. In a large installation, you would wrap this definition in tests to ensure the DSA keys existed. You would also use the RSA keys if they existed as well.
You could then modify jumpbox to only collect resources for production, for example, as follows:
Two important things to remember when working with exported resources: first, every resource must have a unique name across your installation. Using the fqdn domain name within the title is usually enough to keep your definitions unique. Second, any resource can be made virtual. Even defined types that you created may be exported. Exported resources can be used to achieve some fairly complex configurations that automatically adjust when machines change.
sshkey resource for
You could then modify jumpbox to only collect resources for production, for example, as follows:
Two important things to remember when working with exported resources: first, every resource must have a unique name across your installation. Using the fqdn domain name within the title is usually enough to keep your definitions unique. Second, any resource can be made virtual. Even defined types that you created may be exported. Exported resources can be used to achieve some fairly complex configurations that automatically adjust when machines change.
sshkey resources for each area as shown in the following code snippet:
jumpbox to only collect resources for production, for example, as follows:
fqdn domain name within the title is usually enough to keep your definitions unique. Second, any resource can be made virtual. Even defined types that you created may be exported. Exported resources can be used to