
When you created a new Unreal Engine 4 C++ project, you saw that both Visual Studio and Unreal Engine 4 opened up. In this recipe, we will go through an example of modifying a script in Visual Studio and then compiling the code to see the changes.
UE4 – hot reloading
Getting ready
To see the effects of changing one of the classes, we have to actually be using the class. Unreal automatically creates one of these classes for us by default (AChapter01_GameModeBase), so for this simple example, we will make use of it.
Note that everywhere you see Chapter01 in the recipes in this chapter, I am referring to the project name, and if yours is named differently, you may see different text.
- From the Unreal Editor, go to Edit | Project Settings. Select the Maps & Modes option under the Project section.
- Under Default GameMode, select Chapter01_GameMode:
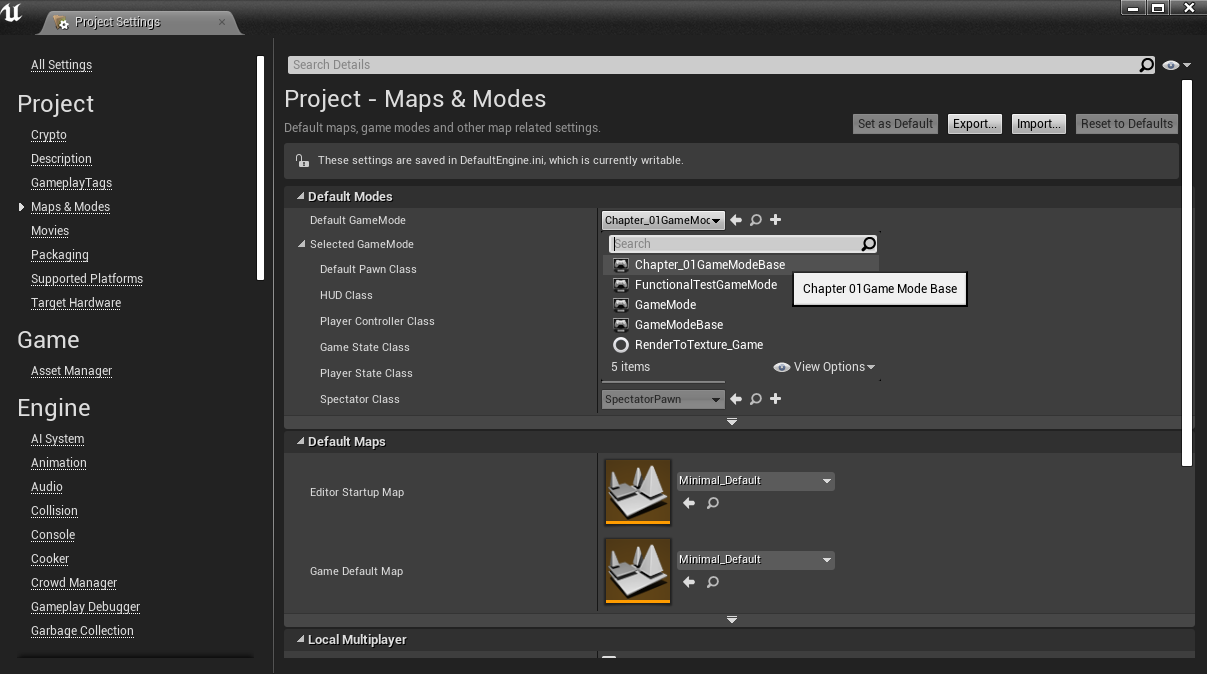
Note that the class name is AChapter01_GameModeBase in code, while in Unreal's menus it doesn't have the A. This is because Unreal's naming convention for classes always adds an A to classes that inherit from the Actor class. We will discuss this in greater detail later on in this book.
A game mode is a class that will contain the rules of your game type.
For more information on game modes, check out https://docs.unrealengine.com/en-US/Gameplay/Framework/GameMode.
How to do it...
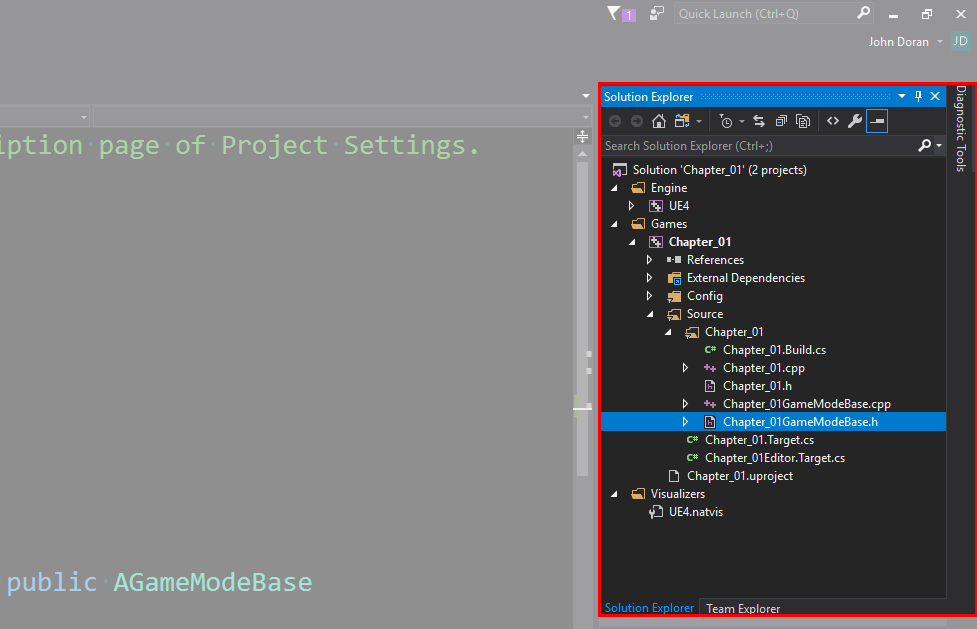
- Inside Visual Studio under the Solution Explorer, you will see a number of pre-created files. Open the Games/Chapter_01/Source/Chapter_01 folder and you should see the Chapter01GameModeBase.h and .cpp files. Double-click on the .h file to open it:
- Add the following code (in bold) to the file:
// Fill out your copyright notice in the Description page of Project Settings.

#pragma once

#include "CoreMinimal.h"
#include "GameFramework/GameModeBase.h"
#include "Chapter_01GameModeBase.generated.h"

/**
 *
 */
UCLASS()
class CHAPTER_01_API AChapter_01GameModeBase : public AGameModeBase
{
 GENERATED_BODY()
public:
  void BeginPlay();

};
- Next, open the .cpp file and update it to have the following:
// Fill out your copyright notice in the Description page of Project Settings.

#include "Chapter_01GameModeBase.h"

void AChapter_01GameModeBase::BeginPlay()
{
  Super::BeginPlay();
}
This code currently doesn't do anything, but it gives us the ability to add changes to it later on in the future recipes of this chapter.
- Save both files and return to the Unreal editor. From the editor, click on the Compile button:
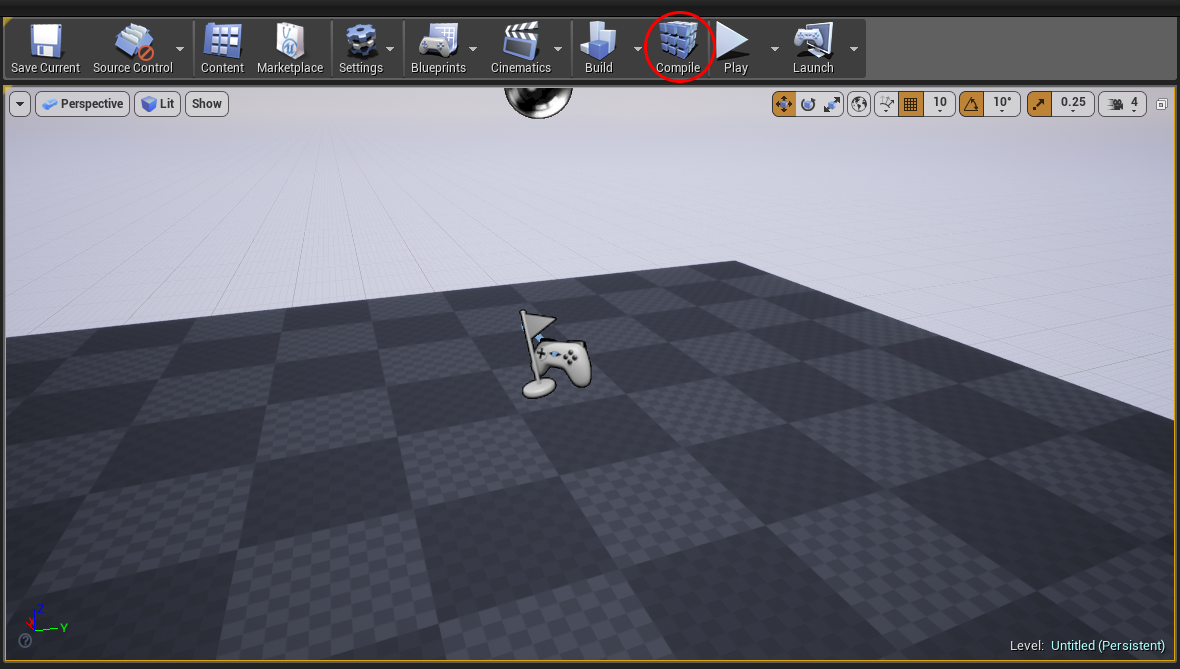
If all goes well, you should see a menu appear on the bottom-right of the screen, and after a period of time, you should see it say Compile Complete!:

It is also possible to compile your code in Visual Studio by right-clicking on the project from the Solution Explorer and selecting Build. Upon completion, when we go back to the Unreal editor, it should automatically load the changes that were made.
It is important for us to remember to compile our code any time we make changes to our code files. Otherwise, we will not be able to see those changes reflected in our project.
For more information on compiling your own code for Unreal Engine 4, check out https://docs.unrealengine.com/en-US/Programming/QuickStart.