Book Image

Complete Virtual Reality and Augmented Reality Development with Unity

By : Jesse Glover, Jonathan Linowes
Book Image

Complete Virtual Reality and Augmented Reality Development with Unity

By: Jesse Glover, Jonathan Linowes

Overview of this book

Unity is the leading platform to develop mixed reality experiences because it provides a great pipeline for working with 3D assets. Using a practical and project-based approach, this Learning Path educates you about the specifics of AR and VR development using Unity 2018 and Unity 3D. You’ll learn to integrate, animate, and overlay 3D objects on your camera feed, before moving on to implement sensor-based AR applications. You’ll explore various concepts by creating an AR application using Vuforia for both macOS and Windows for Android and iOS devices. Next, you’ll learn how to develop VR applications that can be experienced with devices, such as Oculus and Vive. You’ll also explore various tools for VR development: gaze-based versus hand controller input, world space UI canvases, locomotion and teleportation, timeline animation, and multiplayer networking. You’ll learn the Unity 3D game engine via the interactive Unity Editor and C# programming. By the end of this Learning Path, you’ll be fully equipped to develop rich, interactive mixed reality experiences using Unity. This Learning Path includes content from the following Packt products: • Unity Virtual Reality Projects - Second Edition by Jonathan Linowes • Unity 2018 Augmented Reality Projects by Jesse Glover
Table of Contents (24 chapters)
Title Page
Copyright
About Packt
Contributors
Preface
Index

OpenCV with Unity


We can now move on to importing our dlls into Unity and writing our wrapper classes to handle interfacing with OpenCV and Unity. That way, we can then create our scripts to build our project:

  1. Create a folder. I will call mine ConfigureOpenCV:

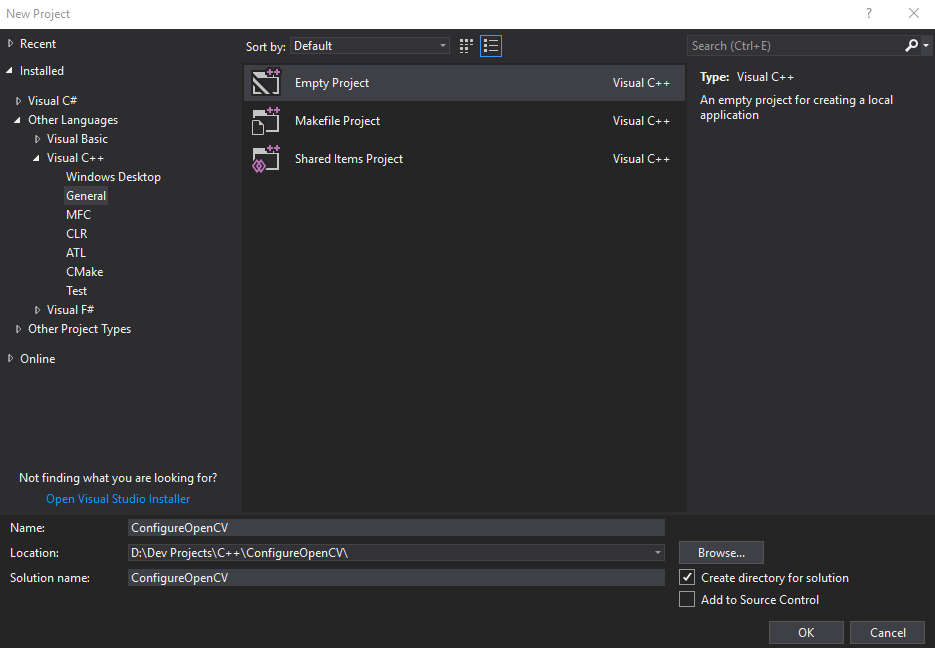
  1. We need to create a new empty C++ project in Visual Studio. I will call mine ConfigureOpenCV, with the location being set in the ConfigureOpenCV folder:
  1. Set the platform to be x64 in Visual Studio:

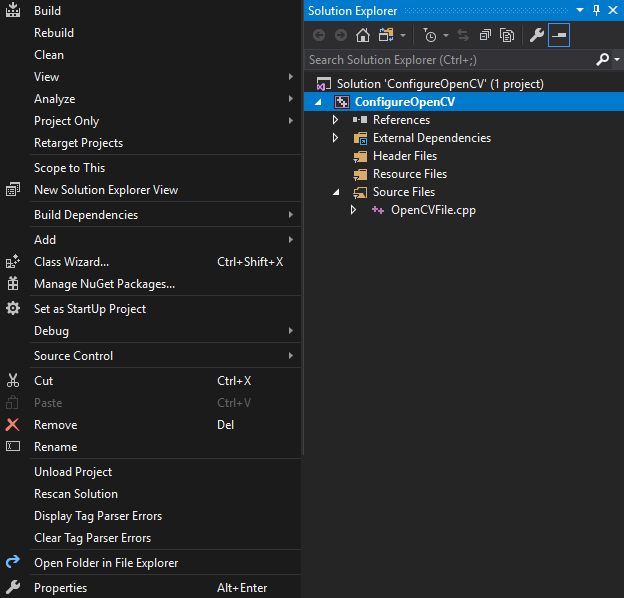
  1. Right-click on the project properties file and select Properties:

  1. This will open our properties window:
  1. The first thing we need to do is change Target Extension in the General tab from .exe to .dll:

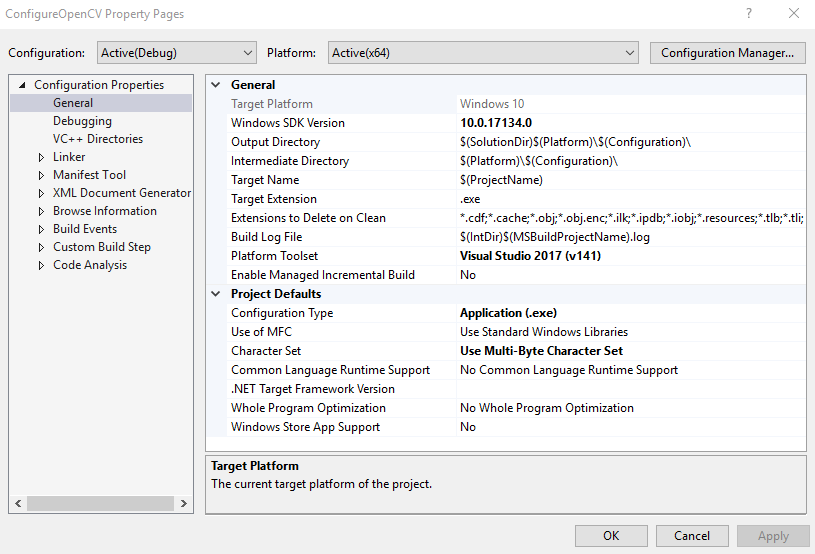
  1. We need to change the Configuration Type from Application (.exe) to Dynamic Library (.dll):
  1. Over in VC++ Directories, add our OPENCV_DIRs to include it in Include Directories:

  1. Over in Linker’s General Tab, add $(OPENCV_DIR)\lib\Debug to the Additional Library Directories option:
  1. Finally, in the Linker’s Input tab, we need to add a few items to the Additional...