

Mu is an easy-to-use graphical code editor written in Python that runs on Windows, macOS, Linux, and the Raspberry Pi. In this recipe, we will learn how to install Mu and use it to access the REPL on the Circuit Playground Express.
Using Mu to access the REPL
Getting ready
This recipe requires Python and pip to be installed on the computer. The Mu editor will be installed using the pip command, so this recipe can optionally be run within virtualenv.
How to do it...
Let's have a look at how to do this:
- Execute the following pip3 install mu-editor command to install the Mu editor.
- Run the mu-editor command to start the editor.
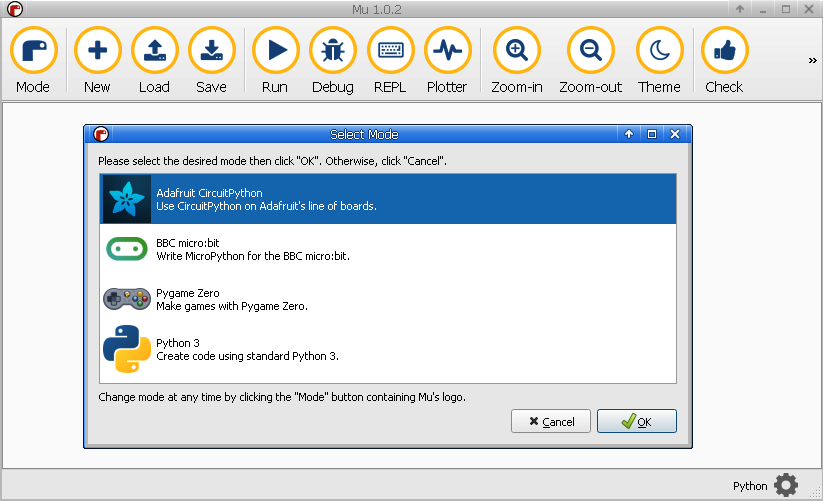
- The first time you run the editor, it will ask which mode it should run in. On the following screenshot, select the Adafruit CircuitPython mode:
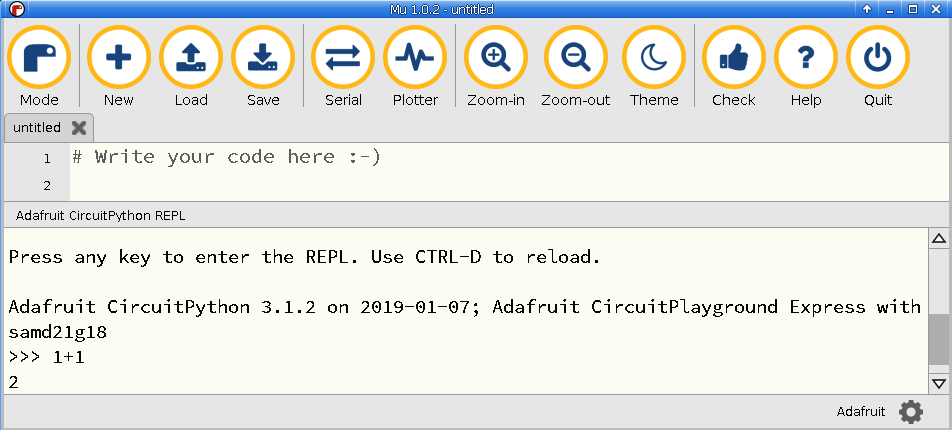
- Click the Serial button on the toolbar to open a REPL session with the device.
- On Linux systems, if a Cannot connect to device error appears, then exit the editor and start it again with the sudo /full/path/to/mu-editor command, where the absolute path to the editor is given.
- Once a connection is successfully made to the device, you can test the REPL by evaluating the 1+1 expression, which should produce output like the following screenshot:
How it works...
When you click on the Serial button in the Mu editor, it will attempt to open a serial connection to the board. If successful, it captures your input, sends it the device, and displays the output just as a typical Terminal emulator would.
The beauty of this application is that it works on all the major desktop OSes and automatically finds the correct device address without the need to manually specify it, as is required by your typical Terminal emulators. It also has a very simple and approachable layout, making it easy to use for first-time users to connect to microcontrollers.
There's more...
The Mu editor is a great graphical application to begin with when you first start working with MicroPython. Its simple and intuitive design makes it easy to get productive fast and makes it fun to explore its different features. Beyond its REPL features, it also has the main part of the Screen, which can be used to edit and save Python scripts. It has code-editing features such as code completion and will show helpful popups with details on a function's accepted arguments and documentation on what the function does.
See also
Here are a few references:
- The GitHub repository for the project can be found at https://github.com/mu-editor/mu.
- The projects homepage can be found athttps://codewith.mu/.