Book Image

WordPress 2.7 Cookbook

Book Image

WordPress 2.7 Cookbook

Overview of this book

About 120,000 blogs are created every day. Most of them quickly die, but a few stay, grow up, and then become well known and respected places on the Web. If you are seriously interested in being in the top league, you will need to learn all the tricks of the trade. WordPress 2.7 Cookbook focuses on providing solutions to common WordPress problems, to make sure that your blog will be one of the ones that stay. The author's experience with WordPress enables him to share insights on using WordPress effectively, in a clear and friendly way, giving practical hands-on solutions to WordPress problems, questions, and common tasks ñ from themes to widgets and from SEO to security. Are you feeling limited with WordPress, or are you wondering how popular blogs do a certain kind of thing that you can't? With this cookbook, you will learn many WordPress secrets and techniques, with step-by-step, useful recipes dedicated to achieving a particular goal or solve a particular problem. You'll learn the secret of expensive premium themes, how to optimize your blog for SEO and online profits, and how to supercharge WordPress with killer functions used by the most popular blogs over the Internet.
Table of Contents (17 chapters)
WordPress 2.7 Cookbook
Credits
About the Author
About the Reviewers
Preface
2
Finding and Installing Themes
Index

Managing media files with the Media Library


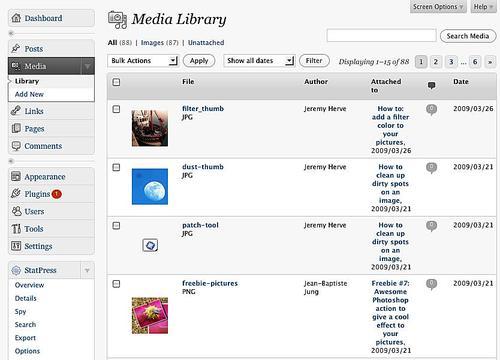
The Media Library allows you to manage all the media files (images, videos, and so on) in one place. The Media Library allows you to add, delete, and edit media files for further integration on your blog posts.

Getting ready

To access WordPress Media Library, log in to your WordPress Dashboard and go to Media | Library, located to the right of the screen.

How to do it...

  1. To add a new media file on the Media Library, click the Media option, in WordPress admin menu, and then click on Add new. A Select files button will be displayed. Simply click on it and select the media files from your hard drive.

  2. There are two uploaders available: the Flash uploader (which uses Adobe Flash technology) and the Browser uploader (which uses a good old input file HTML field). The Flash uploader allows you to select multiple files at once, while the browser uploader allows you to upload only one file at a time. With WordPress 2.6, the Flash uploader wasn't working on Mac OS and GNU/Linux platforms. This has been fixed with WordPress 2.7. However, if you have any issues with Flash uploader, the Browser uploader will always work.

To delete the media, carry out the following steps:

  1. Deleting media is an easy process. On the Media Library, simply hover an item and the Edit, Delete, and Views buttons will be displayed.

  2. Click on Delete and the media will be deleted for good.

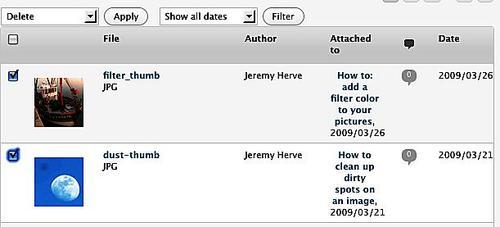
For bulk media deletion, carry out the following steps:

  1. If you need to delete around 5 or 10 media files, WordPress allows you to erase all the undesired files at once.

  2. To do so, simply go to the Media Library and check the checkboxes related to the media you want to delete.

  3. Select the Delete option in the Bulk Actions drop-down list (located on the top left of the page) and then click on the Apply button.

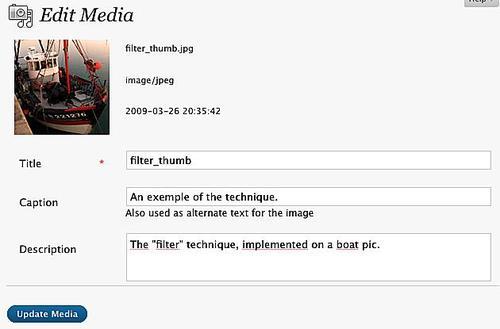
All media files can be edited. You can change its title and add a caption or description. Carry out the following steps to do so:

  1. Go to the Media Library.

  2. Hover the mouse over the item you'd like to edit and click on the Edit link which appears.

  3. A new page opens, allowing you to define the file settings.

  4. Click on the Apply button when you're done editing the file settings.

How it works...

The Media Library allows you to manage, upload, and delete media files. Unlike adding or deleting media files directly on your server by using a FTP program, the Media Library ensures that database entries related to media are updated or deleted, depending on the action you have taken.