Book Image

Mahara 1.2 E-Portfolios: Beginner's Guide

Book Image

Mahara 1.2 E-Portfolios: Beginner's Guide

Overview of this book

Mahara is a user-centred environment with a permissions framework that enables different views of an e-portfolio to be easily managed. These views helps you display your artefacts – text files, spreadsheets, images, and videos – in a way you choose and to the people you want. You can also create online communities and social networks through groups, blogs, and forums.Being a novice, you will need a quick and easy implementation guide to set up your feature-rich digital portfolio.This book is your step-by-step guide to building an impressive professional e-portfolio using Mahara. It covers the key features of Mahara that will help you set up your customized digital portfolio and display the artefacts in your preferred way allowing contribution from selected users only.This book will introduce to the exciting features of Mahara framework and help you develop a feature-rich e-portfolio for yourself. You will see how easily you can create folders, upload multiple files like journals, project documents, pictures, and videos and share them with your friends. You will learn to set up views of these files, making these visible to your chosen friends only. And then, you will allow people to give their inputs.You will learn to create blogs and forums and get connected to the rest of the world. Customization and administration of your Mahara site will become easy after you have gone through this book. Imagine how good you will feel when you will see your knowledge, success, and ideas going live and available to your chosen audiences for their inputs.
Table of Contents (15 chapters)
Mahara 1.2 ePortfolios
Credits
About the Authors
About the Reviewers
Preface

Time for action - adding some folders and files to your Portfolio


  1. 1. Click the My Portfolio option on the Main Menu. By default, the My Views tab will be selected. We will be using this area later to create some more views, but for now, click on the My Files tab.

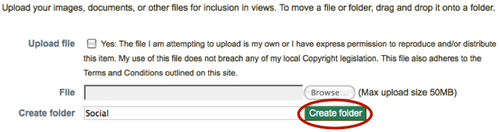
  2. 2. We recommend that you start by creating yourself a file structure of folders just as you would do on your laptop or desktop computer. Don't worry about getting them perfect, because you will be able to edit this structure later. Enter the name for your first folder, and click Create folder. In the example below, Janet Norman has created a folder in her portfolio called Social:

  1. 3. You should now see the folder that you have just created. By the side of it you have the options to edit or delete it. Let's add some more details to our new folder by giving it a description. Click the Edit button.

  2. 4. You will now see a new section appearing below. Write in your description for your folder. This will appear in the information next to the...