
When working on slightly larger projects in teams, source control is an absolute necessity. By far, the most popular source control system in the Microsoft world today is Team Foundation Server (TFS). This recipe explains all that we need to get TFS to work with Silverlight applications in Visual Studio and Blend. It doesn't explain how to work with TFS itself.
Before getting started, make sure that you have installed Blend 4 and the necessary developer tools as described in the Getting our environment ready to start developing Silverlight applications section.
To start using TFS as a versioning system with a Silverlight-enabled solution, we need to perform the following steps:
1. Using TFS source control with a Silverlight application in Visual Studio is exactly the same as using it with any other type of Visual Studio project. Team Explorer is used for this purpose and this is automatically installed out of the box with Visual Studio 2010. (For Visual Studio 2008, it has to be separately installed from http://www.microsoft.com/downloads/details.aspx? FamilyID=0ed12659-3d41-4420-bbb0-a46e51bfca86&DisplayLang=en.)
2. Blend 4 also supports source control out of the box. However, for Blend 3, TFS update KB967483 must be downloaded and installed from http://code.msdn.microsoft.com/KB967483. This update enables TFS source control for Expression Blend 3.
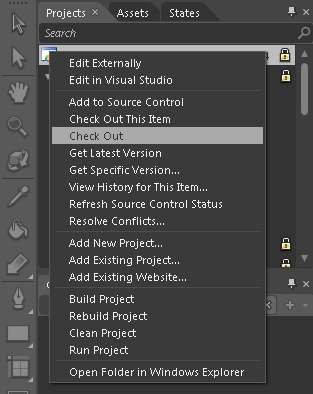
3. Once these are installed, we can use TFS source control from within Blend for any solution bound to the TFS source control. Right-click on any file in the Solution Explorer window to view the source control options just as we would do in Visual Studio's Solution Explorer window. We can now check out, check in, and merge files from Expression Blend.
Team Foundation Server source control is the preferred way of enabling version control on our projects. Explaining in detail how to work with TFS is beyond the scope of this book, but the following are a few basic steps and references:
1. We must make sure that we have the correct permissions on our Team Foundation Server to handle the tasks we need to do. We need different permissions to (for example) create projects than to check out files. Have a look at this MSDN article to learn how to set these permissions: http://msdn.microsoft.com/en-us/library/ms252587.aspx.
2. Next, we'll need to connect to TFS using Team Explorer. Have a look at this MSDN article to learn how to do that: http://msdn.microsoft.com/en-us/library/ms181474.aspx.
3. We'll now need to create a workspace on our machine. We can look at the workspace as a local folder containing copies of the source-controlled files on the TFS. For more information, have a look at this MSDN article: http://msdn.microsoft.com/en-us/library/ms181384.aspx.
4. After we've created a local workspace, we can download the files from the TFS to that local folder. More information about this can be found at http://msdn.microsoft.com/en-us/library/ms181385.aspx.
5. We're now able to open our source-controlled solution in Blend and/or Visual Studio and check out files, merge files, add projects, and so on depending on the permissions.
While working a lot with TFS, an interesting feature to download is the Team Foundation Server Power Tools. This is a set of extra features that is added to TFS and is mainly aimed at power users. It can be downloaded at http://msdn.microsoft.com/en-us/teamsystem/bb980963.aspx.
A complete glossary of TFS terms can be found at http://msdn.microsoft.com/en-us/library/ms242882.aspx. As a reference, the following are a few of the more commonly used ones along with their brief explanation:
|
Term |
Explanation |
|---|---|
|
TFS workspace |
A TFS workspace is a location on the Team Foundation Server (TFS) where a record of changes between local files and corresponding repository files is stored. It can also be thought of as a copy of the client-side directory, a staging ground where local changes are persisted until they are checked into the server, or a collection of working folder mappings that can be viewed and edited. |
|
Working folder |
A working folder should be seen as a client-side representation of the TFS workspace. Binding the TFS workspace to the client-side working folder is done through a TFS workspace mapping. |
|
Check in |
Check in refers to the task of committing a pending change/pending changes to a TFS repository. When you check in pending changes, a new changeset is created on the server. |
|
Check out |
Check out refers to the task of notifying the TFS server that you are changing the status of a resource from locked to writeable. When you check out for edit, TFS appends an edit to that resource. |
|
Get latest |
Get latest refers to the task of retrieving the most recent version of a file from the TFS source control to your local working folder. |