

After you set this up, you do not need to manually create the site map. Magento will create it whenever you want.
Before you can complete this task, you must have FTP access to your Magento site, that is, you must be able to upload, delete, and edit files in your Magento site.
You must also be able to create cron jobs on your web server. Most hosting services enable you to create cron jobs. You should check the help files for your host, and ensure that you understand how to create a cron job.
Many hosting services offer the cPanel application for managing your files on the host. If your hosting service offers cPanel, then you might find this documentation helpful:
Let's begin with creating the site map:
Note
Although it's called a "Google Sitemap", the major search engines use the same protocol. So this site map will work for all of them.
3. Click on the Add Sitemap button. The New Sitemap page displays.
4. In the Filename field, enter a name for the site map.
5. In the Path field, enter the directory on your Magento server where you want the site map. To place it in the root (home) directory of your site, enter a slash like this: /
6. Click on the Save & Generate button, and the new site map is generated.
7. You can see a URL in the Link for Google column. Either copy and paste this URL into a document so that it can easily retrieve it, or minimize this window without closing it. Later, you will want to copy and paste this link.
Pointing search engine crawlers to the site map:


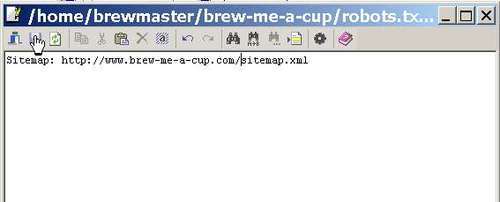
3. The file might already have some text in it. That's okay. Add this line to the file:
Sitemap: http://www.yourdomain.com/sitemap.xmlwhere:
www.yourdomain.com is your domain. In our example, it's www.brew-me-a-cup.com.
/sitemap.xmlis the path and filename for the site map. In our example, the site map is in the root directory. If we put Magento in a subdirectory, it might look like this: www.brew-me-a-cup.com/magento/sitemap.xml.
Configuring Magento to periodically refresh the site map:
2. Select System | Configuration | Google Sitemap.
3. Under Categories Options, Products Options, and CMS Pages Options, you will see a drop-down list labeled Frequency. This drop-down list answers the question, "How often do you update this kind of page in your store?"
For example, if you add or edit products every day, then for Products Options, select a Frequency of Daily. If you add or edit category landing pages every week, then for Categories Options, select a Frequency of Weekly.
4. For Categories Options, Products Options, and CMS Pages Options, select the correct Frequency for your site.
5. Under Categories Options, Products Options, and CMS Pages Options, you will see a drop-down list labelled Priority. This drop-down list answers the question, "What is the relative importance of this kind of page?"
6. For example, if product pages are four times as important as category landing pages, then for Products Options, enter a Priority of 1.0, and for Categories Options, enter a Priority of 0.25.
7. For Categories Options, Products Options, and CMS Pages Options, enter the correct Priority for your site.
8. Under Generation Settings, select Yes. This turns on the feature. Magento will not generate the site map until you enable this.
9. Under Start Time, select the time you want the site map to be generated. On or after this time, Magento will generate your site map.
For example, suppose you enter 2:30am here and your cron job is set to run every hour. When your cron job runs at 2:00am, it will not cause Magento to generate the site map. When the cron job runs again at 3:00am because the time for generating the site map has passed, Magento will generate the site map.
10. Under Frequency, select how often you want Magento to generate a site map. This can be Daily, Weekly, or Monthly. There is no point in generating a site map more often than once a day because a web crawler will almost certainly not visit your site any more often than that.
11. Under Error Email Recipient, enter the email address to which you want Magento to send errors. Magento will notify this email address if it encounters errors while trying to generate the sitemap.
12. The Error Email Sender is the email address from which the error email will appear to come. These email addresses are set up under Store Email Addresses on the same page.
13. The Error Email Template is the template that Magento will use when sending the error email. You can leave this at the default selection or create a new template under System | Transactional Emails.
14. Click on the Save button.
Setting up the Magento cron job:
On your web host, you must create a cron job. The cron job will tell the Magento script cron.php to execute a number of functions. Among those functions will be generating a new site map.
Note
Magento's cron.php is not the cron job. The cron job is script that you create on your web hosting service. The cron job, in turn, tells cron.php to run. The cron.php file then activates many functions, including generating a site map.
The method for creating a cron job will vary from host to host. In all cases, you want the cron job to run the file cron.php, found in Magento's home directory.
You should configure the cron job to run at least as often as you want the site map generated, that is, if you want a new site map generated daily, you should configure the cron job to run at least every day.
Under Catalog | Google Sitemap, you told Magento what to call the site map and where to store it. In robots.txt, you told search engine crawlers where to find the site map.
Then, under System | Configuration | Google Sitemap, you told Magento how often to refresh the site map. You also chose some settings for the site map. These settings tell the search engine crawlers how often to check back for updated pages and the relative importance of different types of pages.
Finally, you created a cron job on your hosting service that runs cron.php at set times (every week, day, hour, and so on). The cron job runs cron.php, and cron.php tells Magento to refresh the site map.