
Isolated pictures of different items are to be presented on an empty book. The idea is that this empty book, which is full of different objects, should have a story written. The items are of any kind. Students are to write a story using these images and connectors.
We are going to design a guided writing activity through a Journal. We are going to design the activity so that our students write a story out of some pictures. We enter the course and choose the Weekly outline section in which we want to add the activity. Let's Moodle it!
Before creating the activity in Moodle, we have to create the file with the images to upload. In this case, we are going to do it in Microsoft Word. These are the steps to follow in case you have created similar files. After you have opened the software, create a new document and follow these steps:
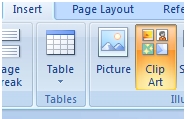
1. Click on Insert and choose Clip Art, as shown in the following screenshot:
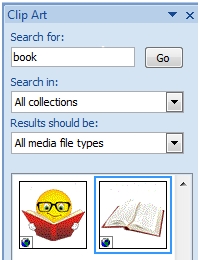
2. In the Search for block, write the word book and click on Go, as shown in the following screenshot:
3. Find an image—in this case, the empty book—and add other clipart images on it to guide the story that the students are going to write.
4. Look for the pictures to insert inside the book so that students can write the story. Select a rose, a couple, and a car.
5. Repeat the same process and create a picture document.
6. Select the pictures from Microsoft Word, copy and paste them in Paint, Inkscape, or Image Editor, and copy them in
.png, .jpeg, or.jpgformats. This is shown in the following screenshot:

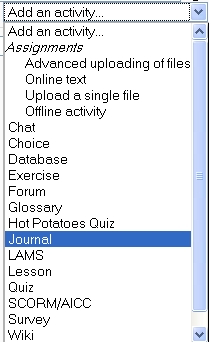
Choose the Weekly outline section where you want to carry out the activity. You are going to design this activity in a Journal. It is a good option to carry out this activity. Choose Add an activity and click on Journal, as shown in the following screenshot:
1. Fill the Journal name block with the title of the activity.
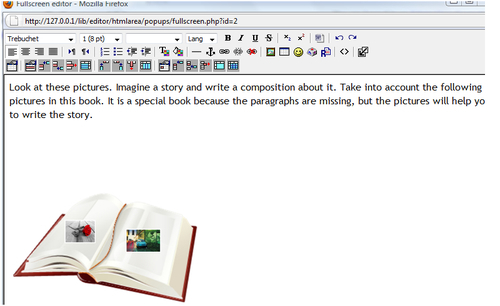
2. In the Journal question, write the description of the activity and add the pictures on the empty book (by empty book, I mean a book with pictures without any text whatsoever). Copy and paste the file we created using Word in Paint. To upload the pictures, click on the icon to insert a picture.
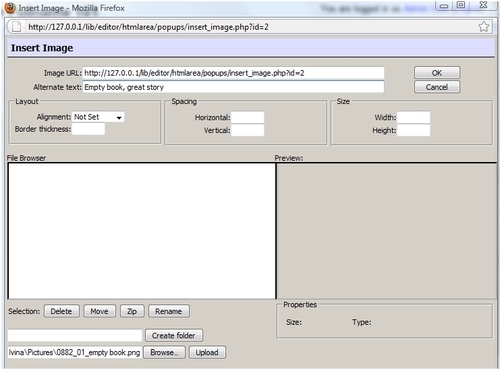
3. Click on Browse to find the file.
4. When you have found the file, click on Open.
5. Click on Upload. Click on the image's link and its URL is automatically inserted into the Image URL block.
6. Complete the Alternate text block as shown in the following screenshot: