
This recipe describes how to create and assign optional network interfaces to our firewall.
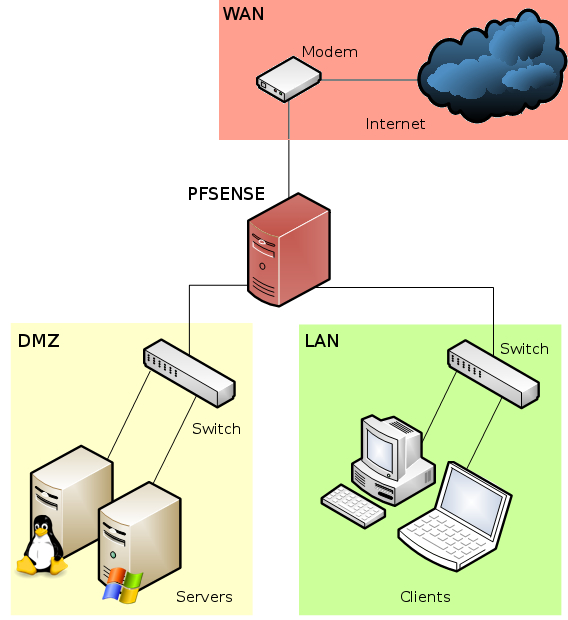
The optional network you'll create in this is example is commonly referred to as a DMZ. The idea is taken from the military concept of a de-militarized zone, in which some traffic is allowed to pass and some traffic isn't. The idea is that the area is controlled and clearly separate from your other areas. When applied to networking, a DMZ network follows this pattern:
Internet Traffic | ← DMZ ← LAN Traffic
Unsafe Internet traffic is allowed to enter the DMZ, to access a webserver for example. LAN traffic can also enter the DMZ; it wants to access the webserver too. However, the key lies in the last rule—no DMZ traffic is allowed to enter the LAN.
The DMZ network is our less secure network we'll allow certain external access to. To configure a DMZ, or any other optional network, we'll need an available interface.
Browse to an available interface, Interfaces | OPT1.
Check Enable Interface.
Set Description to DMZ.
Choose an address configuration Type, Static for our example.
Enter an IP address and the subnet mask. We'll use 192.168.2.1 and select 24 from the drop-down list.
Leave Gateway set to None.

Ensure Block private networks and Block bogon networks are unchecked.
Save the changes.

Apply changes.
Your DMZ network will allow external (WAN) access. Your DMZ will also allow access from the LAN, but it won't be permitted to send traffic to the LAN. This will allow devices on the Internet to access your DMZ resources (websites, e-mail, and so on) without being able to access any part of your private LAN network.
You could now attach a switch to your DMZ interface to connect multiple machines. If you've been following these recipes in order, a diagram of your network would look something like this: