
We know what Drupal is, we know what social networking is, and we know what we are going to create with Drupal throughout the course of this book; let's get started! The first thing we need to do is install Drupal. This section contains some detailed technical information regarding the requirements and installation of Drupal.
Note
For most of the book, we will be working with Drupal installed locally on our own computers (see Appendix A, for setting up a development environment if you don't have web server software installed on your own computer). As we build up the site we will then deploy Drupal onto a web server in Chapter 10, Deploying and Maintaining our Social Network.
Provided we used the instructions in Appendix A to set up our development environment, we will already have a suitable development environment which meets the minimum requirements to run Drupal. For reference, or if you are using a custom development environment and want to check if it meets the requirements for Drupal, the minimum requirements are:
A web server:
Apache 2.0 or greater is recommended
PHP 5.2.4 or greater.
Database engine: Either MySQL 5.0.15 (or greater), MariaDB 5.1.44 (or greater), PostgreSQL 8.3 (or greater) or SQLite 3.4.2 (or greater). MySQL is assumed during the course of this book.
To make use of friendly or clean URLs, the
mod_rewritemodule for Apache, and the ability to use.htaccessfiles is required. However, this is optional.PHP's XML extension may be required to utilize certain XML-based services using Drupal. This is also optional.
The Drupal Handbook also has a page on installation and usage requirements; however this page is currently for several versions of Drupal, with accompanying notes, and is marked as requiring an update: http://drupal.org/requirements.
We can download Drupal from the download page, http://drupal.org/download. This page contains download links for Drupal Core, Installation Profiles, Themes, Translations, and Modules. We want to download Drupal core:

Now that we have downloaded a copy of Drupal 7, we need to install it on our local web server, to do that we need to:
Extract the Drupal files
Create a database
Run the Drupal installer
The file we have downloaded is a compressed file containing all of the individual files which make up Drupal. We need to extract this into the web folder in our development environment (see Appendix A) using an unzipping program (such as WinZip, PowerArchiver, or Windows, built in "Compressed folders" system, or the default program for handling compressed files on your computer).
We need a database for Drupal to use to store information such as the website's content, details of our users, settings, and so on. PHPMyAdmin is a web-based tool for administering MySQL databases; most web hosts provide access to it, and we have a copy on our local machine too.
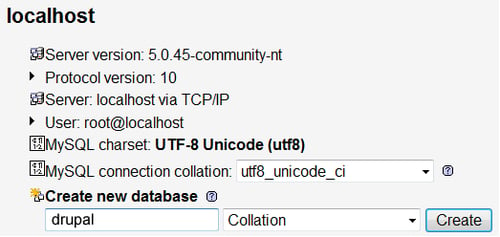
Let's log in to phpMyAdmin and create our database, our local installation is located at http://localhost/phpmyadmin/. We will need to have our database username and password available (see Appendix A, if you are using that development environment). Most of the development environment software, such as WAMP, XAMPP, and so on have a default username of root without a password.
Once logged in, we have the option to create a new database, let's call it drupal, by entering it into the Create new database box:
Now we have our database, we can run the installer; to do that we just need to visit the folder where we extracted Drupal, using our web browser. This should be http://localhost/drupal/.
Since we haven't installed Drupal yet, visiting this page will take us straight to the installer, which initially asks us if we wish to install the Standard (with the most commonly used features pre-configured) or Minimal (with only a few modules enabled) installations.
Select an installation profile: Let's select Standard, and then click the Save and continue button:

Choose a language: Next, we need to select the language we want to install Drupal in. The default download only includes English, though additional languages can be downloaded from
Drupal.org, so we can click the Save and continue button again:
Drupal will then automatically verify the development server against the installation requirements; as we are using a suitable development environment, this won't raise any issues for us.
Database configuration: We are then presented with the Set up database screen where we can enter the name of the database we created earlier,
drupal, and the username and password (working locally, the default WAMP installation gives us a username ofrootwith no password) required to access that database:
Once we have entered that, we again click Save and continue.
Drupal installer: Now the installer gets to work:

Configure the site: The final step in the installation process is for us to provide some basic configuration information, including the Site name, Site e-mail address, details for a maintenance account, server country and time zone, and update notifications.
We need to supply the site name,
DinoSpace!, and e-mail address, so that our site has a name, and all site e-mails come from a site related e-mail address. The site maintenance account will be our initial administrative user account; it is important that we use a secure username and password:
The SERVER SETTINGS indicate the country to be used for the site, and the default time zone for dates and times displayed on the site. Finally, we can select to have our Drupal installation automatically check for updates and send notifications to us:

Once we have completed this page, we click Save and continue.
Installation complete: Our installation is now complete; the final screen confirms this for us, and provides us a link to view the newly installed Drupal site:

If we click that link, we see our new site, and we are automatically logged in:

We will discuss Drupal's administrative options more in Chapter 2, Preparing Drupal for a Social Networking Site; however, now that we have installed Drupal let's look at configuring our installation.
Provided we are logged in as an administrator, the administration bar is at the top of the page, listing the main administrative sections available. Click the Configuration option:

This then presents us with a pop up window overlay within our browser, containing the administration options available:
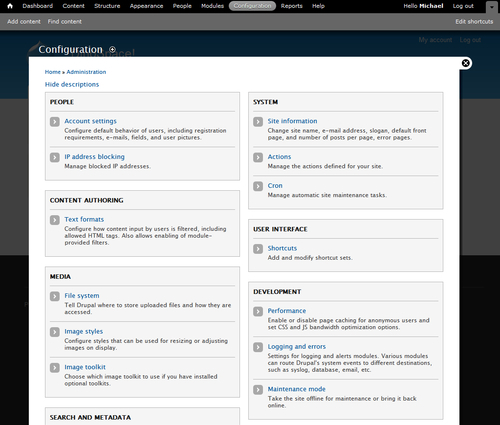
Let's go through these, focusing on the ones important to us for initially configuring our site.
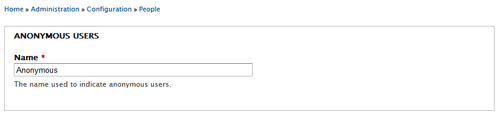
Here the first group of settings is for ANONYMOUS USERS; this has a setting Name, which is the name given to users who have not logged into the site, but who are interacting with the site. Any content that they create will be created under this name. Let's leave this as Anonymous:
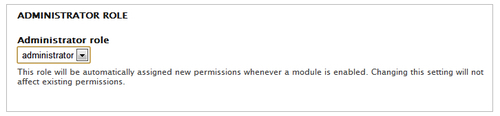
The next group of settings is ADMINISTRATOR ROLE, the role for administrative users. Within Drupal, users have a number of roles within the site (such as administrator, editor, reviewer, and so on) and these roles have various permissions assigned to them. When new modules are installed, the administrator would automatically have full permissions for these modules; by selecting or changing the Administrator role here, we can change which role will automatically receive these permissions when new modules are installed. Let's leave this setting as administrator.
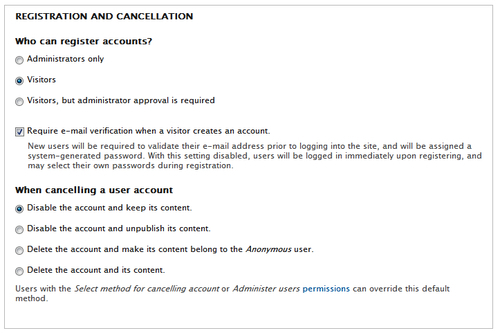
Next we have REGISTRATION AND CANCELLATION, which defines who can register for a user account, if these accounts require e-mail validation, and what happens in the event of an account cancellation. Since we will want lots of visitors to sign up to DinoSpace! we should configure it so that Visitors are selected under Who can register accounts?. To prevent automated SPAM accounts registering and posting SPAM content, we should require all visitors to verify their e-mail account before they are able to log in.
Finally, we should leave it so that when accounts are disabled, the content created by that user is retained on the site. If we changed this, various pages, comments, and discussion posts would be removed when a user cancels their account.
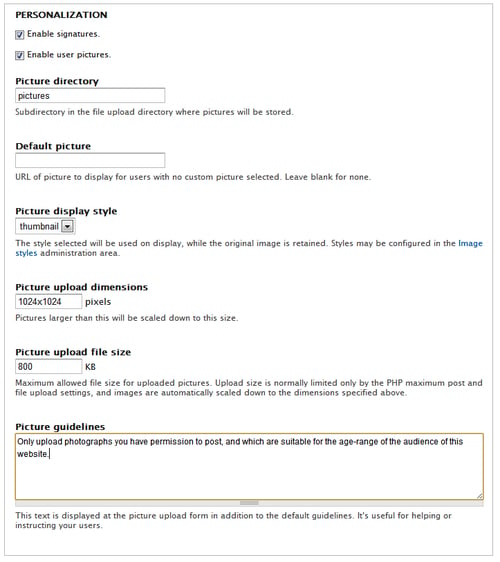
The next section, PERSONALIZATION, allows us to provide some brief personalization options for our users, such as allowing them to upload pictures and use e-mail signatures. Let's enable signatures so that our users can have a custom piece of text added after their posts on the website, and add picture guidelines requesting that our users only upload photos that they are permitted to upload, and that are within the guidelines of our site:
The final group of options here allows us to customize the text of any of the user account related e-mails which Drupal sends out:
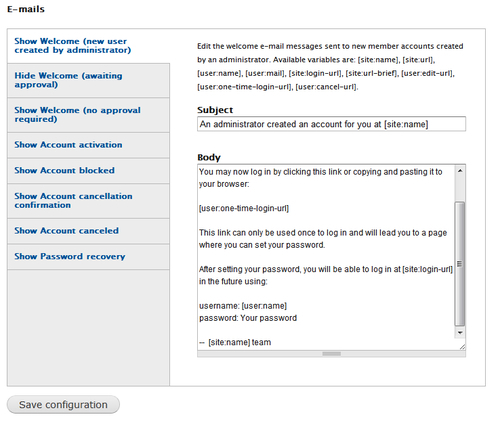
We should leave the e-mail options as they are and click Save configuration.
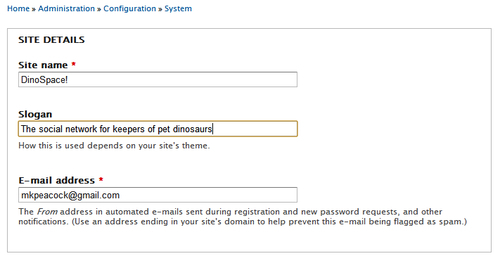
After clicking Save configuration from the e-mail settings, the site information can be found under the Configuration menu. The first group of settings under site information is SITE DETAILS, this includes the Site name and E-mail address, which we set when we installed Drupal, and also the site's slogan, so we need to add that in here:
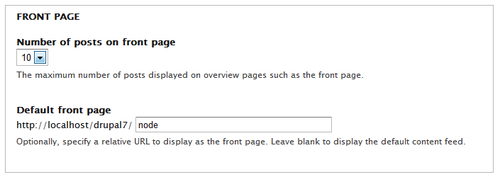
The next group of settings, FRONT PAGE, define which page should act as the front page, and how many posts should be displayed on that page. This isn't something we are ready to change yet, as we don't have any content, so we can leave that as it is:
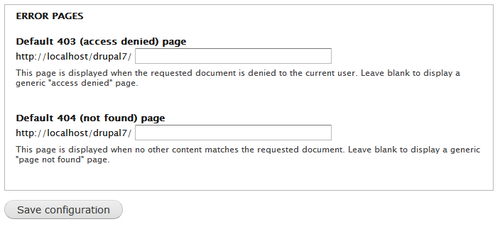
The final group of settings relate to ERROR PAGES, and which pages should be used for the default 403 and 404 error pages. Again, we don't have content in place for these pages, so for now, we should leave them as they are. Once we have created pages to act as the error pages, we simply add the pages' URLs into the appropriate boxes:
The other configuration options are not immediately important to us, however now is a good time for us to take a look at what these settings do.
This setting allows us to list a number of IP addresses, the Internet addresses assigned to computers, which we want to block from using our site. If we find that we are receiving troublesome posts from one particular user or SPAM account, we can block their access to the site. This isn't foolproof, as IP addresses can be spoofed to appear to be different, or the user could request a renewed IP address from their Internet Service Provider.
Certain tasks, such as bulk mailings or search indexing, need to be processed on a regular basis automatically. The cron settings allow us to manually run these tasks, and configure how frequently they should be run.
From here we can configure types of formatting that we wish to enable in our site, and the types of users who are permitted to use that content. For example, allowing users to post full HTML could pose a security risk, and only administrators should be permitted to post that. Other users would be allowed to post a restricted sub-set of HTML tags with their posts.
This section indicates where files are uploaded to, and the servers temporary folder; these are automatically set from the installation process.
This section allows us to group various image effects (resizing, cropping, and so on) together, for use by other features and modules.
By default, since we are using the GD image library, this allows us to set the default image quality for uploaded images; this is a compromise between image quality and file size.
Various options to help with the speed and performance of our site are managed within this section. By default, Drupal caches (keeps its own copy, preventing the need for it to continually lookup or load it) certain information, which keeps things running fast. Sometimes, we may need to turn off caching or clear the cache so that new options and changes we apply (for example, adding a new template) can take effect.
This allows us to define which types of errors should be logged, and how many of these logs should be kept.
This allows us to turn our website off, placing it into maintenance mode, and displaying a message to our users.
This allows us to "map" one web address onto another, for instance, creating a shortcut link to a long URL to promote on marketing materials.
This allows us to enable or disable the use of Clean URLs in our site. Clean URLs convert URLs which make use of the query string (?path=node/) to ones which don't, making them cleaner and more user friendly.
This allows us to customize our default RSS feed, which is a list of publicly visible content that visitors can read through their favorite feed reader.