

It would suffice to say that every user of Sandbox will have different preferences to how different views and toolsets should be distributed on screen. The CryENGINE 3 Sandbox allows for this kind of user-based customization and this recipe will take you through the use of some of the built-in tools for customizing your interface.
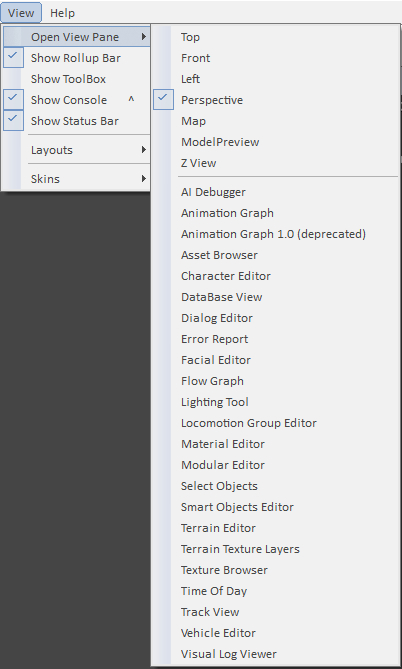
Before starting, it's important to introduce the view menu. The view menus allow you to turn various windows, toolbars, and subsystems on or off as well as open the various Sandbox extended editors and tool dialogs.
While experimenting with views, be aware that if you close a window and want to open it again, this can be done easily using the View | Open View Pane menu.
Another important toolset that you will likely want on your layout is the Rollup Bar.
The Rollup Bar is similar to the 3ds Command Panels for those already familiar with 3ds. It is a quick menu bar for the majority of the functions available to the editor exposed to the developer in an easily accessible format.
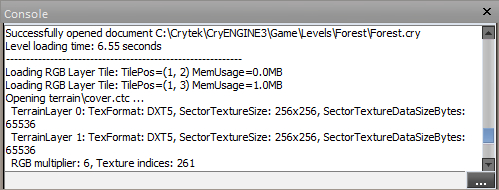
The final important tool you will likely want is the Console.
The Console is a direct command-line editor to the CryENGINE 3. This essentially allows access to various advanced functions within the Sandbox editor, including various debug and test profiles.
To start this tutorial, you should have Sandbox Editor.exe started.
The first step of customization will be to learn how to scale and move the various windows in Sandbox around:
Let's first open a new window.
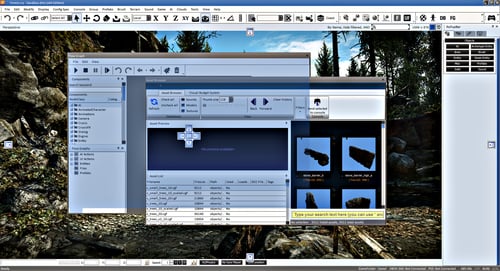
Click VIEW | Open Viewpan>e | Asset Browser.
This will open up a window containing the asset browser in the centre of your screen.
Ignore the contents for now as the asset browser will be explained later on in this recipe; let's resize the window.
Move the mouse pointer to the edge of the window, so that it turns into a double-ended black arrow. Click and drag the mouse pointer to scale the window.
Now that we have resized the window to our liking, let's use the docking toolbars to anchor the asset browser into the layout.
You can see the docking helpers whenever you drag a window over another window, or the Sandbox editor itself.
Click and drag the window from the title bar and move it over various docking helpers shown around the main view window.
Notice that once you release the mouse button, the window will dock itself into that location.

Now that the window is docked, we should learn how to undock it:
Similar to when we docked the window, drag the title bar again and move the selected window away.
Notice that the window maintains its original size and shape. You may thus want to resize the window once you have undocked it.
Another important interface to master is the ability to dock a window within other windows.
Go back to the View menu and open another window.
For this example, open the Flow Graph window.
Now, drag the Asset Browser window to the Flow Graph window.
You will observe the docking buttons being displayed again.
Use the lower, central button to dock the selected window in the lower half of the Flow Graph window.
You can also dock windows at the top and sides of other windows using the other docking buttons:
To do this drag the title bar of the Asset Browser out of the Flow Graph window and away to another docking helper within the flow graph window to move it.
The final tool that is available to you in customization is Docking a Window as a Tab in Another Window.
For people using only one monitor, this is almost essential!
You may have noticed previously that when you move a window to another window, a new central, circular button is displayed.

This anchor will allow you to place the currently selected window as a tab within another window.
Drag the Asset Browser to the Flow Graph window, and on to the central dock as the tab button.
You will notice that there are now two tabs at the bottom of the window, Flow Graph and the Asset Browser.
You can now select each window by clicking on its corresponding tab.

Keep in mind that you can undock a window by dragging its tab to another part of the screen.
Once you are happy with your layout you can save this layout for easy loading later.
To do this, we will access the Layout Configuration window on the Display menu under Configure Layout.
Select Save Layout from the Configure Layout dialog.

You will then be presented with an opportunity to name this layout. Type the name of the configuration in this window and click OK.
The docking helpers work very similar to windows office applications, so any users of those applications may be familiar with this system.
The save layout process creates a folder under the CryENGINE3/editor directory called layouts.
In this folder, it then saves a .layout file that is essentially an .xml file. This means that it could be edited by hand if required but can also be version controlled, which means multiple presets can be shared across large teams.
The Status Bar contains translation/rotation/scaling information for selected objects, editor interaction shortcuts, and camera controls.
The Console in the Sandbox editor is used to input variables. It can be visually toggled on or off by going to the View Menu and selecting View Console or by pressing the caret key (^) while the Perspective Viewport is selected.
In the editor, a full list of console variables can be accessed by double-clicking the input field on the Console to open the Console Variables window.

Search for variables with partial or complete commands. Information on individual variables can be shown by hovering the mouse over a Console Variable for a couple of seconds in the Console Variable window; text will then be displayed as a tool-tip.