
As far as hardware requirements are concerned, you should be aware that the server distribution, at the time of writing, requires about 150 MB of hard disk space and allocates a minimum of 64 MB and a maximum of 512 MB for a standalone server.
In order to get started, we are going to perform the following steps:
Download and install the Java Development Kit.
Download and install WildFly 8.
Download and install the Eclipse development environment. While we will use Eclipse in this book, you are free to use your IDE of choice.
At the end of this chapter, you will have all the required software installed and will be ready to start working with the application server.
WildFly is written in Java; therefore it needs a Java Virtual Machine (JVM) in which to run, along with the standard edition Java libraries. So, before we can get started setting up or learning about WildFly, we first need to install the Java Development Kit (JDK).
To use WildFly, you will need at least Java SE 7 or above. Although there is no plan to use Java 8 language changes within the WildFly 8.x source code, WildFly is compiled against Java 8. It is recommended that you use the latest version of Java SE 8 to run WildFly.
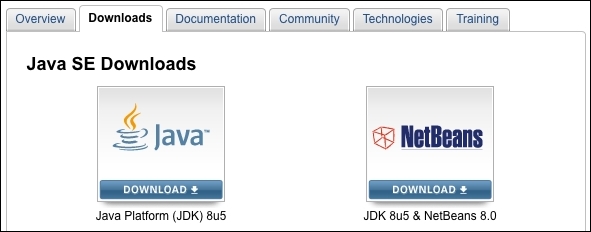
So, let's move to the Oracle download page, http://www.oracle.com/technetwork/java/javase/downloads/index.html, which now hosts all JDK downloads, as shown in the following screenshot:
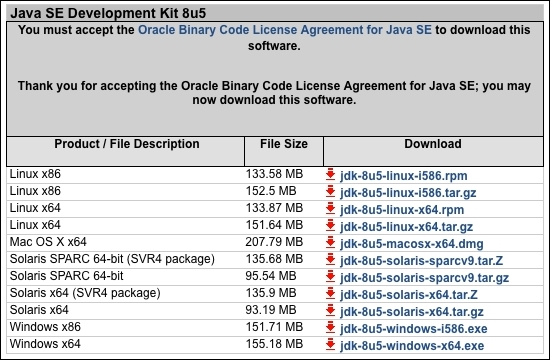
This will take you to the download page for the latest JDK. At the time of writing, this was Java 8 update 5. You will need to accept the license agreement before downloading the JDK. Choose to download the latest version of Java for your operating system. Have a look at the following screenshot:
The download will take a few minutes depending how fast your network is.
Installing Java on Linux is very straightforward. Once the download is complete, extract the tar.gz file to your chosen install location. This command extracts the archive to your current directory:
tar -xzvf jdk-8u5-linux-x64.tar.gz
Next, you need to add the path as an environment variable. This can be achieved by adding the following lines to your user profile script (the .profile file found in your home directory):
export JAVA_HOME=/installDir/jdk1.8.0_05
export PATH=$JAVA_HOME/bin:$PATH
Windows users can simply run the executable (.exe) file to start the installation. The name of the installer varies depending on the operating system and your system architecture (32-bit or 64-bit); however, the steps will be the same—just the name will change. At the time of writing, the installer for the latest version of Java for 64-bit Windows is called jdk-8u5-windows-x64.exe.
When using Windows, you should stay away from installation paths that include empty spaces, such as C:\Program Files, as this leads to some issues when referencing the core libraries. An installation path such as C:\Software\Java or simply C:\Java is a better alternative.
When the installation is complete, you will need to update a couple of settings on the computer so that it will know where to find Java. The most important setting is JAVA_HOME, which is directly referenced by the WildFly startup script.
If you are running Windows XP/2000, follow these steps:
Right-click on My Computer, and select Properties from the context menu.
On the Advanced tab, click on the Environment Variables button.
Then, in the System variables box, click on New.
Name the new variable
JAVA_HOME, and give a value of the path to your JDK installation; I recommend something likeC:\Java\jdk1.8.0_05.
Tip
Windows 7 tip
Because of increased security in Windows 7, standard users must have User Account Control (UAC) turned on to change the environment variables, and the change must be completed via user accounts. In the User Accounts window, under Tasks, select Change my environment variables. Use the New, Edit, or Delete button to amend environment variables
Now it's time to modify the system's
PATHvariable. Double-click on thePATHsystem variable. In the box that pops up, navigate to the end of the Variable Value line, add a semicolon to the end, and then add the path to your JDK. This will be something like%JAVA_HOME%\bin.
The WildFly application server can be downloaded for free from the WildFly site, http://www.wildfly.org/downloads/. Have a look at the following screenshot:
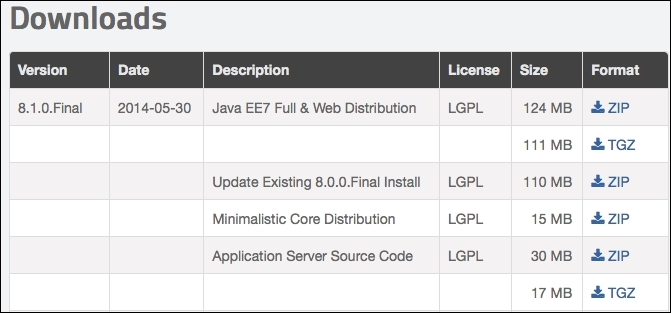
You will notice that there is an option to download a minimalistic core distribution. This is aimed at developers who want to build their own application runtime using the WildFly 8 architecture.
Choose to download the full Java EE7 distribution. Like JBoss AS 7, WildFly does not come with an installer. It is simply a matter of extracting the compressed archive to a location of your choosing.
Linux users can extract the file using the tar or unzip command (depending on the type of compressed file you downloaded):
tar -xzvf wildfly-8.1.0.Final.tar.gz
unzip wildfly-8.1.0.Final.zip
For those of you using Windows, you can use WinZip or WinRAR, taking care to choose a folder that does not contain empty spaces.
Tip
Security warning
Unix/Linux users should be aware that WildFly does not require root privileges, as none of the default ports used by WildFly are below the privileged port range of 1024. To reduce the risk of users gaining root privileges through WildFly, install and run WildFly as a non-root user.
After installing WildFly, it is wise to perform a simple startup test to validate that there are no problems with your Java configuration. To test your installation, move to the bin directory of your WildFly install and issue the following command:
For Linux/Unix users:
$ ./standalone.shFor Windows users:
> standalone.bat
The following screenshot shows a sample WildFly 8 startup console:
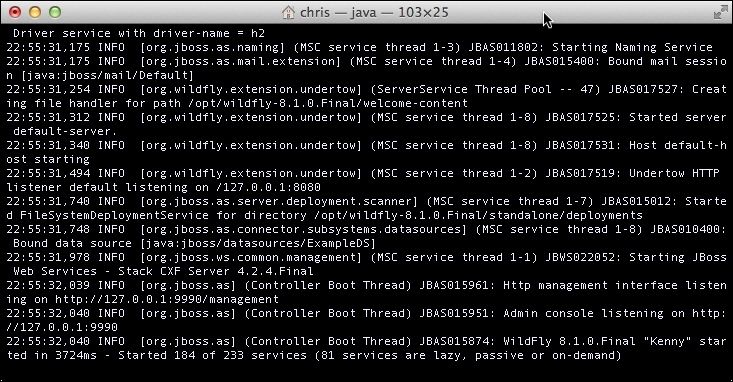
The preceding command starts up a WildFly standalone instance that's equivalent to starting the application server with the run.sh script used by releases prior to JBoss AS 7. The run.sh file remains in the WildFly bin directory but is merely a placeholder and will not start the application server.
Notice how fast the application server starts. This is due to the modular architecture of WildFly. Essential services are started concurrently on boot-up, and non-critical services are started only when needed, resulting in an exceptionally fast startup. Local caching means that the server will start even quicker second time round!
If you need to customize the startup properties of your application server, then you need to open and modify the standalone.conf file (or standalone.conf.bat for Windows users). This file contains the memory requirements of WildFly. The following is the Linux core section of it:
if [ "x$JAVA_OPTS" = "x" ]; then
   JAVA_OPTS="-Xms64m -Xmx512m -XX:MaxPermSize=256m -Djava.net.preferIPv4Stack=true"
   JAVA_OPTS="$JAVA_OPTS -Djboss.modules.system.pkgs=$JBOSS_MODULES_SYSTEM_PKGS -Djava.awt.headless=true"
fi
Tip
Java SE 8 users
PermGen has been replaced with Metaspace in Java 8. If you are using Java 8, then remove the -XX:MaxPermSize=256m property from the standalone.conf file, and replace it with -XX:MaxMetaspaceSize=256m. This will prevent VM warnings being printed to your WildFly logs on startup.
By default, the application server starts with a minimum heap space memory requirement of 64 MB and a maximum requirement of 512 MB. This will be just enough to get started; however, if you need to run a core Java EE application on it, you will likely require a minimum of 1 GB of heap space. More realistically, you will need 2 GB or more depending on your application type. Generally speaking, 32-bit machines cannot execute a process whose space exceeds 4 GB; however, on 64-bit machines, there's essentially no limit to process the size.
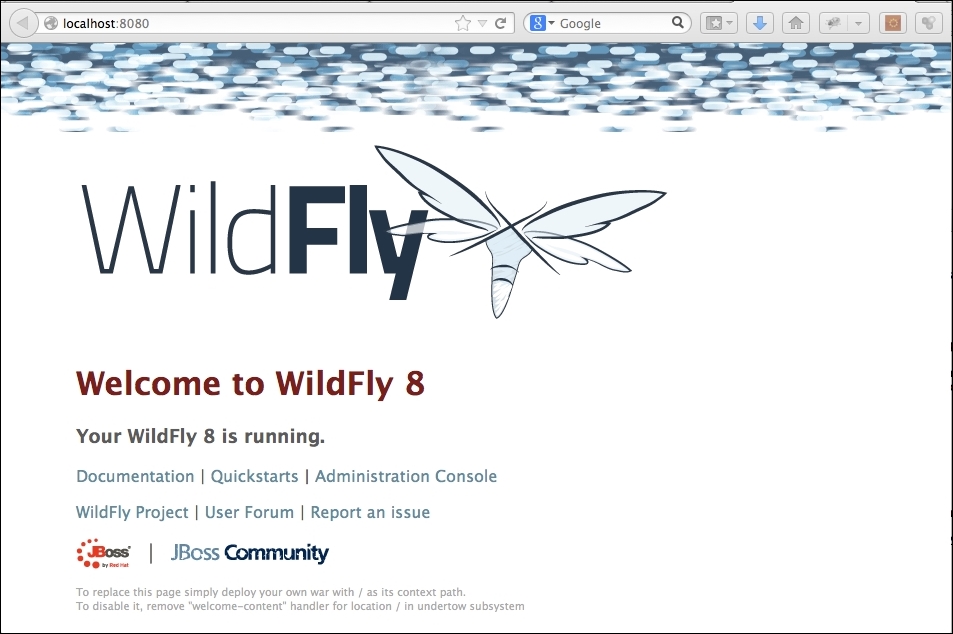
You can verify that the server is reachable from the network by simply pointing your browser to the application server's welcome page, which is reachable by default at the well-known address: http://localhost:8080. Have a look at the following screenshot:
If you have been using releases of the application server prior to JBoss AS 7, you might have heard about the twiddle command-line utility that queries the MBeans installed on the application server. This utility was replaced in JBoss AS 7 and is still used in WildFly. Its replacement is a more sophisticated interface named the command-line interface (CLI), which can be found in the JBOSS_HOME/bin folder.
Tip
References to JBOSS_HOME
Although the community version of JBoss AS has been renamed to WildFly, you will see that the properties in the startup scripts continue to use the property, JBOSS_HOME, to reference the install directory of WildFly. For this reason, we will continue to use JBOSS_HOME when referring to the root install of WildFly.
Just launch the jboss-cli.sh script (or jboss-cli.bat for Windows users), and you will be able to manage the application server via a shell interface, as shown in the following screenshot. Bear in mind that the server needs to be running in order to connect via the CLI.

Once you are in the shell session, if you are unsure of what commands can be issued, you can simply press the Tab button to display all possible commands. If your command is partly typed, and there is only one possible matching command, your command will be autocompleted. Those of you who use Linux will be used to this type of command-line assistance.
In the preceding screenshot, we have just connected to the server using the connect command, which, by default, uses the loopback server address and plugs into port number 9990.
Note
The CLI is discussed in depth in Chapter 7, Using the Management Interfaces, which is all about the server-management interfaces. We will have an initial taste of its basic functionalities in the following sections, to get you accustomed to this powerful tool.
Probably the easiest way to stop WildFly is to send an interrupt signal using Ctrl + C. This should be done in the same console window in which you issued the startup command, that is, where the server is running.
However, if your WildFly process was launched in the background or is running on another machine (see in the following sections), then you can use the CLI interface to issue an immediate shutdown command as follows:
[disconnected /] connect
[standalone@localhost:9990 /] shutdown
[disconnected /]
There is actually one more option to shut down the application server, which is pretty useful if you need to shut down the server from within a script. This option consists of passing the --connect option to the admin shell, thereby switching off the interactive mode as follows:
jboss-cli.sh --connect command=:shutdown       # Unix / Linux
jboss-cli.bat --connect command=:shutdown      # Windows
Shutting down an application server running on a remote machine is just a matter of connecting and providing the server's remote address to the CLI:
[disconnected /] connect 192.168.1.10

[192.168.1.10:9990 /] shutdown
Note
Remotely accessing WildFly via the CLI requires authentication. Check out Chapter 10, Securing WildFly, for more information about it. It also requires that the management interface on the remote WildFly install is opened to allow remote connections. This is covered in detail in Chapter 7, Using the Management Interfaces.
The CLI contains a lot of useful commands. One of the most helpful options is the ability to reload all or part of the server configuration using the reload command.
When issued on the root node path of the server, WildFly reloads all the services configuration, as shown in the following command:
[disconnected /] connect

[standalone@localhost:9990 /] reload
Although the main focus of this book is the administration of the WildFly application server, we are also concerned with application packaging and deployment. For this reason, we will sometimes add examples that require a development environment to be installed on your machine.
The development environment used in this book is Eclipse. Eclipse is known by developers worldwide and contains a huge set of plugins, building on its core functionality. If you are comfortable with another IDE, then feel free to use it, but this book will demonstrate Eclipse only. At the time of writing this, only Eclipse and NetBeans have plugins for WildFly.
So let's move to the Eclipse download page, located at http://www.eclipse.org/downloads.
From this page, download the latest Enterprise edition. The compressed package contains all the Java EE plugins already installed and requires about 248 MB of disk space. Have a look at the following screenshot:

Tip
If you are using Java 8, you should make sure you download Eclipse Luna (4.4) or the patched Version of 4.3.
Once you have downloaded Eclipse, unzip it to a folder of your choice. The extracted folder will be called eclipse. To start Eclipse, navigate to the eclipse folder and run:
$ ./eclipse
Windows users can simply double-click on the executable file contained in the eclipse folder (the one with the big, blue, round eclipse icon).
The next step is to install the WildFly 8 adapter, which is a part of the suite of plugins named JBoss tools. Installing new plugins in Eclipse is pretty simple; just perform the following steps:
From the menu, navigate to Help | Eclipse Marketplace.
Then, search for the plugin you want to install (in this case, type
jboss tools).Finally, click on Install as shown in the following screenshot:

Make sure you select the version of JBoss tools that matches your version of Eclipse, for example, Luna or Kepler. In this case, we are using Eclipse Luna, so I have selected the Luna version of JBoss tools. If you want to install just the WildFly adapter, select JBossAS Tools. Agree to the terms and click on OK. Restart Eclipse when prompted to do so.
You can now set up the WildFly server in Eclipse by performing the following steps:

