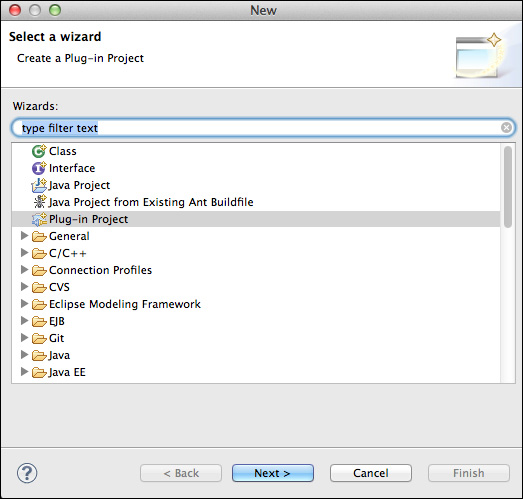
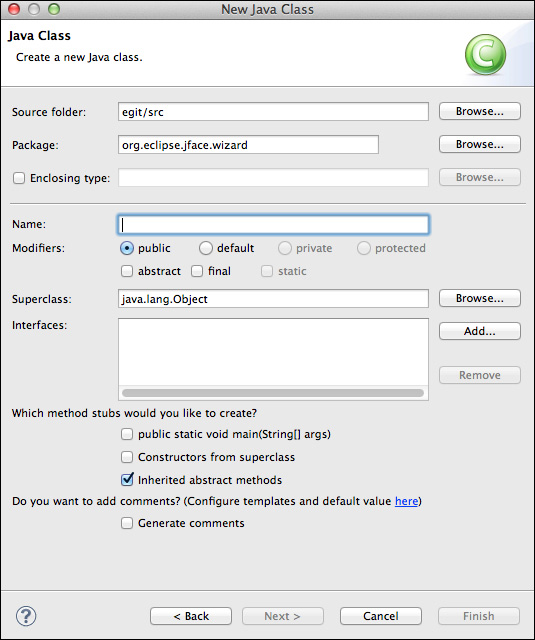
Whenever a new project or file is created in Eclipse, the standard JFace wizard is used. For example, the following screenshots show the wizards to create a new Plug-in Project or Java Class:
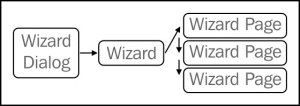
A JFace wizard has a common section at the top and bottom of the dialog, which provides the title/icon and transition buttons along with an optional help link. Each wizard consists of one or more linked pages that define the visible content area and the button bar. The window title is shared across all pages; the page title and page message allow information to be shown at the top. The page adds per-page content into the content area by exposing a page control. The wizard can be displayed with a wizard dialog or by integrating with the workbench functionality, such as the
newWizards extension point. The following diagram illustrates this:
A wizard is created as a subclass of Wizard or another class that implements the IWizard interface. Create a new plug-in project called com.packtpub.e4.advanced.feeds.ui and ensure that the Generate an activator and This plug-in will make contributions to the UI options are selected. Click on Finish to accept the defaults.
Create a new class called com.packtpub.e4.advanced.feeds.ui.NewFeedWizard that extends org.eclipse.jface.wizard.Wizard. This creates a skeleton file with a performFinish method.
To add content, one or more pages must be created. A page is a subclass of WizardPage or another class that implements the IWizardPage interface. Pages are typically added within the constructor or addPages methods of the owning wizard.
Create a new class called com.packtpub.e4.advanced.feeds.ui.NewFeedPage that extends org.eclipse.jface.wizard.WizardPage. The default implementation will be missing a constructor; create a default constructor that passes the string "NewFeedPage" to the superclass' constructor.
The code should now look like the following code snippet:
Adding pages to the wizard
The wizard has an addPages method that is called when it is about to be shown. This allows one or more pages to be added to allow the wizard to do work. For simple wizards, a single page is often enough; but for complex wizards, it may make sense to break it down into two or more individual pages. A multipage wizard typically steps through its pages in order, but more complex transitions can be achieved if necessary.
Create a new instance of NewFeedPage and assign it to an instance variable called newFeedPage. Create an addPages method that calls addPage with newFeedPage as an argument, as shown in the following code:
Adding content to the page
Each page has an associated content area, which is populated through the createControl method on the page class. This is given a Composite object to add widgets; a typical wizard page starts off with exactly the same stanza as other container methods by creating a new Composite, setting it as the control on the page and making it incomplete. The code is as follows:
Pages are typically set up as data gathering devices, and the logic is delegated to the wizard to decide what action to take. In this case, a feed has a simple URL and a title, so the page will store these as two instance variables and set up UI widgets to save the content.
One of the easiest ways to get data out of the page is to persist references to the SWT Text boxes that are used to input content and then provide accessors to access the data. To guard against failure, accessor methods need to test for null and check that the widget hasn't been disposed. The code is as follows:
This allows the parent wizard to access the data entered by the user once the page is complete. The process of getting the data is typically performed within the performFinish method, where the resulting operation can be displayed.
The page's user interface is built in the createControl method. This is typically organized with a GridLayout, although this isn't a requirement. The user interface for wizards tend to offer a grid of Label and Text widgets, so it could look like the following code snippet:
The Finish button on the wizard is enabled when the page is marked as complete. Each wizard knows what information is required to finish; when it is finished, it should call setPageComplete(true). This can be arranged in the NewFeedPage class by listening to text entry changes on the feed description and URL and setting the page to be complete when both have non-empty values:
Now, whenever a key is pressed and there is text present in both the description and URL fields, the Finish button will be enabled; if text is removed from either field, it will be disabled.
To test whether the wizard works as expected before it is integrated into an Eclipse application, a small standalone test script can be created. Although bad practice, it is possible to add a main method to NewFeedWizard to allow it to display the wizard in a standalone fashion.
Wizards are displayed with the JFace WizardDialog. This takes a Shell and the Wizard instance; so a simple test can be run using the following snippet of code:
Now, if the wizard is run, a standalone shell will be displayed and the fields and checks can be tested for correct behavior. A more complex set of tests can be set up with a UI test framework such as
SWTBot.
Tip
For more information about SWTBot, see chapter 9 of the book Eclipse 4 Plug-in Development by Example Beginner's Guide, Packt Publishing, or visit the SWTBot home page at http://eclipse.org/swtbot/.
If the wizard is shown as is, the title area will be empty. Typically, a user will need to know what information to put in and what is required in order to complete the dialog. Each page can contribute information specific to that step. In the case of a multipage wizard where there are several distinct stages, each page can contribute its own information.
In the case of the new feed page, the title and message can be informational. The constructor is a good place to set the initial title and message. The code to perform this operation is as follows:
When feed information is entered, the message can be replaced to indicate that a description or URL is required. To clear the message, invoke setMessage(null). To add an error message, invoke setMessage and pass in one of the constants from IMessageProvider, as shown:
To display an image on the wizard as a whole, the page can have an image of size 75 x 58 pixels. This can be set from an image descriptor in the constructor:
Now, running the wizard will display an icon at the top-right corner (if it doesn't, check that build.properties includes the icons/ directory in the bin.includes property):
Note
Due to Eclipse bug 439695, Eclipse 4.4.0 may be unable to load the IMessageProvider.ERROR image. If the red cross is seen as a small red dot, this can be ignored; it will work when running as an Eclipse plug-in. This bug is fixed in Eclipse 4.4.1 and above, and does not occur in Eclipse 4.3.
Use this to add a feed file of http://www.packtpub.com/rss.xml with a description of Packt Publishing special offers.
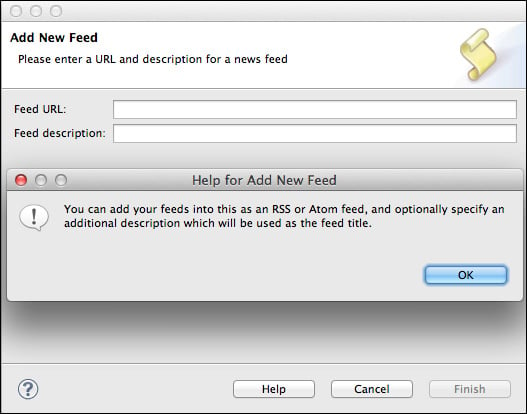
To add help, the wizard needs to declare that help is available. During the construction of the wizard or in the addPages method, a call to the parent's setHelpAvailable method with a true parameter has to be invoked.
Help is delegated to each page by calling a performHelp method. This allows context-sensitive help to be delivered for the specific page displayed, and it also helps to get the state of the page or its previous page states. The code is as follows:
Executing the preceding code will show a Help button on the bottom of the dialog; when clicked, it will show a help dialog with some text as shown in the following screenshot:
When the user clicks on the Finish button on the wizard, the corresponding
performFinish method is called. This allows the wizard to acquire data from the underlying pages and perform whatever action is required.
In this case, a Properties file called news.feeds can be created underneath a project called bookmarks in the workspace. This will require that org.eclipse.core.resources is added to the plug-in's dependencies.
Tip
For more information about creating resources and projects, see chapter 6 of Eclipse 4 Plug-in Development by Example Beginner's Guide, Packt Publishing, or visit the Eclipse help documentation at http://help.eclipse.org.
First, acquire or create a project called bookmarks and then acquire or create a file called news.feeds. The underlying content will be stored in the Properties file as a list of key=value pairs, where key is the URL and value is the description.
To simplify access to ResourcesPlugin, create a helper method in NewFeedWizard that will obtain an IFile from a project as follows:
To access the feeds from the resources, create two public static final variables that define the name of the project and the name of the bookmarks file:
These can be used to create a helper method to add a single feed on the resource by reading the contents of the file (creating it if it doesn't exist), adding the feed, and then saving the new contents of the file:
Finally, to hook this method in with the performFinish method being called, pull the description and url fields from NewFeedPage and then pass them to the addFeed method. Since an exception may be raised, surround them with a try/catch block that returns true or false (as appropriate):
Running the wizard from the test harness won't have an effect, since the workspace won't be open. It is thus necessary to contribute this to the new wizard's mechanism in Eclipse, which is done in the next section.
Adding the FeedWizard to the newWizards extension point
To integrate the wizard into Eclipse, it should be added to the newWizards extension point provided by the org.eclipse.ui plug-in.
There is a minor modification required in the wizard to make it fit in with the new wizard extension point: implementing the INewWizard interface. This adds an additional method, init, that provides the current selection at the time of calling. This allows the wizard to detect whether (for example) a string URL is selected and, if so, fills the dialog with that information. The modification is shown in the following code snippet:
Add the following extension, along with a 16 x 16 icon, to the plugin.xml file:
Now, the Eclipse application can be run and a Feeds category will be added to the New dialog situated under File.
Adding a progress monitor
The wizard container can have a progress bar for long-running operations and can be used to display the progress, including optional cancellation, if the job requires it.
To acquire a progress monitor, the wizard's container can be used to invoke RunnableWithProgress, which is an interface that has a run method with an IProgressMonitor argument. The addFeed method can be moved into an anonymous inner class, which allows the wizard to display the progress of the operation without blocking the UI. The code is as follows:
The fork argument passed to the run method indicates whether the job should run in the path of the performFinish method or if it should run in a new thread. If a new thread is chosen, the run method will return hiding any errors that may be generated from the result of the addFeed call. The cancel argument provides an option to cancel the job if run in the same thread.
The addFeed method can be modified (as shown in the following code snippet) to interact with the progress monitor after converting it to a SubMonitor and passing it to the child tasks as appropriate. Regularly checking whether the monitor is cancelled will give the user the best experience if they decide to cancel the job.
If the wizard is shown now, the cancellation button and progress bars are not shown. In order to ensure that the wizard shows them, the addPages method must also declare that the progress monitor is required, as shown in the following code snippet:
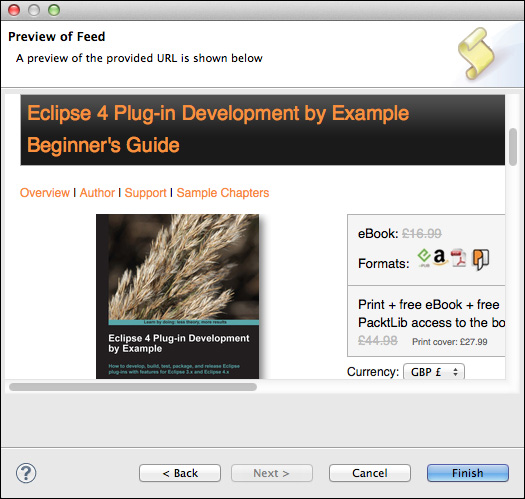
When feed information is added, the Finish button is automatically enabled. However, the user may be interested in verifying whether they have entered the correct URL. Adding an additional Preview page allows the user to confirm that the right details have been entered.
To do this, create a new class called NewFeedPreviewPage that extends WizardPage. Implement it using a constructor similar to the NewFeedPage and with a createControl method that instantiates a Browser widget. Since loading a URL will be an asynchronous operation, the browser can be pre-filled with a Loading... text message that will be briefly visible before the page is loaded. The code is as follows:
To have the browser show the correct URL when it is shown, override the setVisible method. This only needs to be done if the page is visible and also if the browser widget is not null and not disposed.
To find out what the value of the URL should be, the previous wizard page needs to be acquired. Although it is possible to store these as static variables and use Java to pass references, the parent Wizard already has a list of these pages and can return them by name. Use this to acquire the NewFeedPage from the list of pages, from which the URL can be acquired. The resulting setVisible method then looks like the following code snippet:
The final step is to integrate this into the wizard itself. The only change that is needed here is to add a field to store a reference to the preview page and pass it in the addPages method, as shown in the following code:
Now, when the wizard is invoked, both the Next and Finish buttons are enabled once the fields have been completed. Clicking on the Finish button as before will add the feed, but the Next button will take the user to a page that has a preview of the page.
.


 Free Chapter