

Now that we have successfully created and hosted a WCF service, we need a client to consume the service. We will create a C# client application to consume HelloWorldService.
In this section, we will create a Windows console application to call the WCF service.
First, we need to create a console application project and add it to the solution. Follow these steps to create the console application:
In the Solution Explorer, right-click on the solution HelloWorld and select Add | New Project… from the context menu. The Add New Project dialog window should appear, as shown in the following screenshot:

Select Visual C# | Console Application as the template, change the project name from the default value of
ConsoleApplication1toHelloWorldClient, and leave the Location field asC:\SOAwithWCFandEF\Projects\HelloWorld. Click on the OK button. The new client project has now been created and added to the solution.
In order to consume a SOAP WCF service, a client application must first obtain or generate a proxy class.
We also need a configuration file to specify things such as the binding of the service, address of the service, and contract.
To generate these two files, we can use the SvcUtil.exe tool from the command line. You can follow these steps to generate the two files:
Start the service by pressing Ctrl + F5 or by selecting the menu option DEBUG | Start Without Debugging (at this point, your startup project should still be
HostExpressServer; if not, you need to set this to be the startup project).After the service has been started, open a command-line window, change the directory to your client application folder (that is,
C:\SOAwithWCFandEF\Projects\HelloWorld\HelloWorldClient), and then run the command-lineSvcUtil.exetool with the following syntax (SvcUtil.exemight be in a different directory in your machine and you need to substitute55859with your service hosting port):"C:\Program Files\Microsoft SDKs\Windows\v8.1A\bin\NETFX 4.5.1 Tools\SvcUtil.exe" http://localhost:55859/HostExpressServer/HelloWorldService.svc?wsdl /out:HelloWorldServiceRef.cs /config:app.config
You will see an output similar to that shown in the following screenshot:

Here, two files have been generated—one for the proxy (HelloWorldServiceRef.cs) and the other for the configuration (App.config).
If you open the proxy file, you will see that the interface of the service (IHelloWorldService) is mimicked inside the proxy class and a client class (HelloWorldServiceClient) is created to implement this interface. Inside this client class, the implementation of the service operation (GetMessage) is only a wrapper that delegates the call to the actual service implementation of the operation.
Inside the configuration file, you will see the definitions of HelloWorldService such as the endpoint address, binding, timeout settings, and security behaviors of the service.
Note
You can also generate a proxy class within Visual Studio, which we will do later in this book, but behind the scenes the same SvcUtil.exe tool is used by Visual Studio to generate the proxy class.
In addition to generating a static proxy class at design time, you can also create a proxy dynamically at runtime or call the service through a Channel Factory instead of a proxy. Beware, if you go with the Channel Factory approach, you might have to share your interface DLL with the clients.
Before we can run the client application, we still have some more work to do. Follow these steps to finish the customization:
When you switch to Visual Studio 2013, you will be asked to reload the
App.configfile, as it has been changed. Click on Yes to reload it.Add the proxy file to the project. In the Solution Explorer, first select the HelloWorldClient project and click on Show All Files to show all the files. Now, under the
HelloWorldClientfolder, you will see the proxy file (HelloWorldServiceRef.cs). However, this file is not yet included in the project. Right-click on it and select Include In Project to include it in the client project. You can also use the menu PROJECT | Add Existing Item… (or the context menu Add | Existing Item…) to add it to the project.Add a reference to the
System.ServiceModelnamespace. From the Solution Explorer, just right-click on the HelloWorldClient project, select Add | Reference…, and check System.ServiceModel under Assemblies | Framework. Then, click on the OK button to add the reference to the project.Modify
program.csto call the service. Inprogram.cs, add the following line to initialize the service client object:var client = new HelloWorldServiceClient();
Note
Using the default constructor on HelloWorldServiceClient means that the client runtime will look for the default client endpoint in the App.config file, which is present due to the use of SvcUtil.
Then, we can call the GetMessage method of our newly created object just as we would do for any other object:
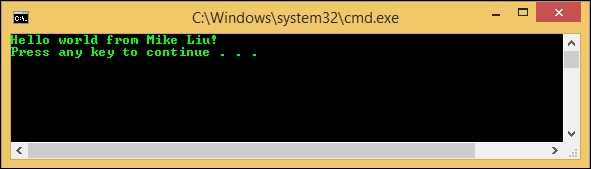
Console.WriteLine(client.GetMessage("Mike Liu"));Pass your name as the parameter to the GetMessage method so that it prints out a message for you.
We are now ready to run the client program.
First, make sure that the service host application, HostExpressServer, has been started. If you have stopped it previously, start it now (you need to set HostExpressServer as the startup project and press Ctrl + F5 to start it in the non-debugging mode, or you can just right-click on the HostExpressServer project and select View in Browser (Internet Explorer) from the context menu).
Then, from the Solution Explorer, right-click on the HelloWorldClient project, select Set as StartUp Project, and then press Ctrl + F5 to run it.
You will see an output as shown in the following screenshot:
As we know we have to start the service host application before we run the client program, we can make some changes to the solution to automate this task, that is, to automatically start the service immediately before we run the client program.
To do this, in the Solution Explorer, right-click on solution, select Properties from the context menu, and you will see the Solution 'HelloWorld' Property Pages dialog box:
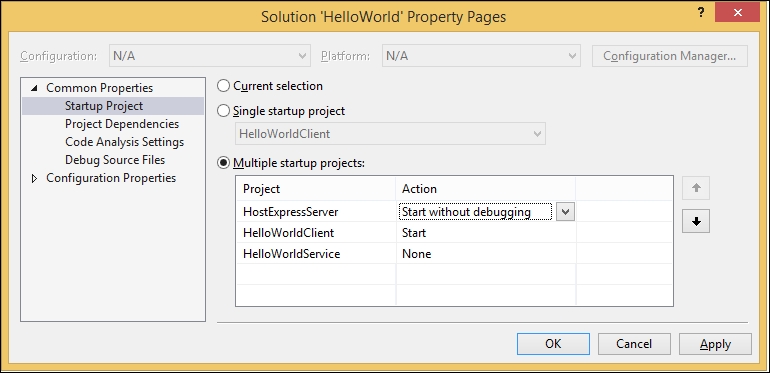
On this page, first select the Multiple startup projects option. Then, change the action of HostExpressServer to Start without debugging. Change HelloWorldClient to the same action.
Note
HostExpressServer must be above HelloWorldClient. If it is not, use the arrows to move it to the top.
To test it, first stop the service and then press Ctrl + F5. You will notice that HostExpressServer is started first, and then the client program runs without errors.
Note that this will only work inside Visual Studio IDE. If you start the client program from Windows Explorer (C:\SOAwithWCFandEF\Projects\HelloWorld\HelloWorldClient\bin\Debug\HelloWorldClient.exe) without first starting the service, the service won't get started automatically and you will get an error message that says There was no endpoint listening at http://localhost:55859/HostExpressServer/HelloWorldService.svc.