Book Image

Expert Delphi

By : Paweł Głowacki
Book Image

Expert Delphi

By: Paweł Głowacki

Overview of this book

Delphi is the most powerful Object Pascal IDE and component library for cross-platform native app development. It enables building natively compiled, blazingly fast apps for all major platforms including Android, iOS, Windows, Mac, and Linux. If you want to build server-side applications, create web services, and have clear GUIs for your project, then this book is for you. The book begins with a basic primer on Delphi helping you get accustomed to the IDE and the Object Pascal language and will then quickly move on to advanced-level concepts. Through this book, we’ll help you understand the architecture of applications and will teach you the important concepts of the FireMonkey library, show you how to build server-side services, and enable you to interact with the Internet of Things. Towards the end, you will learn to integrate your app with various web services and deploy them. By the end of the book, you will be able to build powerful, cross-platform, native apps for iOS and Android with a single code base.
Table of Contents (14 chapters)

Delphi installation

Delphi is a Windows program, so you need to have a computer with a proper version of Windows installed and enough free space on your hard drive. You may want to install Delphi on a physical computer or onto a Windows virtual machine image using one of the available virtualization solutions such as VMware. Installing onto a virtual machine has some advantages in cross-platform development. In order to create iOS apps, you will need to have access to a Mac computer. This could be another computer available on a local network or the same physical machine. One of the most convenient configurations is to have just one physical machine that allows you to target all operating system platforms supported by Delphi.

In order to deploy to iOS devices, you need to use a physical Mac machine. At the same time, Delphi is a Windows program, so you will also need Windows. You can use both on one computer by running Windows in a virtual machine installed on Mac. Whether you choose to install Delphi onto a physical or virtual Windows machine, the installation process is the same.

Delphi is implemented as a native Windows 32-bit executable. As such, it can be installed to either 32-bit or 64-bit versions of Windows. Some parts of Delphi are written in .NET 3.5, so at the beginning of the installation, the installer may also install a .NET 3.5 redistributable package which is not installed by default in newer versions of Windows.

Delphi versions

Delphi comes in different versions, so before downloading the installer, we need to decide which version to choose. There are four Delphi versions--Starter, Professional, Enterprise, and Architect:

  • The Starter version is the simplest one and it does not contain features necessary for doing mobile development. This version is aimed at hobbyists, students, and in general for anyone that just wants to learn Delphi. Starter supports building application for Windows 32-bit only. That's not what we need.
  • The next version is Professional. It also does not contain features for mobile development, but they can be installed separately in the form of mobile add-on packs. The Professional is a good choice if you plan to build applications for Windows and you do not need the possibility to connect to remote databases.
  • The third version is Enterprise. This is the full version of Delphi and contains everything that is in the Professional plus more. It allows you to create apps for all supported mobile and desktop platforms including Android, iOS, Windows, Mac, and Linux. It also contains the DataSnap framework for building scalable, multitier systems that is not available in Professional edition. This is the version of Delphi that we are going to use in this book.
  • The highest Delphi version is Architect. This is a product bundle that contains Delphi Enterprise and separately installed ER/Studio Developer Edition for modeling relational SQL databases and DB Power Studio Developer Edition that contains tools for working with SQL databases.

Delphi is available as a standalone product, but it can also be used as part of RAD Studio. RAD Studio contains Delphi and C++Builder. Delphi and C++Builder are two different IDE personalities of RAD Studio and both can be installed from the same RAD Studio installer into one deeply integrated environment. Both products, Delphi and C++Builder, provide the same capabilities of building mobile and desktop apps for different operating systems from the same source code using visual designers, and share the same component libraries, but differ in the programming language being used. Delphi uses Object Pascal and C++Builder uses standard C++.

I'm trying as much as possible to make sure that this book is not tied to any particular Delphi version. However, it is important to pay attention to which version of different pieces of software we are using.

In this book, we are going to use Delphi 10.2 Tokyo Enterprise edition. Delphi is produced by Embarcadero and you can find more information about different Delphi versions and features on the Embarcadero Delphi home page (http://www.embarcadero.com/products/delphi). You can get Delphi directly through the Embarcadero website or through one of many partner companies that represent Embarcadero in different countries. After purchasing Delphi, you will receive an automatically generated email with the download link to the Delphi installer and the serial number that you will need during the installation.

Running the Delphi installer

Delphi installer is available in two different formats. You can either choose to install Delphi using the so-called Electronic Software Delivery (ESD) for short, or you can install from the ISO image of the full Delphi installation DVD. The first option is the default one and it makes for faster installation. The ESD installer is a relatively small application that downloads and installs only those parts of Delphi that you have chosen at the beginning of the installation process. After Delphi is installed you can always choose to install or uninstall different features. The second option is to install from the DVD ISO image. This is useful when the internet access is slow, unreliable, or for some security reasons the Windows machine that you install Delphi onto does not have internet access at all.

Here we are going to use the web installer. Download the installation file from the link provided in the email. You will need to have administration rights on Windows to be able to install Delphi. On one of the first installer screens you will be prompted to enter the serial number that you have received from Embarcadero and also you will need to enter your Embarcadero Developer Network (EDN) username and password. If you do not have an EDN account, you can quickly create one from within the installer. It is free and it makes the connection between the serial number that you have received and you as the user of the software.

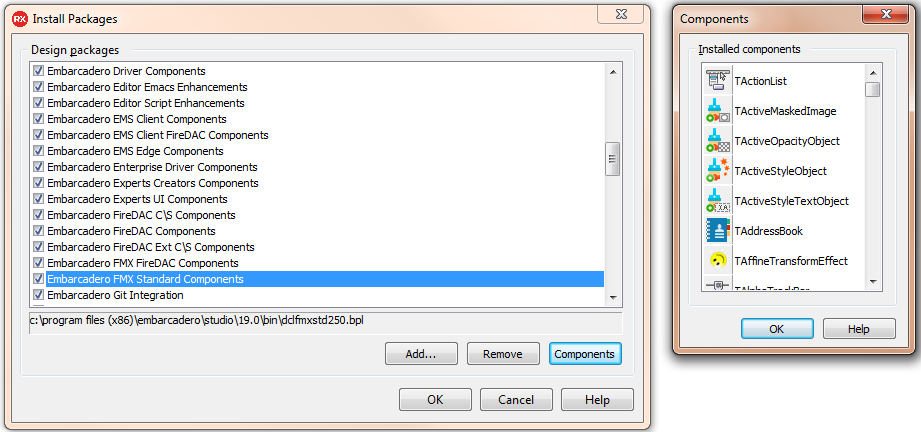
During the installation, you can choose which platforms and additional features you want to install. You can always add or remove platforms and features from the IDE Welcome Page after the installation is complete, as shown in the following screenshot:

Platform Selection

After this, we need to select platforms and all additional features, as shown in the following screenshot:

Additional Options

I'm going for the full install, so I have selected all platforms and all additional features to be installed, except for languages other than English. Depending on the speed of your internet connection, the installer should complete the installation in a couple of minutes. At the end of the installation, you will see the message that the installation is complete and you can start working.

If you run into problems during the installation, you can review the Delphi Installation Notes on the Embarcadero DocWiki (http://docwiki.embarcadero.com/RADStudio/en/Installation_Notes).

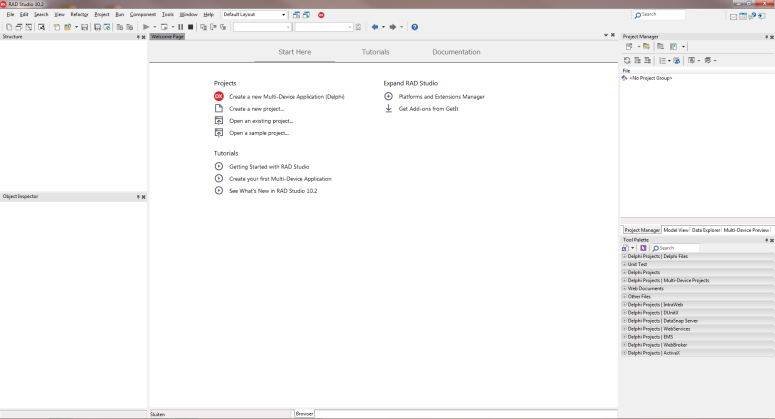
Delphi is now installed. Run it and the first thing you will see is the Welcome Page, as shown in the following screenshot:

Delphi Welcome Page

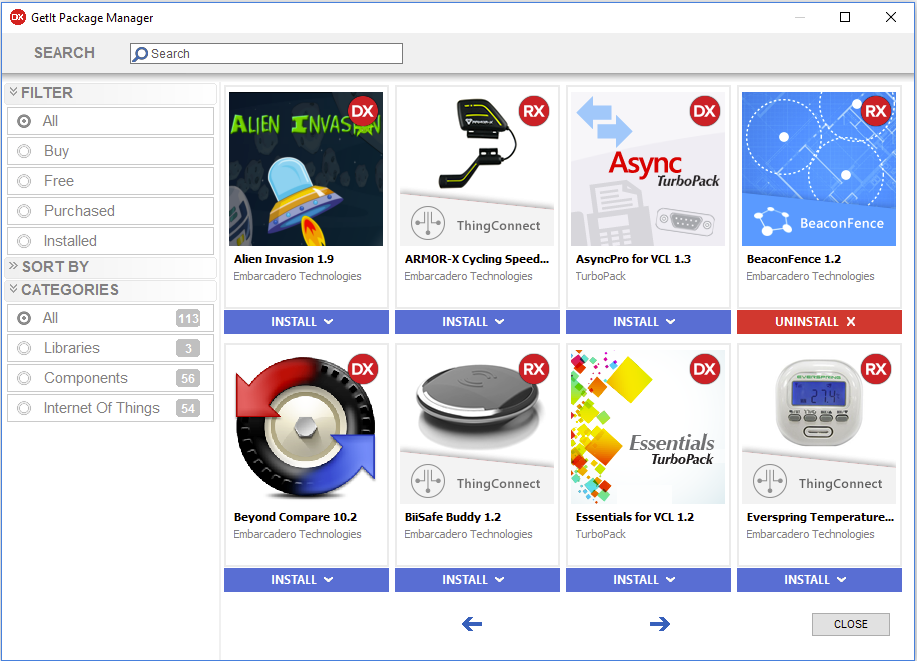
Here you can display the Platforms and Extensions Manager, which will give you an opportunity to add or remove installed platforms and additional options. From the Welcome Page you can open sample projects, watch video tutorials, and access online documentation. You can also easily open recently closed projects. The projects that you frequently work with can be added to Favorites for quick access.

Installing custom components

Delphi IDE has an open architecture and provides many ways to extend its functionality through additional packages. You can see the list of currently installed packages in the Installed Packages option available from the Component menu. The most typical Delphi building block is a Component. Technically, this is about taking the object-oriented programming principles and moving it one step further. With components, you have the ability to manipulate regular programming language object instances during the design time, before the project is built for a given platform. Packages may also contain custom property editors and the Open Tools API extension to the IDE itself that may add custom functionality to the IDE, such as additional menus and windows.

Out of the box, with the default Delphi installation, you will get a few hundred components already preinstalled. Depending on your Delphi version and selected features, this list may differ. Click on the Installed Packages option in the Component menu to verify which components are actually installed, as shown in the following screenshot:

Installed Packages window with components shown for a selected package

There are many additional free and commercial component packages that are not installed by default. They can be installed with the integrated GetIt Package Manager. It is available either from the Welcome Page or from the Tools menu, as shown in the following screenshot:

Delphi GetIt Package Manager

If you want to install any of the available component packages, just click on the Install button under the image of the package. The installation process is very straightforward. After accepting the license, the components are downloaded from the internet, compiled, and installed into the IDE.

IDE options

You can manage all aspects of how the Delphi IDE works from the Options dialog available from the Tools menu. Here, you can control various aspects of how Delphi operates as a whole. Take a look at the following screenshot:

Delphi Options

Riding the Integrated Development Environment

In a nutshell, Delphi is a program for making other programs. The actual program responsible for generating executable files from the source code is a compiler. It is typically implemented as a command-line application. When executing a command-line application, you can pass to it command-line parameters. Compilers take different command-line parameters, including the location of source code files necessary to generate the resulting binary file. Take a look at the following diagram:

Simplified compiler architecture

It is possible to write your programs using a text editor like Notepad and then execute the compiler from the command line, but it is not the most efficient way of creating applications. Most programmers use IDE for working on apps. The idea of an integrated development environment originates from the Delphi ancestor, Borland Turbo Pascal, and comes from the integration of three previously separate programs: Code Editor, compiler, and debugger.