
Learning a new development environment can be a roadblock. Luckily, Apple provides some excellent tools for iOS developers. We will start our journey by installing Xcode.
Xcode is Apple's Integrated Development Environment (IDE). You will need Xcode to create your game projects, write and debug your code, and build your project for the App Store. Xcode also comes bundled with an iOS simulator to test your game on virtualized iPhones and iPads on your computer.
Apple praises Xcode as "an incredibly productive environment for building amazing apps for Mac, iPhone, and iPad" .
To install Xcode, search for Xcode in the AppStore, or visit http://developer.apple.com and select Developer and then Xcode.
Note
Swift is continually evolving and each new Xcode release brings changes to Swift. If you run into errors because Swift has changed, you can always use Xcode's built-in syntax update tool. Simply use Xcode's Edit | Convert to Latest Syntax option to update your code.
Xcode performs common IDE features to help you write better, faster code. If you have used IDEs in the past, then you are probably familiar with autocompletion, live error highlighting, running and debugging a project, and using a project manager pane to create and organize your files. However, any new program can seem overwhelming at first. We will walk through some common interface functions over the next few pages. I have also found tutorial videos on YouTube to be particularly helpful if you are stuck. Most common search queries result in helpful videos.
Do you have Xcode installed? Let's see some game code in action in the simulator!
We will start by creating a new project in Xcode. For our demo game, we will create a side-scrolling endless flyer featuring an astonishing flying penguin named Pierre. I am going to name this project Pierre Penguin Escapes the Antarctic, but feel free to name your project whatever you like. Follow these steps to create a new project in Xcode:
Launch Xcode and navigate to File | New | Project.
You will see a screen asking you to select a template for your new project. Select iOS | Application in the left pane, and Game in the right pane. It should look like this:

Once you have selected Game, click Next. The following screen asks us to enter some basic information about our project. Don't worry; we are almost at the fun bit. Fill in the Product Name field with the name of your game.
Let's fill in the Team field. Do you have an active Apple developer account? If not, you can skip over the Team field for now. If you do, your Team is your developer account. Click Add Team and Xcode will open the accounts screen where you can log in. Enter your developer credentials, as shown in the following screenshot:

Once you're authenticated, you can close the accounts screen. Your developer account should appear in the Team dropdown.
You will want to pick a meaningful Organization Name and Organization Identifier when you create your own games for publication. Your Organization Name is the name of your game development studio. For me, that is Joyful Games. By convention, your Organization Identifier should follow a reverse domain name style. I will use
io.JoyfulGamessince my website isJoyfulGames.io.After you filled out the name fields, be sure to select Swift for the Language, SpriteKit for Game Technology, and Universal for Devices.
For now, uncheck Integrate GameplayKit, uncheck Include Unit Tests, and uncheck Include UI Tests. We will not use these features in our demo game. Here are my final project settings:

Click Next and you will see the final dialog box. Save your new project. Pick a location on your computer and click Next. And we are in! Xcode has pre-populated our project with a basic SpriteKit template.
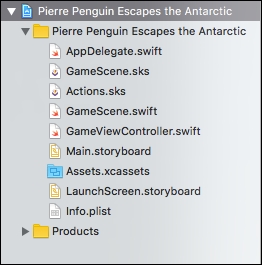
Now that we have created our project, you will see the project navigator on the left-hand side of Xcode. You will use the project navigator to add, remove, and rename files and generally organize your project. You might notice that Xcode has created quite a few files in our new project. We will take it slow; don't feel that you have to know what each file does yet, but feel free to explore them if you are curious: