Book Image

Mastering Visual Studio 2017

Book Image

Mastering Visual Studio 2017

Overview of this book

Visual Studio 2017 is the all-new IDE released by Microsoft for developers, targeting Microsoft and other platforms to build stunning Windows and web apps. Learning how to effectively use this technology can enhance your productivity while simplifying your most common tasks, allowing you more time to focus on your project. With this book, you will learn not only what VS2017 offers, but also what it takes to put it to work for your projects. Visual Studio 2017 is packed with improvements that increase productivity, and this book will get you started with the new features introduced in Visual Studio 2017 IDE and C# 7.0. Next, you will learn to use XAML tools to build classic WPF apps, and UWP tools to build apps targeting Windows 10. Later, you will learn about .NET Core and then explore NuGet, the package manager for the Microsoft development platform. Then, you will familiarize yourself with the debugging and live unit testing techniques that comes with the IDE. Finally, you'll adapt Microsoft's implementation of cloud computing with Azure, and the Visual Studio integration with Source Control repositories.
Table of Contents (11 chapters)

The new installation experience

In this section, we will discuss the various workloads and components of Visual Studio 2017's new installation experience. The basic installer that comes in the web-only mode allows you to select the components that you want to install before it downloads them. This saves you a lot of bandwidth. We will cover them here.

Unlike the previous versions of Visual Studio, you will not find an Offline Installer for Visual Studio 2017. You need to manually create it, which you can use to install Visual Studio 2017 without internet connectivity. This can be done by creating a layout using the web installer. Although the download size of the offline installer is big, it saves you the time and bandwidth when you want to install it on multiple devices.

In this section, we will learn how to configure and install different workloads or components using the online and offline installers. We will then continue to learn the ways to modify or uninstall the Visual Studio installation, as well as signing in to the IDE for a synced workspace setting across devices.

Before going into depth, let's see the system requirements to install Visual Studio 2017:

  • Visual Studio 2017 will install and run on the following operating systems:
    • Windows 10 version 1507 or higher to build apps for Universal Windows Platform (UWP)
    • Windows Server 2016
    • Windows 8.1 (with Update 2919355)
    • Windows Server 2012 R2 (with Update 2919355)
    • Windows 7 SP1 (with the latest Windows Updates)
  • Here's the hardware requirements:
    • 1.8 GHz or faster processor. It's recommended to have dual core or higher.
    • At least 2 GB of RAM, minimum 2.5 GB if running in a Virtual Machine. It's recommended to have 4 GB of RAM.
    • It's recommended to have 1 GB to 40 GB HDD space, based on the features you are going to install.
    • Visual Studio will work best at a resolution of WXGA (1366 by 768) or higher.

Overview of the new installation experience

The new version of the installer that is used to install Visual Studio 2017 allows you to control the individual workload/module that you need. Unlike the previous versions of the installer, it does not take more installation space; rather, it allows you to do a basic installation, having a few hundred MBs only for the core editor to install. On a need basis, you can select the workload or the individual module.

The Workloads screen will allow you to select the module that you want to install. If you want to build applications targeting Windows 10 only, you should go with Universal Windows Platform development. Consider the following screenshot:

If you want to build applications for Python or Node.js, the respective workloads are there to help you install the required components. Consider the following screenshot:

We will discuss more about the installation steps in the next point, where we will see how to install Visual Studio 2017 using the online installer.

Installation using the online installer

You can go to https://www.visualstudio.com/downloads/ and select the Visual Studio 2017 edition that best suits your need and then download it. There are three different editions available--Visual Studio Community 2017, Visual Studio Professional 2017, and Visual Studio Enterprise 2017.

The Visual Studio Community edition is a free, fully-featured IDE for students, open source developers, and individual developers. In all these cases, you can create your own free or paid apps using the Visual Studio 2017 Community edition. Organizations will also be able to use the Community edition, but only under the following conditions:

  • In an enterprise organization, an unlimited number of users can use the Community edition if they are using it in a classroom learning environment, academic research, or an open source project. An organization is defined as an enterprise organization if they have more than 250 computers or a 1 million dollar annual revenue.
  • In a non-enterprise organization, the Community edition is restricted to up to five users.

To know more about the Visual Studio Community 2017 license terms, check out this page:

https://www.visualstudio.com/license-terms/mlt553321/

If you are a professional in a small team, you need to select Visual Studio Professional 2017, and for end-to-end solutions by a team of any size, select Visual Studio Enterprise 2017.

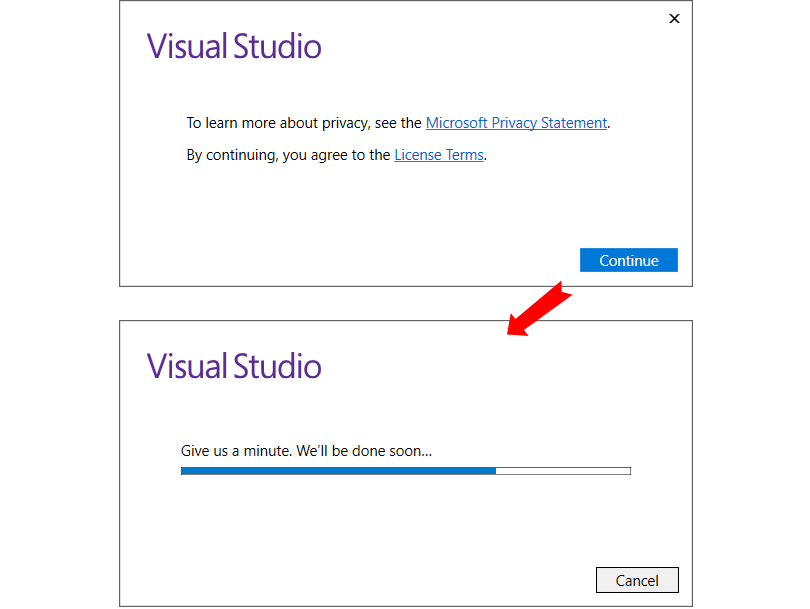
Once you have downloaded the online/web installer, double-click on it to start the installation process. This will first show a screen where you can read the License Terms and Microsoft Privacy Statement, which you need to agree to before continuing with the installation process. Once you click on the Continue button, the installer will take a few minutes to prepare itself. This is shown in the following screenshot:

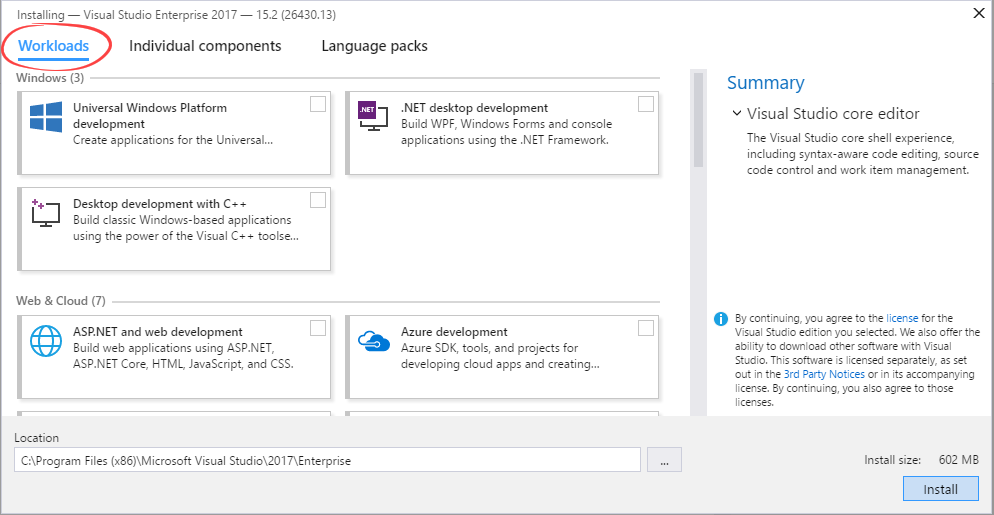
The main screen of the installer has three different tab contents--Workloads, Individual components, and Language packs.

The Workloads tab allows you to select the group of components that comes under a single module. In other words, each workload contains the features you need for the programming language or platform you prefer.

For example, if you like to build Windows Presentation Foundation (WPF) applications, you need to select .NET desktop development, and to build ASP.NET web applications, you need to select the ASP.NET and web development module under the workloads.

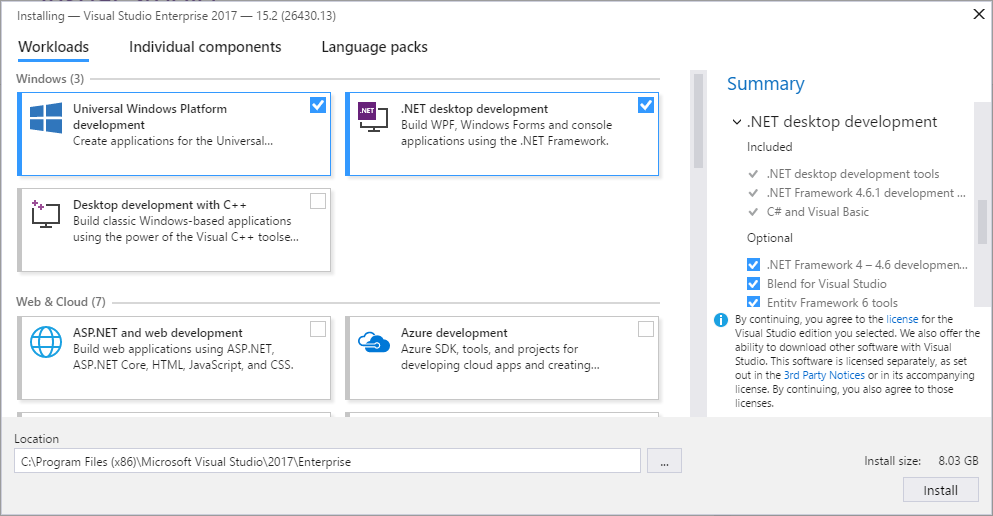
To install and build applications for both WPF and Windows 10, select .NET desktop development and Universal Windows Platform development, as shown in the following screenshot. For each individual workload, the selected components will be listed in the panel on the right-hand side of the screen:

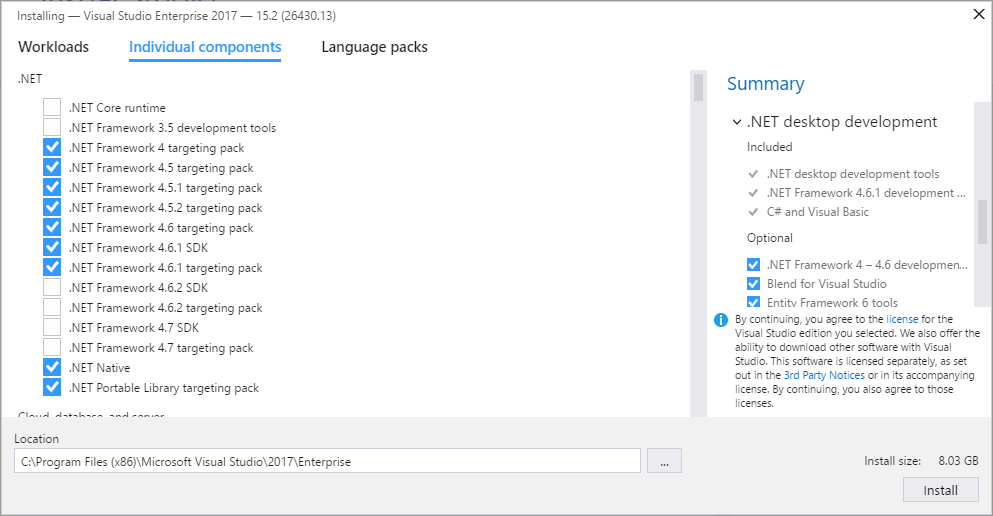
The Individual components tab lists all the component parts of individual workloads, category wise, for you. The components part of the selected workloads will be auto-checked by default.

Only use this section if you are an advanced user. Some components may have dependencies with one or more workloads. Deselecting one of them can cause the other workloads to unload from the installation process. So, be cautious while selecting/deselecting any one of them.

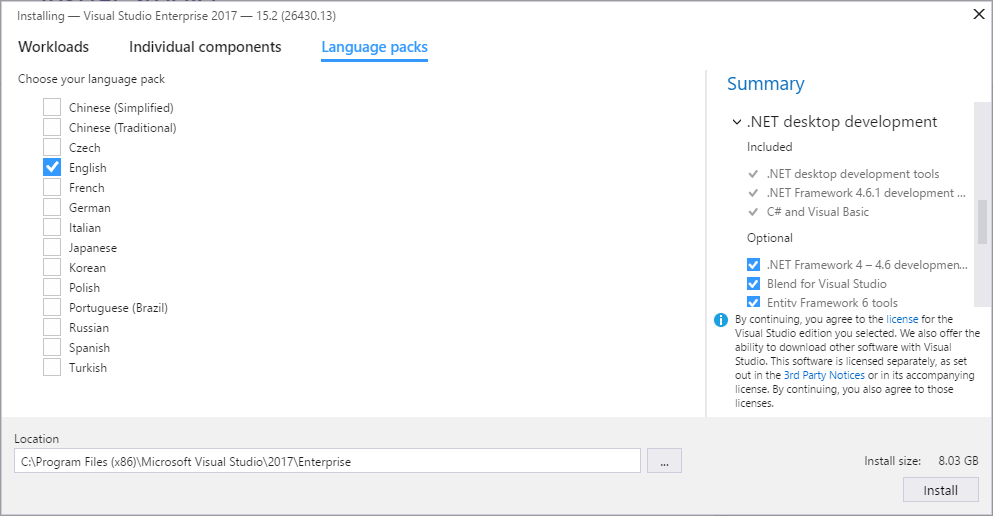
The third tab is the Language packs tab, which allows you to choose the language that you want to use with Visual Studio 2017. By default, it's the system's default language selected on the screen; however, you can opt for Czech, French, German, or any other languages from the available list shown in the following screenshot:

By default, a location is prepopulated for the installer to install Visual Studio 2017, but you can change it to a different folder. Once you are done, click on the Install button.

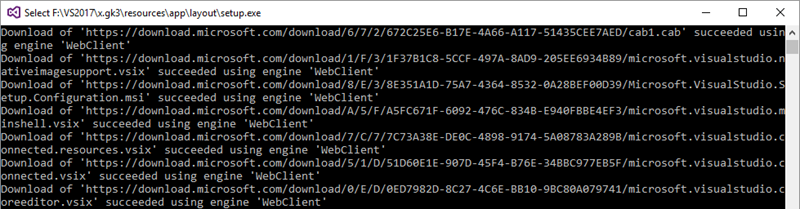
This will start the actual installation process. If you are using the web installer, it will download an individual module from the Microsoft server and install them gradually. This may take some time, based on your selected workloads/components and internet bandwidth. Consider the following screenshot:

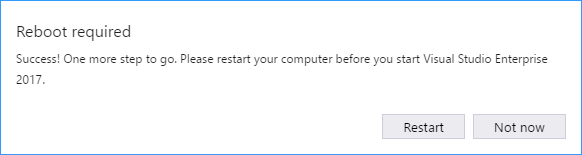
This will be fast and take less time than the previous IDE installers. Once it completes the installation, it may ask you to restart your system to take into effect the changes that it made to start the Visual Studio instance. If you see such a message on the screen, as shown in the following screenshot, make sure to restart your computer by clicking on the Restart button:

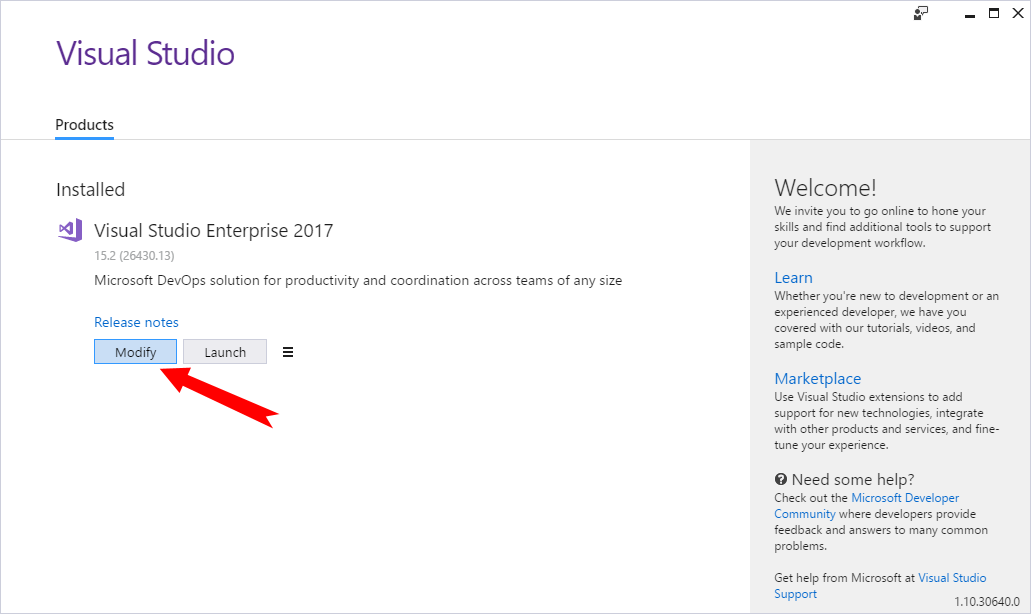
From the same page, you will be allowed to modify the existing installation, launch the Visual Studio 2017 IDE, or uninstall the complete installation.

Creating an offline installer of Visual Studio 2017

Sometimes, we may need to have an offline copy of the installer so that we can install it to multiple devices without an active or fast internet connection. This will save your bandwidth from downloading the same copy multiple times over the network. The offline installer is big. So, before going further to create the offline copy, make sure that you have an active internet connection available with no limitation of download bandwidth.

  1. First, download the Visual Studio setup executable file (web installer) to a drive on your local machine.
  2. Now, run the downloaded setup executable with the following arguments (switches) from a command prompt:
    • Add --layout <path>, where <path> is the location where you want the layout to be downloaded. By default, all languages will be downloaded along with all the packages.
    • In case you want to restrict the download to a single language only, you can do so by providing the --lang <language> argument, where <language> is one of the ISO country codes given in the following list. If not specified, support for all localized languages will be downloaded.

ISO CODE

LANGUAGE

cs-CZ

Czech

de-DE

German

en-US

English

es-ES

Spanish

fr-FR

French

it-IT

Italian

ja-JP

Japanese

ko-KR

Korean

pl-PL

Polish

pt-BR

Portuguese - Brazil

ru-RU

Russian

tr-TR

Turkish

zh-CN

Chinese - Simplified

zh-TW

Chinese - Traditional

For example, to download the Visual Studio 2017 Enterprise edition under the local path C:\VS2017\, you need to provide the following command:

vs_enterprise.exe --layout "C:\VS2017\"

To download the English localized edition to local path C:\VS2017\, provide the following command:
vs_enterprise.exe --layout "C:\VS2017\" --lang "en-US"

To download only the .NET desktop development workload, run:
vs_enterprise.exe --layout "C:\VS2017\" --add Microsoft.VisualStudio.Workload.ManagedDesktop

To download the .NET desktop development and Azure development workloads, provide the following command:

vs_enterprise.exe --layout "C:\VS2017\" --add Microsoft.VisualStudio.Workload.ManagedDesktop Microsoft.VisualStudio.Workload.Azure

As shown in the following screenshot, it will start downloading all the packages part of Visual Studio 2017. As the offline installer is big, it will take plenty of time, depending on the speed of your internet network:

Once the download completes, go to the folder where you downloaded the packages (in our case, it's C:\VS2017\) and run the installer file, that is, vs_enterprise.exe, for example. Then, follow the same steps as mentioned earlier to select the required Workloads and/or Individual components to start the installation process.

Installing Visual Studio 2017 from the command line

You can use command-line parameters/switches to install Visual Studio 2017. Be sure to use the actual installer, for example, vs_enterprise.exe for the Visual Studio 2017 Enterprise edition, and not the bootstrapper file, which is named vs_setup.exe. The bootstrapper file loads the MSI for actual installation. You can also run C:\Program Files (x86)\Microsoft Visual Studio\Installer\vs_installershell.exe to install the Visual Studio components from the command line.

Here is a list of the command-line parameters/switches:

Parameters/Switch

Description

[--catalog] <uri> [<uri> ...]

Required -- One or more file paths or URIs to catalogs.

--installDir <dir>
--installationDirectory <dir>

Required -- The target installation directory.

-l <path>, --log <path>

Specify the log file; otherwise, one is automatically generated.

-v, --verbose

Display verbose messages.

-?, -h, --help

Display parameter usage.

--instanceId <id>

Optional -- The instance ID to install or repair.

--productId <id>

Optional -- The product ID to install. Otherwise, the first product found is installed.

--all

Optional -- Whether to install all workloads and components for a product.

--add <workload or component ID> ...

Optional -- One or more workload or component IDs to add.

--remove <workload or component ID> ...

Optional -- One or more workload or component IDs to remove.

--optional, --includeOptional

Optional -- Whether to install all optional workloads and components for selected workload.

--lang, --language <language-locale> ...

Optional -- Install/uninstall resource packages with the specified languages.

--sharedInstallDir <dir>

Optional -- The target installation directory for shared payloads.

--compatInstallDir <dir>

Optional -- The target installation directory for legacy compatibility payloads.

--layoutDir <dir>
--layoutDirectory <dir>

Optional -- The layout directory in which to find packages.

--locale <language-locale>

Optional -- Change the display language of the user interface for the installer. Setting will be persisted.

--quiet

Optional -- Do not display any user interface while performing the installation.

--passive

Optional -- Display the user interface, but do not request any interaction from the user.

Here is a list of workload IDs that you need to provide while installing Visual Studio 2017 from the command line:

  • Microsoft.VisualStudio.Workload.CoreEditor: This is the core part of Visual Studio 2017 containing the core shell experience, syntax-aware code editing, source code control, and work item management.
  • Microsoft.VisualStudio.Workload.Azure: This contains the Azure SDK tools and projects to develop cloud apps and create resources.
  • Microsoft.VisualStudio.Workload.Data: Using this workload, you can connect, develop, and test data solutions using SQL Server, Azure Data Lake, Hadoop, or Azure Machine Learning.
  • Microsoft.VisualStudio.Workload.ManagedDesktop: This workload will help you build WPF, Windows Forms, and console applications using the .NET Framework.
  • Microsoft.VisualStudio.Workload.ManagedGame: If you are a game developer, you can create 2D and 3D games with Unity, a powerful cross-platform development environment.
  • Microsoft.VisualStudio.Workload.NativeCrossPlat: Want to create and debug applications running in a Linux environment? This workload will allow you to build native cross platform apps.
  • Microsoft.VisualStudio.Workload.NativeDesktop: Classic Windows-based applications using the power of the Visual C++ toolset, ATL, and optional features such as MFC and C++/CLI can be built using this workload.
  • Microsoft.VisualStudio.Workload.NativeGame: If you are a game developer, you can use the full power of C++ to build professional games powered by DirectX, Unreal, or Cocos2d.
  • Microsoft.VisualStudio.Workload.NativeMobile: Using this, you can build cross-platform applications for iOS, Android, or Windows using the C++ APIs.
  • Microsoft.VisualStudio.Workload.NetCoreTools: .NET Core is a new addition to Visual Studio. You can build cross-platform applications using .NET Core, ASP.NET Core, HTML, JavaScript, and CSS.
  • Microsoft.VisualStudio.Workload.NetCrossPlat: To build cross-platform applications for iOS, Android, or Windows using Xamarin, you will need to have this workload installed on your development environment.
  • Microsoft.VisualStudio.Workload.NetWeb: You can build web applications using ASP.NET, ASP.NET Core, HTML, JavaScript, and CSS using the NetWeb workload.
  • Microsoft.VisualStudio.Workload.Node: To build scalable network applications using Node.js and asynchronous event-driven JavaScript runtime, you will need this workload.
  • Microsoft.VisualStudio.Workload.Office: To create Office and SharePoint add-ins, SharePoint solutions, and VSTO add-ins using C#, VB, and JavaScript, you will need this Office workload.
  • Microsoft.VisualStudio.Workload.Universal: To create applications targeting the Universal Windows Platform with C#, VB, JavaScript, or, optionally, C++, you need to install this workload.
  • Microsoft.VisualStudio.Workload.VisualStudioExtension: If you want to create add-ons and extensions for Visual Studio, you will need to install this workload. This also includes new commands, code analyzers, and tool windows.
  • Microsoft.VisualStudio.Workload.WebCrossPlat: To build Android, iOS, and UWP apps using Tools for Apache Cordova, you will need this.

Each of the preceding workloads has its own set of components, which you can refer to from the official Microsoft page (https://aka.ms/vs2017componentids).

Modifying your existing Visual Studio 2017 installation

After the installation ends, if you later decide to modify the existing installation to add or remove any components or uninstall the installation, you can do so from the control panel - Add/Remove Programs. Alternatively, you can launch the Microsoft Visual Studio Installer and click on Modify, as shown in the following screenshot:

To add new modules, check the new workloads, or to remove modules, uncheck the existing workloads, and proceed toward modifying the existing installation.

Uninstalling Visual Studio 2017 installation

If you have set your mind to uninstall all the packages that Visual Studio 2017 installed, the new installer that comes with it can help you uninstall the entire packages completely, without keeping any trace of the components.

You can also launch the Microsoft Visual Studio Installer, click the icon, then Uninstall, as shown in the following screenshot, and then click on OK when asked:

Signing in to Visual Studio 2017

Once you are done with the installation, open your Visual Studio 2017 IDE. When you open it for the first time, it will ask you to sign in. Be sure to sign in with your MSA (Microsoft Account) ID or a work/school account that best represents you. If you don't have an existing account, you can create a personal account for free.

Although it is optional to sign in, it is good to keep all your Visual Studio settings and personalization settings synced in the cloud. Doing so will help you use the same settings from any other devices. If you are working on multiple devices, syncing your settings will help you in many ways (includes Theme).

Here is the screenshot of the sign-in screen of Visual Studio, where you need to provide your account credentials:

Not only will signing in help you extend your trial license, but it will also help if you installed the Visual Studio trial version. By default, it will have a 30 day trial period. Once you sign in to Visual Studio 2017, you will get an additional 90 days to try it.

If you have an account that's associated with the MSDN or VSO (Visual Studio Online) subscription, signing in to Visual Studio will automatically unlock your installation. It will also connect to services such as Microsoft Azure and Visual Studio Team Services in the IDE without prompting again for credentials for the same account.

If you missed logging in to Visual Studio at the first start of the IDE, you can do so later from the Visual Studio by using this path: Help | Register Product | Sign in, or by clicking on the Sign in link available at the top-right corner of the screen, as shown in the following screenshot:

Unless you sign out, you will be automatically signed in to Visual Studio whenever you start it. This will synchronize all your changes to the settings in the cloud.