Book Image

Tkinter GUI Application Development Blueprints - Second Edition

By : Bhaskar Chaudhary
Book Image

Tkinter GUI Application Development Blueprints - Second Edition

By: Bhaskar Chaudhary

Overview of this book

Tkinter is the built-in GUI package that comes with standard Python distributions. It is a cross-platform package, which means you build once and deploy everywhere. It is simple to use and intuitive in nature, making it suitable for programmers and non-programmers alike. This book will help you master the art of GUI programming. It delivers the bigger picture of GUI programming by building real-world, productive, and fun applications such as a text editor, drum machine, game of chess, audio player, drawing application, piano tutor, chat application, screen saver, port scanner, and much more. In every project, you will build on the skills acquired in the previous project and gain more expertise. You will learn to write multithreaded programs, network programs, database-driven programs, asyncio based programming and more. You will also get to know the modern best practices involved in writing GUI apps. With its rich source of sample code, you can build upon the knowledge gained with this book and use it in your own projects in the discipline of your choice.
Table of Contents (12 chapters)

Events and callbacks – adding life to programs

Now that you have learned how to add widgets to a screen and position them where you want, let's turn our attention to the third component of GUI programming.

This addresses the question of how to make widgets functional.

Making widgets functional involves making them responsive to events such as the pressing of buttons, the pressing of keys on a keyboard, and mouse clicks.

This requires associating callbacks with specific events. Callbacks are normally associated with specific widget events using command binding rules, which are discussed in the following section.

Command binding

The simplest way to add functionality to a button is called command binding, whereby a callback function is mentioned in the form of command = some_callback in the widget option. Note that the command option is available only for a few selected widgets.

Take a look at the following sample code:

def my_callback ():
# do something when button is clicked

After defining the preceding callback, we can connect it to, say, a button with the command option referring to the callback, as follows:

tk.Button(root, text="Click me", command=my_callback)

A callback is a function memory reference ( my_callback in the preceding example) that is called by another function (which is Button in the preceding example) and that takes the first function as a parameter. Put simply, a callback is a function that you provide to another function so that it can calling it.

Note that my_callback is passed without parentheses, (), from within the widget command option, because when the callback functions are set it is necessary to pass a reference to a function rather than actually call it.

If you add parentheses, (), as you would for any normal function, it would be called as soon as the program runs. In contrast, the callback is called only when an event occurs (the pressing of a button in this case).

Passing arguments to callbacks

If a callback does not take any argument, it can be handled with a simple function, such as the one shown in the preceding code. However, if a callback needs to take arguments, we can use the lambda function, as shown in the following code snippet:

def my_callback (argument)
#do something with argument

Then, somewhere else in the code, we define a button with a command callback that takes some arguments, as follows:

tk.Button(root,text="Click", command=lambda: my_callback ('some argument'))

Python borrows a specific syntax from functional programming, called the lambda function. The lambda function lets you define a single-line, nameless function on the fly.

The format for using lambda is as follows:

lambda arg: #do something with arg in a single line

Here's an example:

square = lambda x: x**2

Now, we can call the square method, as follows:

>> print(square(5)) ## prints 25 to the console

Limitations of the command option

The command option that is available with the Button widget and a few other widgets is a function that can make the programming of a click-of-a-button event easy. Many other widgets do not provide an equivalent command binding option.

By default, the command button binds to the left-click and the spacebar. It does not bind to the Return key. Therefore, if you bind a button by using the command function, it will react to the space bar and not the Return key. This is counter-intuitive for many users. What's worse is that you cannot change the binding of the command function easily. The moral is that command binding, though a very handy tool, is not flexible enough when it comes to deciding your own bindings.

This brings us to the next method for handling events.

Event binding

Fortunately, Tkinter provides an alternative event binding mechanism called bind() to let you deal with different events. The standard syntax used to bind an event is as follows:

widget.bind(event, handler, add=None)

When an event corresponding to the event description occurs in the widget, it calls not only the associated handler, which passes an instance of the event object as the argument, but also the details of the event. If there already exists a binding for that event for this widget, the old callback is usually replaced with the new handler, but you can trigger both the callbacks by passing add='+' as the last argument.

Let's look at an example of the bind() method (code 1.09.py):

import tkinter as tk
root = tk.Tk()
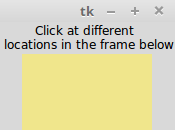
tk.Label(root, text='Click at different\n locations in the frame below').pack()

def callback(event):
print(dir(event))
print("you clicked at", event.x, event.y)

frame = tk.Frame(root, bg='khaki', width=130, height=80)
frame.bind("<Button-1>", callback)
frame.pack()
root.mainloop()

The following is a description of the preceding code:

  • We bind the Frame widget to the <Button-1> event, which corresponds to the left-click. When this event occurs, it calls the callback function, passing an object instance as its argument.
  • We define the callback(event) function. Note that it takes the event object generated by the event as an argument.
  • We inspect the event object by using dir(event), which returns a sorted list of attribute names for the event object passed to it. This prints the following list:
 [ '__doc__' , '__module__' , 'char' , 'delta' , 'height' , 'keycode' , 'keysym' , keysym_num' , 'num' , 'send_event' , 'serial' , 'state' ,'time' , 'type' , 'widget' , 'width' , 'x' , 'x_root' , 'y' , 'y_root ']
  • From the attributes list generated by the object, we use two attributes, event.x and event.y, to print the coordinates of the point of click.

When you run the preceding code (code 1.09.py ), it produces a window, as shown in the following screenshot:

When you left-click anywhere in the yellow colored frame within the root window, it outputs messages to the console. A sample message passed to the console is as follows:

['__doc__', '__module__', 'char', 'delta', 'height', 'keycode', 'keysym', 'keysym_num', 'num', 'send_event', 'serial', 'state', 'time', 'type', 'widget', 'width', 'x', 'x_root', 'y', 'y_root']
You clicked at 63 36.

Event patterns

In the previous example, you learned how to use the <Button-1> event to denote a left-click. This is a built-in pattern in Tkinter that maps it to a left-click event. Tkinter has an exhaustive mapping scheme that perfectly identifies events such as this one.

Here are some examples to give you an idea of event patterns:

The event pattern

The associated event

<Button-1>

Left-click of the mouse

<KeyPress-B>

A keyboard press of the B key

<Alt-Control-KeyPress- KP_Delete>

A keyboard press of Alt + Ctrl + Del

In general, the mapping pattern takes the following form:

<[event modifier-]...event type [-event detail]>

Typically, an event pattern will comprise the following:

  • An event type: Some common event types include Button, ButtonRelease, KeyRelease, Keypress, FocusIn, FocusOut, Leave (when the mouse leaves the widget), and MouseWheel. For a complete list of event types, refer to the event types section at http://www.tcl.tk/man/tcl8.6/TkCmd/bind.htm#M7.
  • An event modifier (optional): Some common event modifiers include Alt, Any (used like <Any-KeyPress>), Control, Double (used like <Double-Button-1> to denote a double-click of the left mouse button), Lock, and Shift. For a complete list of event modifiers, refer to the event modifiers section at http://www.tcl.tk/man/tcl8.6/TkCmd/bind.htm#M6.
  • The event detail (optional): The mouse event detail is captured by the number 1 for a left-click and the number 2 for a right-click. Similarly, each key press on the keyboard is either represented by the key letter itself (say, B in <KeyPress-B>) or by using a key symbol abbreviated as keysym. For example, the up arrow key on the keyboard is represented by the keysym value of KP_Up. For a complete keysym mapping, refer to https://www.tcl.tk/man/tcl8.6/TkCmd/bind.htm.

Let's take a look at a practical example of event binding on widgets (refer to code 1.10.py for the complete working example):

The following is a modified snippet of code; it will give you an idea of commonly
used event bindings:

widget.bind("<Button-1>", callback) #bind widget to left mouse click
widget.bind("<Button-2>", callback) # bind to right mouse click
widget.bind("<Return>", callback)# bind to Return(Enter) Key
widget.bind("<FocusIn>", callback) #bind to Focus in Event
widget.bind("<KeyPress-A>", callback)# bind to keypress A
widget.bind("<KeyPress-Caps_Lock>", callback)# bind to CapsLock keysym
widget.bind("<KeyPress-F1>", callback)# bind widget to F1 keysym
widget.bind("<KeyPress-KP_5>", callback)# bind to keypad number 5
widget.bind("<Motion>", callback) # bind to motion over widget
widget.bind("<Any-KeyPress>", callback) # bind to any keypress

Rather than binding an event to a particular widget, you can also bind it to the top-level window. The syntax remains the same except that now you call it on the root instance of the root window such as root.bind().

Binding levels

In the previous section, you had a look at how to bind an event to an instance of a widget. This can be called an instance-level binding.

However, there may be times when you need to bind events to an entire application. At times, you may want to bind an event to a particular class of widget. Tkinter provides the following levels of binding options for this:

  • Application-level binding: Application-level bindings let you use the same binding across all windows and widgets of an application as long as any one window of the application is in focus. The syntax for application-level bindings is as follows:
widget.bind_all(event, callback, add=None)

The typical usage pattern is as follows:

root.bind_all('<F1>', show_help)

Application-level binding here means that, irrespective of the widget that is currently under focus, pressing the F1 key will always trigger the show_help callback as long as the application is in focus.

  • Class-level binding: You can also bind events at a particular class level. This is normally used to set the same behavior for all instances of a particular widget class. The syntax for class-level binding is as follows:
w.bind_class(class_name, event, callback, add=None)

The typical usage pattern is as follows:

my_entry.bind_class('Entry', '<Control-V>', paste)

In the preceding example, all the entry widgets will be bound to the <Control-V> event, which will call a method named paste (event).

Event propagation
Most keyboard and mouse events occur at the operating system level. The event propagates hierarchically upward from its source until it finds a window that has the corresponding binding. The event propagation does not stop there. It propagates itself upwards, looking for other bindings from other widgets, until it reaches the root window. If it does reach the root window and no bindings are discovered by it, the event is disregarded.