
From now on, every time we talk about Java, we mean Java SE version 10. We will refer to it as Java 10, or Java, or JDK, used as synonyms, unless otherwise specified.
Java SE Development Kit (JDK) installation and configuration
Where to start
Before you can do any Java development on your computer, you will need JDK installed and configured. In order to do this, search the internet for the JDK download and select any link that starts with https://www.oracle.com/. The best, as of this writing, should be http://www.oracle.com/technetwork/java/javase/downloads/index.html.
If you follow the preceding link, you will see this section:
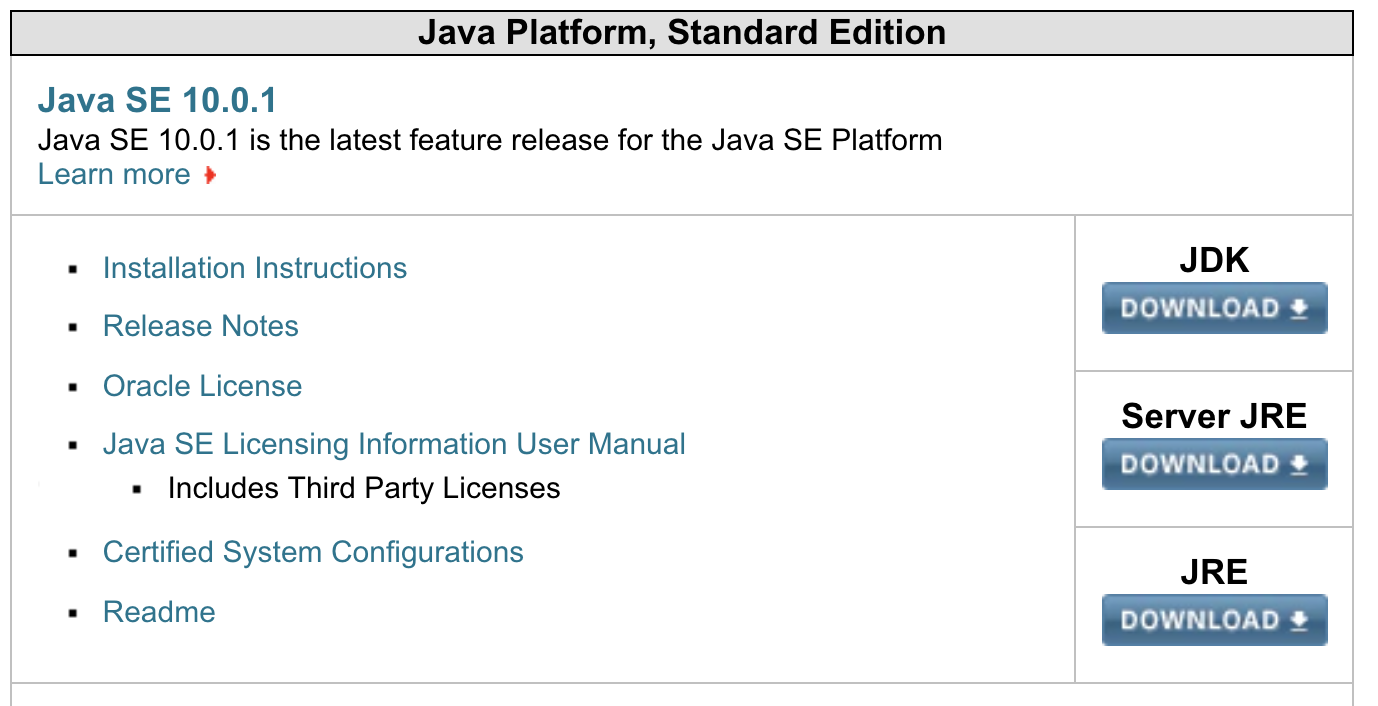
Let us call this page Page1, for further references. Now, you can click the Download link under JDK. The other two download links offer JRE, which, as you know already, only allows you to run already compiled Java programs; we need to write a program, compile it into bytecode, and then run it.
The page with Java installers
After you click, you will see a page (Page2) with this section:
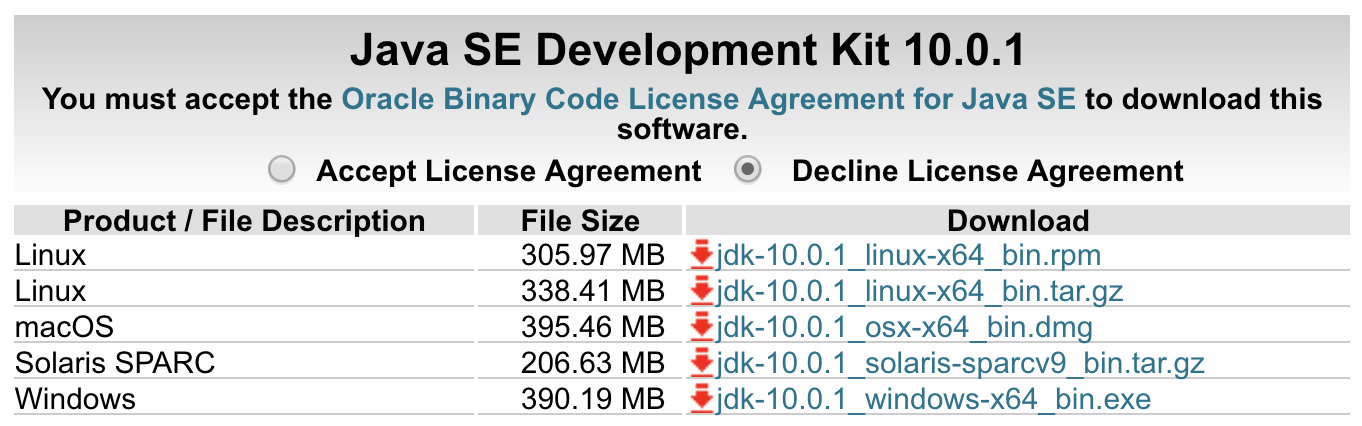
These are the Java installers for different operating systems (OS). You need to choose the one that fits your OS and click the corresponding link (do not forget to click Accept License Agreement using the radio button; if in doubt, read the license agreement via the link Oracle Binary Code License Agreement for Java SE). For Linux, there are two installers – one in Red Hat Package Manager Format (.rpm), and one that is just an archived (.tar) and compressed (.gz) version. Also, noticed that in this list, there are only installers for 64-bit operating systems. As of this writing, it is not clear yet if the 32-bit version is to be dropped officially, although it was available as an early access build.
Select the installer that you need, and download it.
How to install
Now is the time to install Java, which basically consists of the following four steps:
- Expand the installer
- Create directories
- Copy files into these directories
- Make the Java executables accessible without typing the full path
To find the detailed installation instructions, go back to Page1 and click on the Installation Instructions link. Find the link for your operating system and follow the provided steps, but choose only those that are related to JDK.
Eventually, you will come to the point when you are able to run the command java -version, which will display the following:

As you can see, it shows the version for Java as 10.0.1, and for JRE and JVM as 18.3 (build 10.0.1). It is not clear yet if future versions of Java, JRE, and JVM are going to follow the same format.
Anyway, if the java -version command displays the version you tried to install, it means that you have installed Java correctly and can now enjoy working with it. From now on, every time a new version comes out, you are going to be prompted to upgrade, and you can do it by just clicking the provided link. Alternatively, you can go to the page with the installers (Page2), download the corresponding installer, launch it, and repeat the process already familiar to you.
In practice, though, programmers do not upgrade their Java installation every time. They keep their development version the same as the Java in their production environment (in order to avoid potential incompatibility). If they would like to play with a new version before upgrading the production, they might have two versions of Java installed on their computer, in parallel. In Chapter 3, Your Development Environment Setup, you will learn how to do this, and how to switch between them.