Book Image

Mastering Xamarin UI Development - Second Edition

By : Steven F. Daniel
Book Image

Mastering Xamarin UI Development - Second Edition

By: Steven F. Daniel

Overview of this book

This book will provide you with the knowledge and practical skills that are required to develop real-world Xamarin and Xamarin.Forms applications. You’ll learn how to create native Android app that will interact with the device camera and photo gallery, and then create a native iOS sliding tiles game. You will learn how to implement complex UI layouts and create customizable control elements based on the platform, using XAML and C# 7 code to interact with control elements within your XAML ContentPages. You’ll learn how to add location-based features by to your apps by creating a LocationService class and using the Xam.Plugin.Geolocator cross-platform library, that will be used to obtain the current device location. Next, you’ll learn how to work with and implement animations and visual effects within your UI using the PlatformEffects API, using C# code. At the end of this book, you’ll learn how to integrate Microsoft Azure App Services and use the Twitter APIs within your app. You will work with the Razor Templating Engine to build a book library HTML5 solution that will use a SQLite.net library to store, update, retrieve, and delete information within a local SQLite database. Finally, you will learn how to write unit tests using the NUnit and UITest frameworks.
Table of Contents (15 chapters)

Creating a Xamarin project for both iOS and Android

In this section, we will take a look at how to create a Xamarin.Forms solution for the first time. We will begin by developing the basic structure for our application, as well as creating and designing the user interface files using XAML, and then creating the C# code to display planetary information.

Before we can proceed, we need to create our PlanetaryApp project. It is very simple to create this using Visual Studio for Mac. Simply follow these steps:

  1. Firstly, launch the Visual Studio application; depending on your version of Visual Studio installed, you'll be presented with the following screen:
Visual Studio Community IDE
  1. Next, choose the New Project… option, or alternatively choose File|New Solution..., or simply press Shift + command + N.
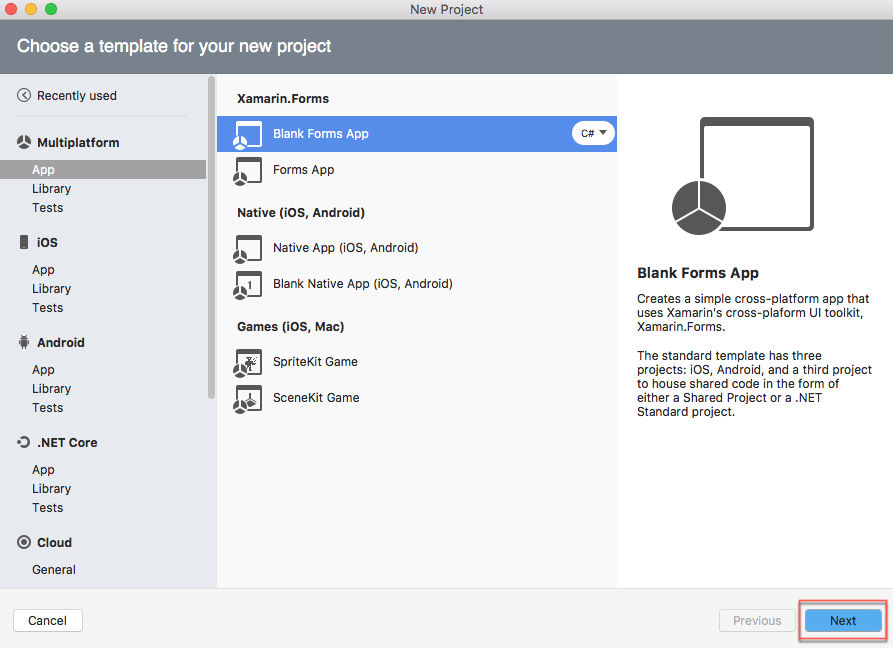
  2. Then, choose the Blank Forms App option, which is located under the Multiplatform|App section, and ensure that you have selected C# as the programming language to use.
  1. Next, click on the Next button to proceed to the next step in the wizard:
Choosing a template for your new project
  1. Next, enter PlanetaryApp to use as the name for your app in the App Name field and then specify a name for the Organization Identifier field.
  1. Then, ensure that both the Android and iOS checkboxes have been selected for the Target Platforms field and ensure that the Use .NET Standard option has been selected in the Shared Code section, as shown in the following screenshot:
Configuring your Blank Forms App

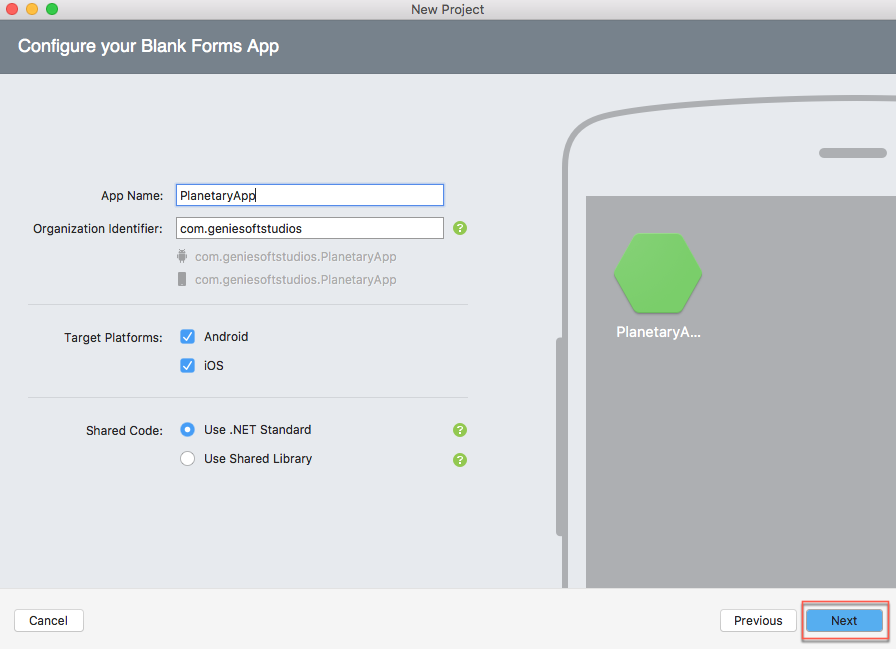
The Organization Identifier option for your app needs to be unique. Xamarin recommends that you use the reverse domain style (for example, com.domainName.appName).

  1. Then, click on the Next button to proceed to the next step in the wizard:
Configuring your new Blank Forms App
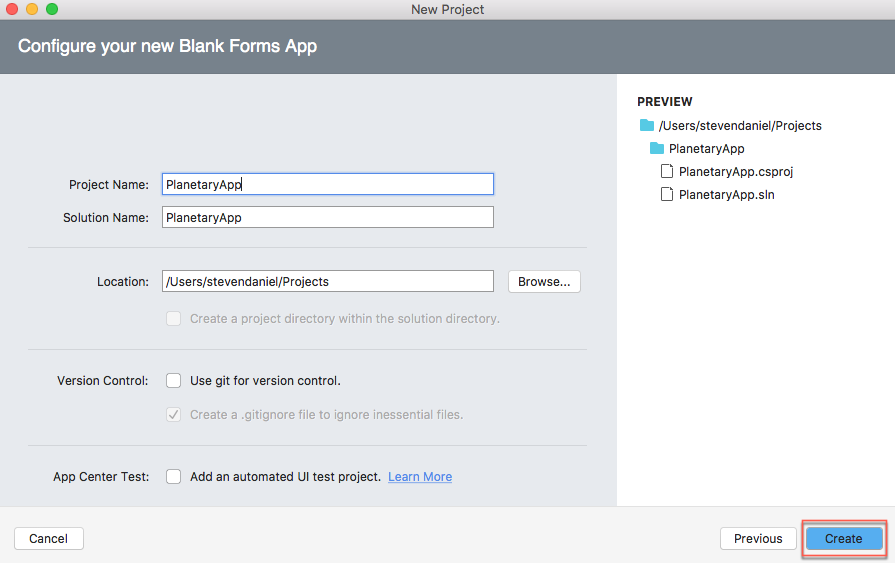
  1. Finally, click on the Create button to save your project at the specified location.

Once your project has been created, you will be presented with the Visual Studio Community 2017 for Mac development environment, containing several project files that the template has created, as shown in the following screenshot:

Components of the PlanetaryApp solution

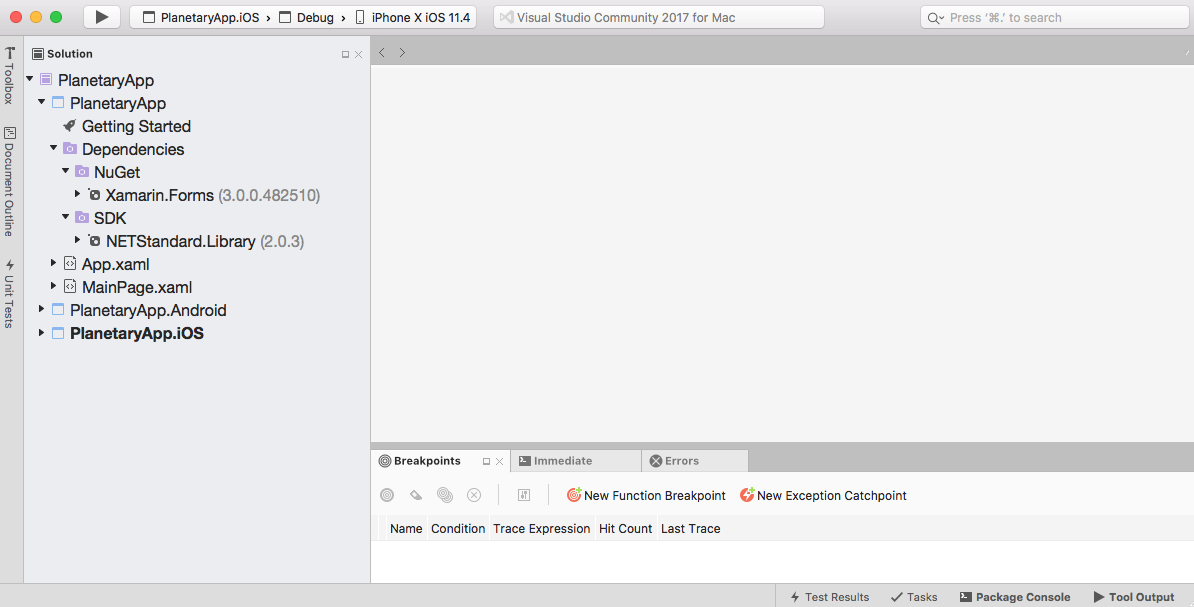
As you can see from the preceding screenshot, the PlanetaryApp solution has been divided into three main areas. The following table provides a brief description of what each area is used for:

Project details

Description

PlanetaryApp

This is the .NET Standard (Shared Library) project that will be responsible for acting as the main architectural layer for the PlanetaryApp solution. This project contains all of the business logic, data objects, Xamarin.Forms ContentPages, Views, and other non-platform-specific code. Any code that you create in this project can be shared across multiple platform-specific projects.

PlanetaryApp.Android

This is an Android-specific project that contains all of the code and assets required to build and deploy the Android app contained in the solution. By default, this project contains a reference to the PlanetaryApp (.NET Standard Shared Library).

PlanetaryApp.iOS

This project is an iOS-specific project that contains all of the code and assets required to build and deploy the iOS app contained in the solution. By default, this project contains a reference to the PlanetaryApp (.NET Standard Shared Library).

One thing you will notice is that our solution contains a file called App.xaml.cs, which is part of the .NET Standard (Shared Library). The App.xaml.cs file contains a class named App that inherits from the Xamarin.Forms.Application class hierarchy, as can be seen in the following code snippet:

 //
// App.xaml.cs
// Main class that gets called whenever our PlanetaryApp is started
//
// Created by Steven F. Daniel on 17/02/2018.
// Copyright © 2018 GENIESOFT STUDIOS. All rights reserved.
//

using Xamarin.Forms;

namespace PlanetaryApp
{
public partial class App : Application
{
public App()
{
InitializeComponent();

MainPage = new MainPage();
}

protected override void OnStart()
{
// Handle when your app starts
}

protected override void OnSleep()
{
// Handle when your app sleeps
}

protected override void OnResume()
{
// Handle when your app resumes
}
}
}

The App constructor method sets up the MainPage property to a new instance of the ContentPage that will simply display some default text as created by the project wizard. Throughout this chapter, we will be building the initial user interface using XAML and then populating a list of planet names in the control elements contained in the XAML.

Creating the user interface for our Planetary app using XAML

In this section, we will begin defining the user interface for our MainPage using XAML. This page will be used to display a list of planet names, as well as information relating to the distance the planet is from the sun. There are a number of ways you can go about presenting this information, but for the purpose of this app, we will be using a ListView to present this information.

Let's start by creating the user interface for our MainPage by performing the following steps:

  1. Open the MainPage.xaml file, which is located as part of the PlanetaryApp group, ensure that it is displayed in the code editor, and enter the following code snippet:
     <?xml version="1.0" encoding="utf-8"?>
<ContentPage xmlns="http://xamarin.com/schemas/2014/forms"
xmlns:x="http://schemsas.microsoft.com/winfx/2009/xaml"
xmlns:local="clr-namespace:PlanetaryApp" x:Class="PlanetaryApp.MainPage">
<ListView x:Name="planetsListView" RowHeight="80" HasUnevenRows="True">
<ListView.ItemTemplate>
<DataTemplate>
<TextCell Text="{Binding Name}" TextColor="Black"
Detail="{Binding Distance}" DetailColor="Red" />
</DataTemplate>
</ListView.ItemTemplate>
</ListView>
</ContentPage>

Let's take a look at what we covered in the preceding code snippet:

  1. We started by defining a ListView and specified the RowHeight to be used for each of the rows that will be allocated and displayed, as well as providing our ListView control with a name, planetsListView.
  2. Next, we defined the ItemTemplate property of our ListView control, which will be used to display the data items, and then defined a DataTemplate that will be used to handle displaying data from a collection of objects in our ListView.
  3. Finally, we used the TextCell control and then set the Text property to bind to our name property, and we set the Detail property to bind our distance property, then set the Textcolor and DetailColor properties of our TextCell control.

Displaying a list of planet names using C#

In this section, we will begin by creating the C# code that will be used to communicate with our PlanetaryApp user interface XAML for our MainPage. We will start by adding code in the MainPage code-behind file.

Let's take a look at how we can achieve this:

  1. Open the MainPage.xaml.cs code-behind file, ensure that it is displayed in the code editor, and enter in the following code snippet:
      //
// PlanetaryAppPage.xaml.cs
// Displays Planetary Information in a Listview control from an array
//
// Created by Steven F. Daniel on 17/02/2018.
// Copyright © 2018 GENIESOFT STUDIOS. All rights reserved.
//

using System.Collections.ObjectModel;
using Xamarin.Forms;

namespace PlanetaryApp
{
public partial class MainPage : ContentPage
{
public class Planet
{
public string Name { get; set; }
public string Distance { get; set; }
}

public PlanetaryAppPage()
{
InitializeComponent();

// Create and populate a List of Planetary names
var planets = new ObservableCollection<Planet>() {
new Planet
{
Name = "Mercury",
Distance = "Distance from Earth: 77 million kilometers"
},
new Planet
{
Name = "Venus",
Distance = "Distance from Earth: 261 million kilometers"
},
new Planet
{
Name = "Earth",
Distance = "Distance from Sun: 149.6 million kilometers"
},
new Planet
{
Name = "Mars",
Distance = "Distance from Earth: 54.6 million kilometers"
},
new Planet
{
Name = "Jupiter",
Distance = "Distance from Earth: 588 million kilometers"
},
new Planet
{
Name = "Saturn",
Distance = "Distance from Earth: 1.2 billion kilometers"
},
new Planet
{
Name = "Uranus",
Distance = "Distance from Earth: 2.6 billion kilometers"
},
new Planet
{
Name = "Neptune",
Distance = "Distance from Earth: 4.3 billon kilometers"
}};

// Set the PlanetList Item to our ListView to display the items
planetsListView.ItemsSource = planets;
}
}
}

Let's take a look at what we covered in the preceding code snippet:

  1. We created a subclass called Planets in the MainPage ContentPage, containing two getters and setters for Name and Distance
  2. Next, we declared an ObservableCollection called planets, which essentially is a collection that allows any code that has been declared outside the collection to be aware of any changes that occur
  3. We then initialized our objects for Name and Distance, before finally setting the planets collection to the ItemSource property of the planetsListView property that is contained in the MainPage.xaml file

Now that you have created the user interface and the necessary C# code to populate the ListView contained in our MainPage XAML, our next step is to compile, build, and run the PlanetaryApp in the iOS simulator.

Launching the Planetary app using the iOS simulator

In this section, we will take a look at how to compile and run our PlanetaryApp. You have the option of choosing to run your application using an actual device, or choosing from a list of simulators available for an iOS device.

Let's begin by performing the following steps:

  1. Ensure that you have chosen the PlanetaryApp.iOS project from the drop-down menu.
  2. Next, choose your preferred device from the list of available iOS simulators.
  3. Then, select the Run|Start Without Debugging menu option, as shown in the following screenshot:
Launching the PlanetaryApp within the iOS Simulator
  1. Alternatively, you can also build and run the PlanetaryApp by pressing command + Enter.

When the compilation is complete, the iOS simulator will appear automatically and the PlanetaryApp application will be displayed, as shown in the following screenshot:

PlanetaryApp running within the iOS Simulator

As you can see from the preceding screenshot, this currently displays a list of static planetary entries that are displayed in our ListView control contained in our XAML. Congratulations, you have successfully built your first Xamarin.Forms application, as well as the user interface using XAML for the PlanetaryApp ContentPage used by our app!