
The Raspbian OS is considered the default or go-to operating system for the Raspberry Pi. In this section, we will install Raspbian using the NOOBS image.
Installing the Raspbian OS
Formatting a microSD card for Raspbian
Raspberry Pi uses a microSD card to store the operating system. This allows you to easily switch between different operating systems (system images) for your Raspberry Pi. We will be installing the default Raspbian OS for our projects using the NOOBS image.
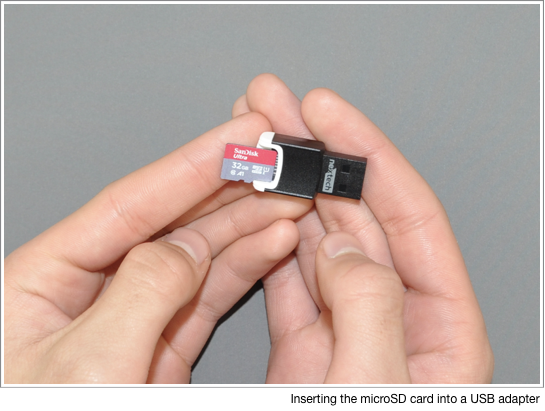
Start by inserting the microSD card into a USB adapter and plug it into your computer:
You may need to format the microSD card. If so, use the utilities appropriate for your computer's operating system to format the card to FAT32. It is recommended that you use a card with a capacity of 8 GB or greater. For Windows OS and cards with 64 GB of capacity or greater, a third-party tool such as FAT32 format should be used for formatting.
Copying the NOOBS files to the microSD RAM
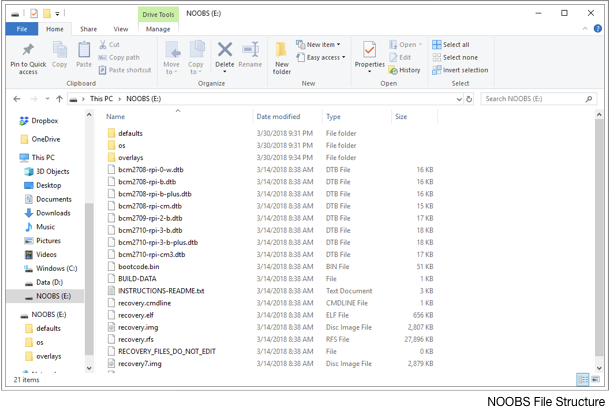
Unzip the NOOBS image that you downloaded. Open up the unzipped directory and drag the files over to the microSD card.
The files should look the same as in the following screenshot:
Running the installer
We will now install Raspbian on our Raspberry Pi. This step should be familiar to those that have previous experience installing operating systems such as Windows or macOS. The Raspbian operating system will be installed and will run off of our microSD card.
To install Raspbian onto our microSD card, do the following:
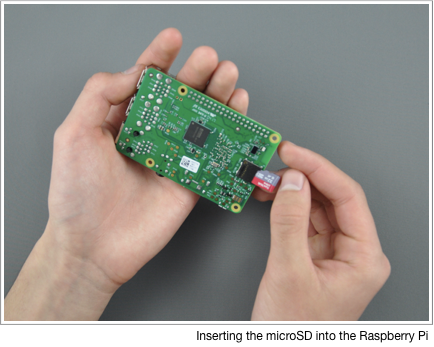
- Start by inserting the microSD card into the appropriate slot on the Raspberry Pi. Be sure to install it so that the label side (opposite side of the exposed contacts) is facing up. Insert it with the metal contacts facing the board. The microSD card should have a slight ridge at the top of the label side, which is good for easy removal using a fingernail.
- Insert a keyboard and mouse into the USB slots on the side, a monitor into the HDMI port, and lastly, a USB power cable into the power port. The Raspberry Pi does not have an on/off switch and will power up as soon as the power cable is connected:
- After an initial black screen with rolling white text, you should see the following dialog:
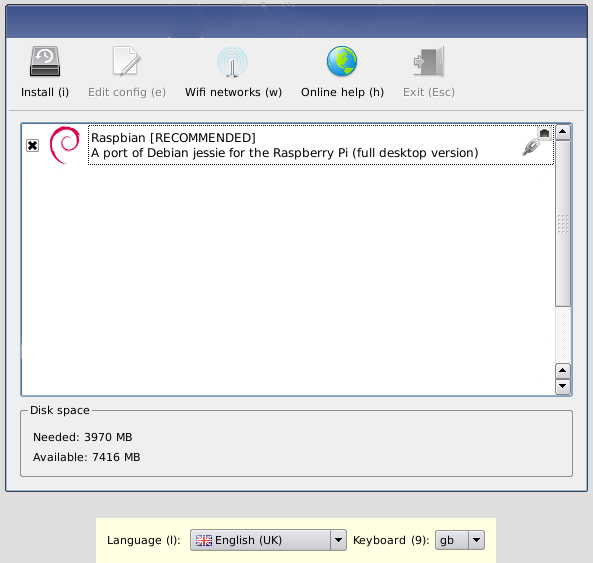
- In the previous screenshot, we clicked on the Language option. For our purposes, we will keep the default of English (UK). We will also keep the keyboard at the standard gb.
- As the Raspberry Pi 3 has wireless LAN, we can set up our Wi-Fi (for older boards, please plug a Wi-Fi dongle into a USB port or use the wired LAN port and skip the next step):
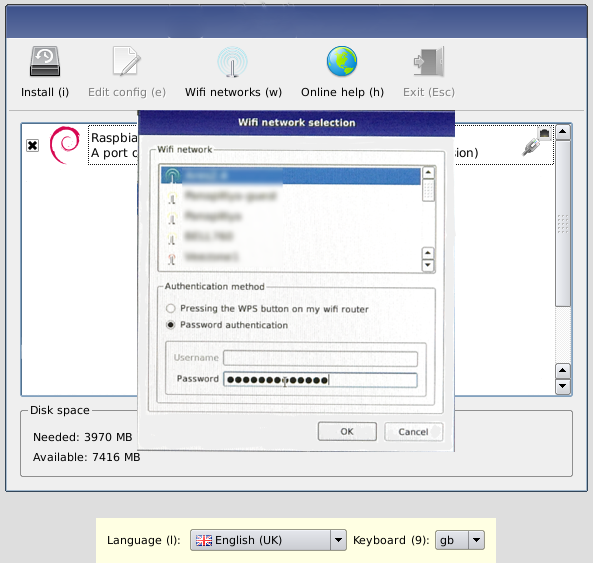
- Click on the Wifi networks (w) button. Choose the Authentication method using the radio buttons. Some routers are equipped with a WPS button that allows you to connect directly to the router. To use the password method, choose the Password authentication radio button and enter the password for your network. After connecting to your network, you will notice that there are now more operating system options to select from:
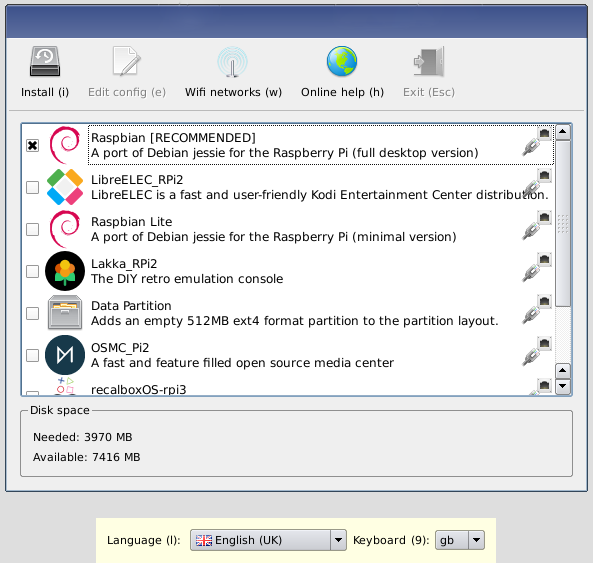
- We will go with the top option, Raspbian. Check the box beside Raspbian [RECOMMENDED] and then click on the Install (i) button at the top-left corner of the dialog. Raspbian will start installing on your Raspberry Pi. You will see a progress bar with previous graphics, describing various features of the Raspbian operating system:
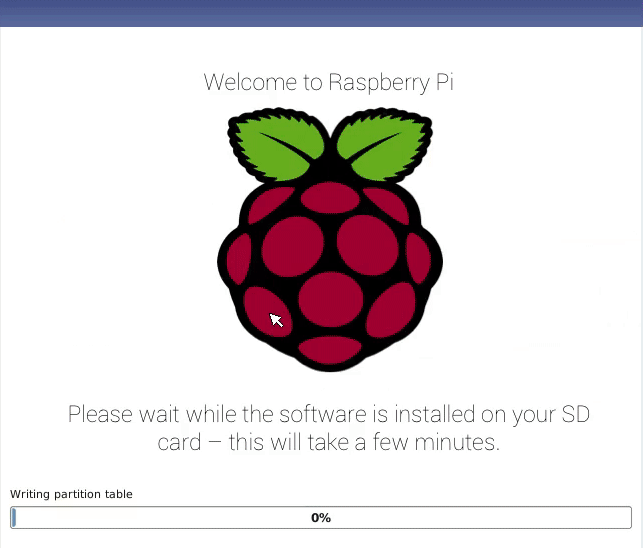
- After the progress bar hits 100%, the computer will reboot and you will see a screen with text before the default desktop loads up: