

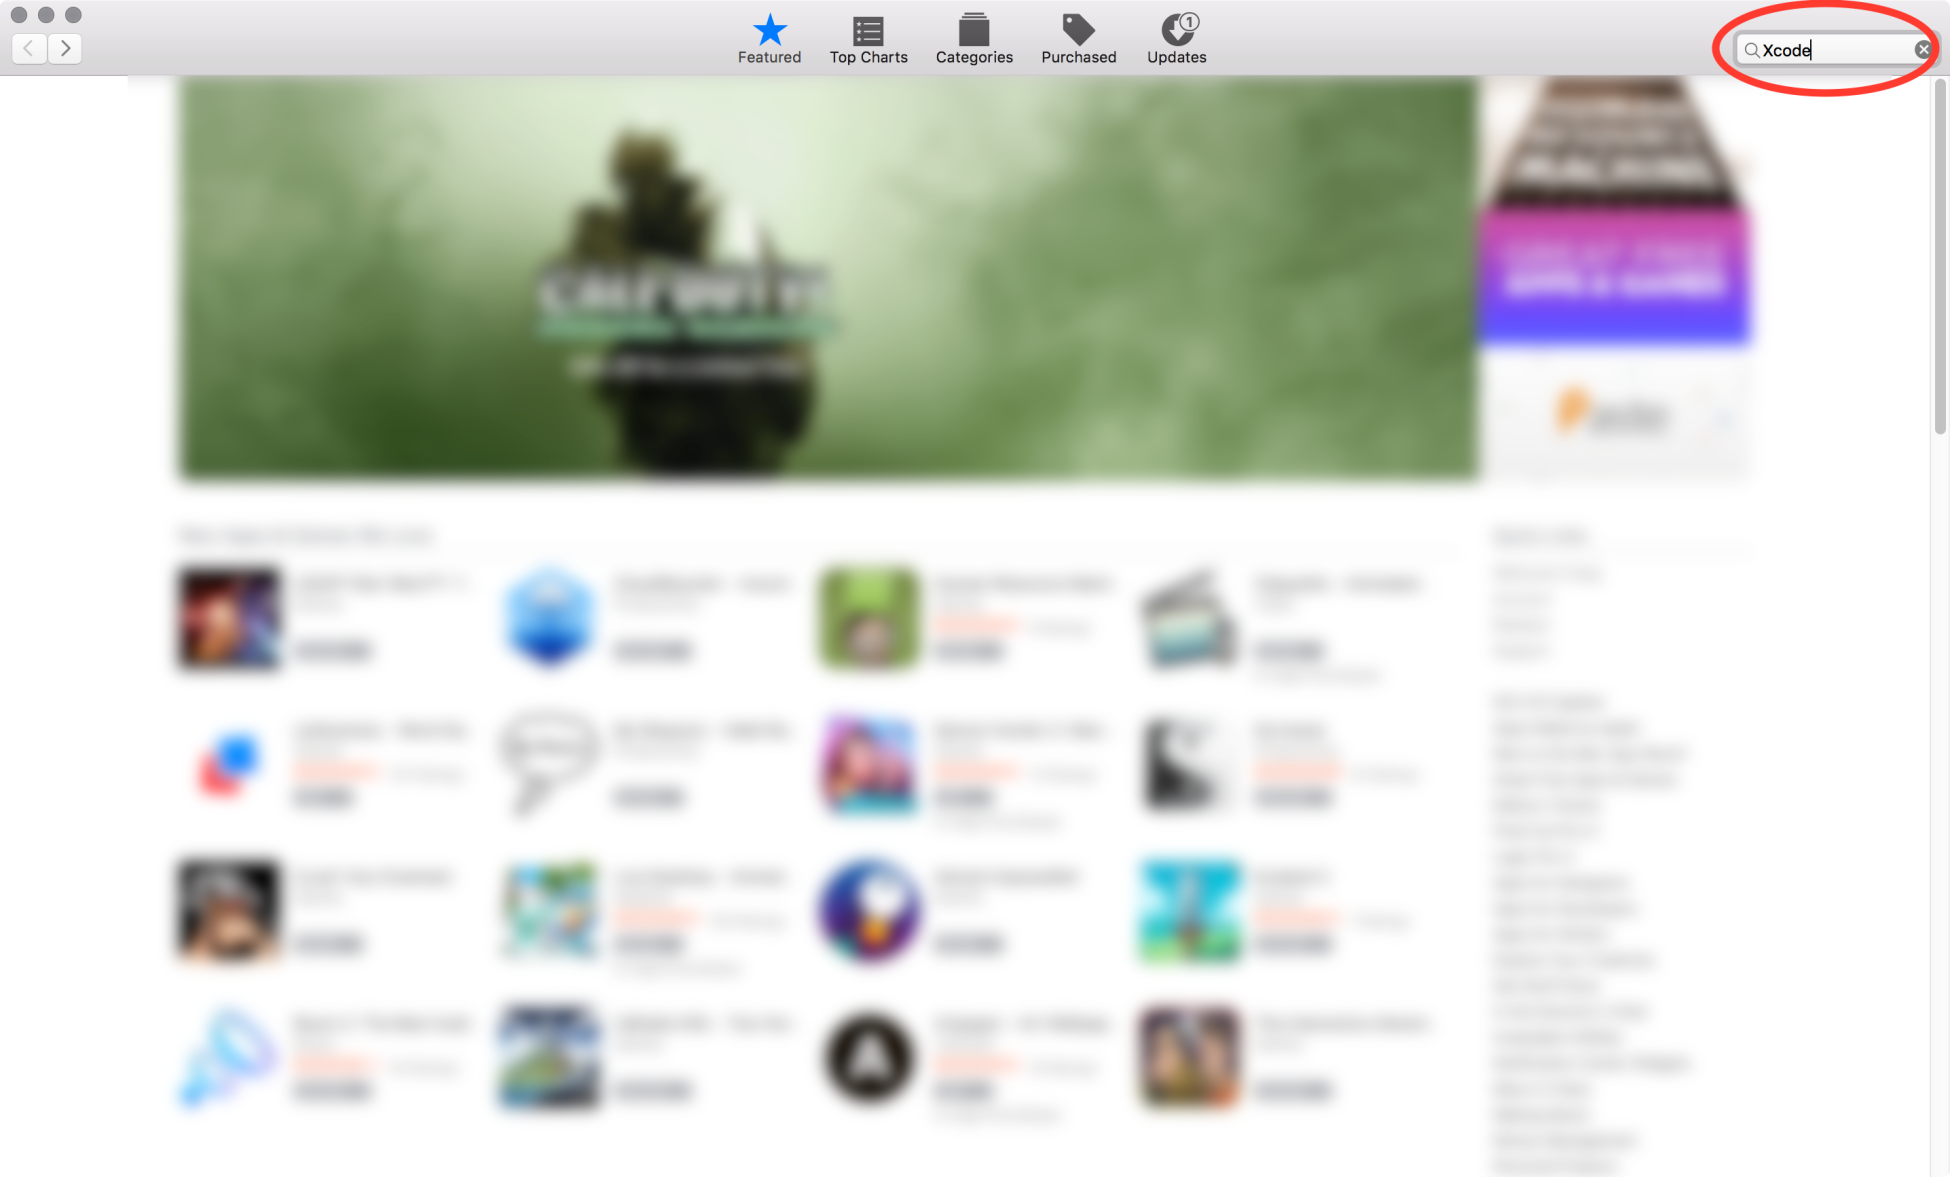
To download Xcode, launch the App Store on your Mac and then type Xcode into the search bar in the upper-right corner:
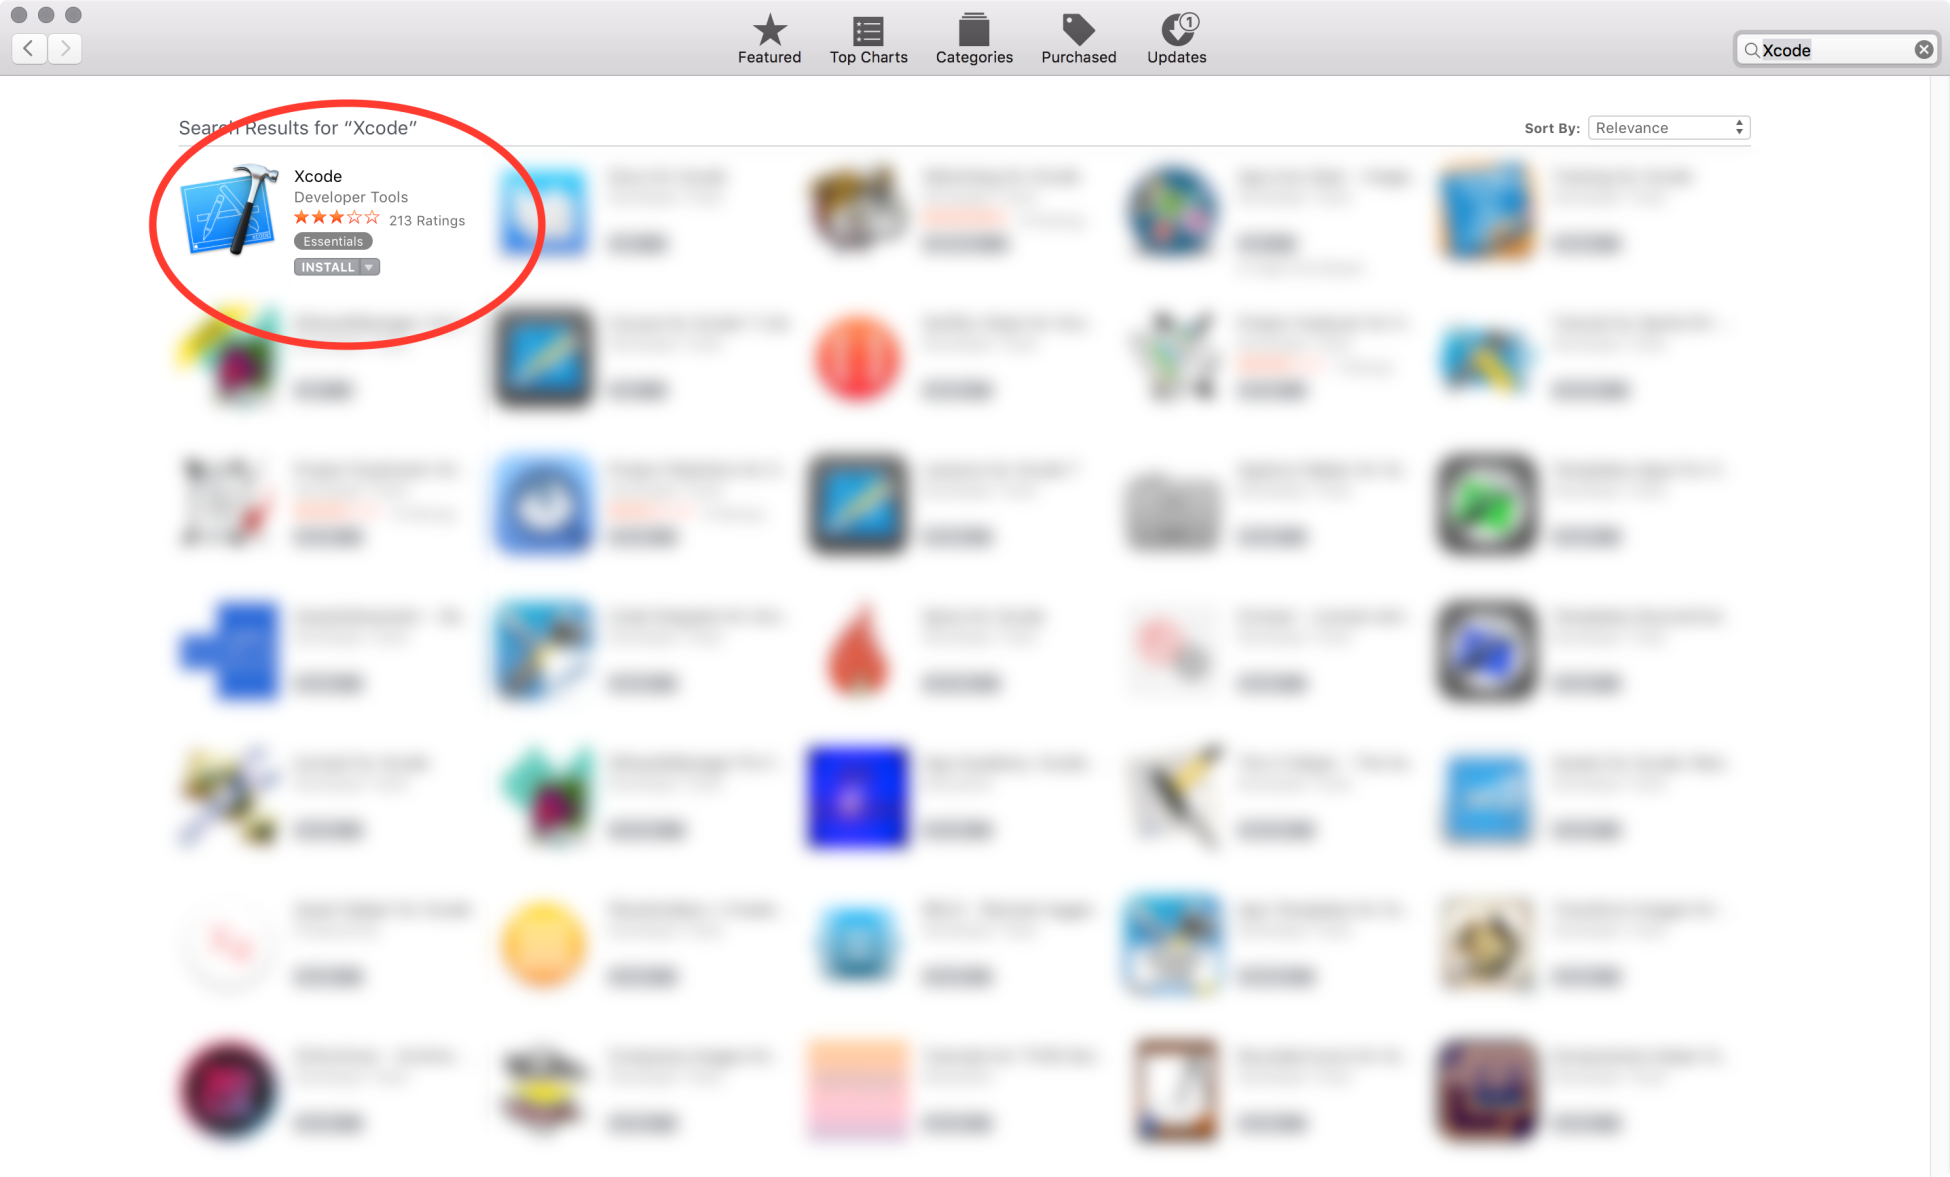
Next, click on INSTALL:
Once installed, launch Xcode, and you should see the following Welcome to Xcode screen:
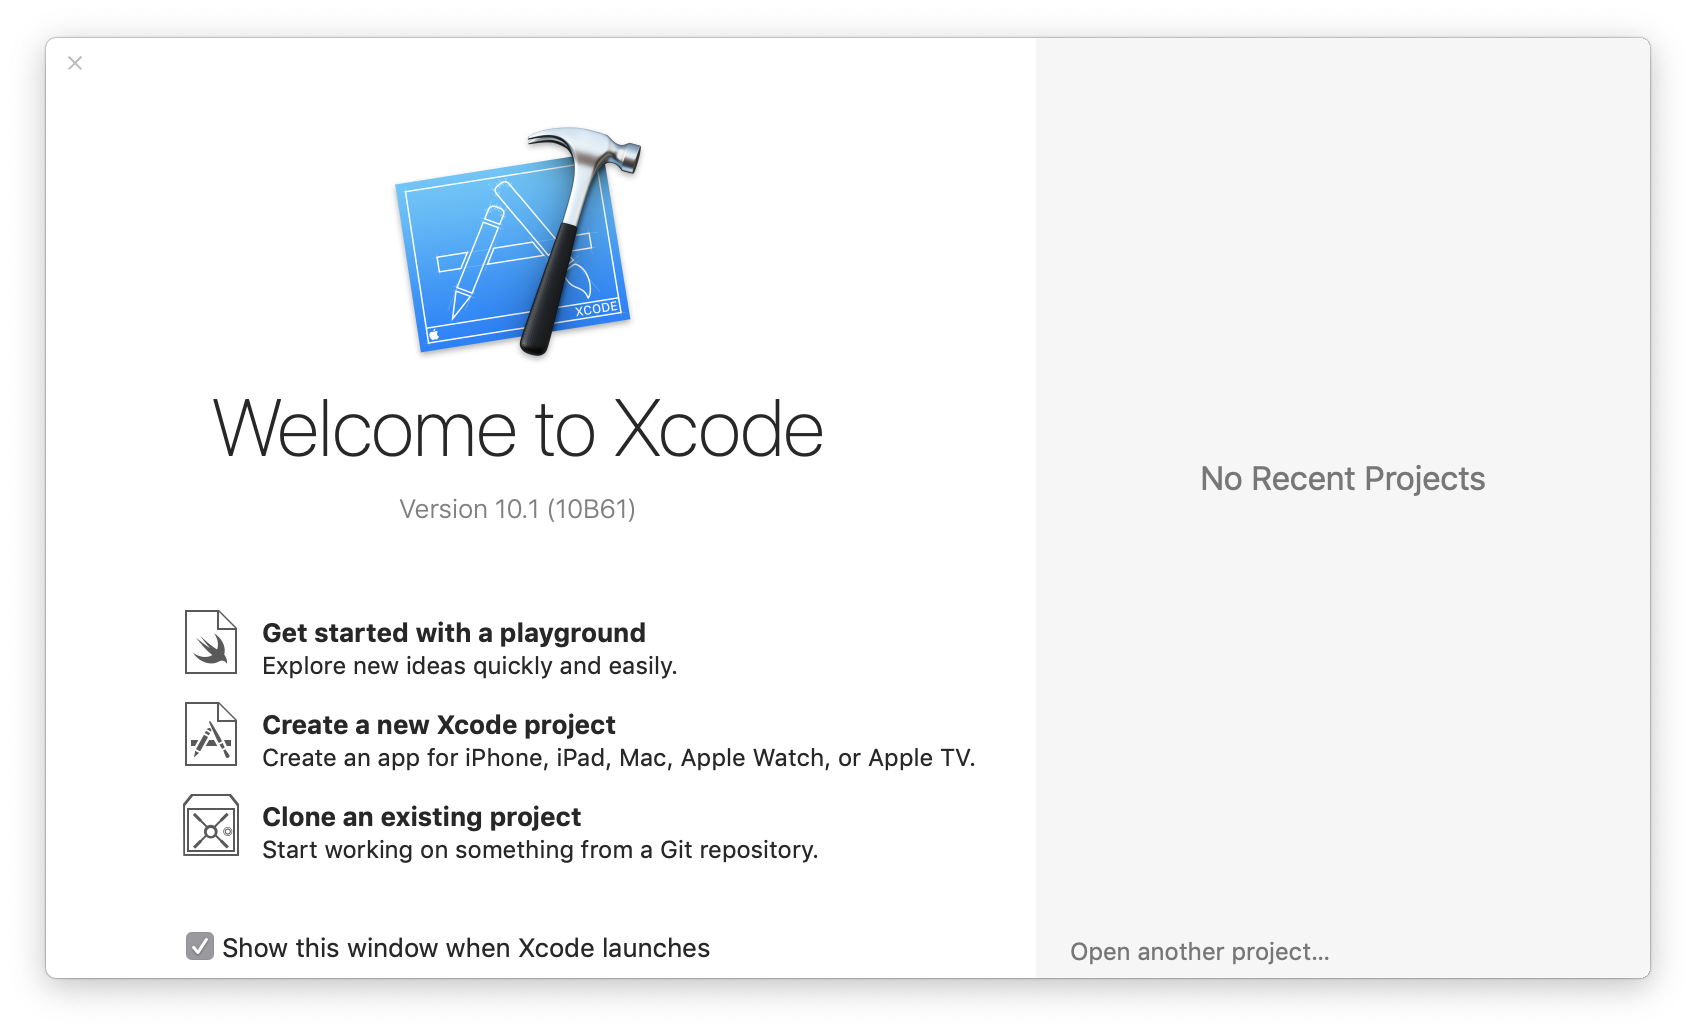
If this is the first time you have launched Xcode, then you will see No Recent Projects in the right-hand panel. If you have previously created projects, then you will see those listed to the right. To get started, we are going to click on Create a new Xcode project in the left-hand panel of the welcome screen. You will see the new project screen, as follows:
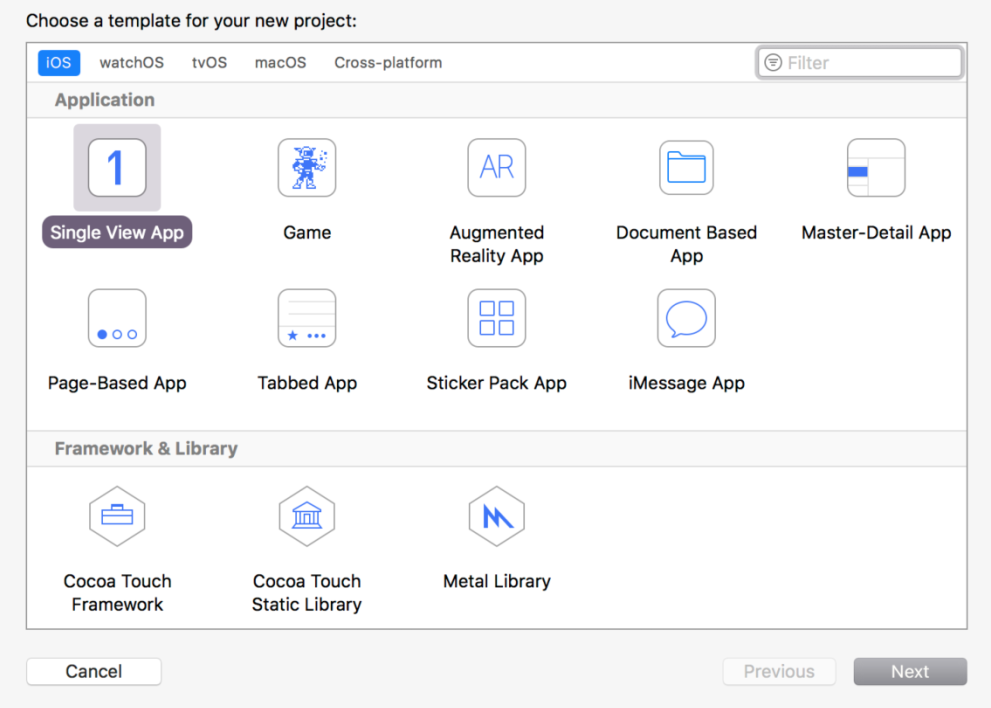
Across the top of this screen, you can select one of the following items: iOS, watchOS, tvOS, macOS, and Cross-platform. Since we are creating apps for iOS, make sure that you have iOS selected. Then, choose Single View App and click on Next. Now, you will see an options screen for a new project:
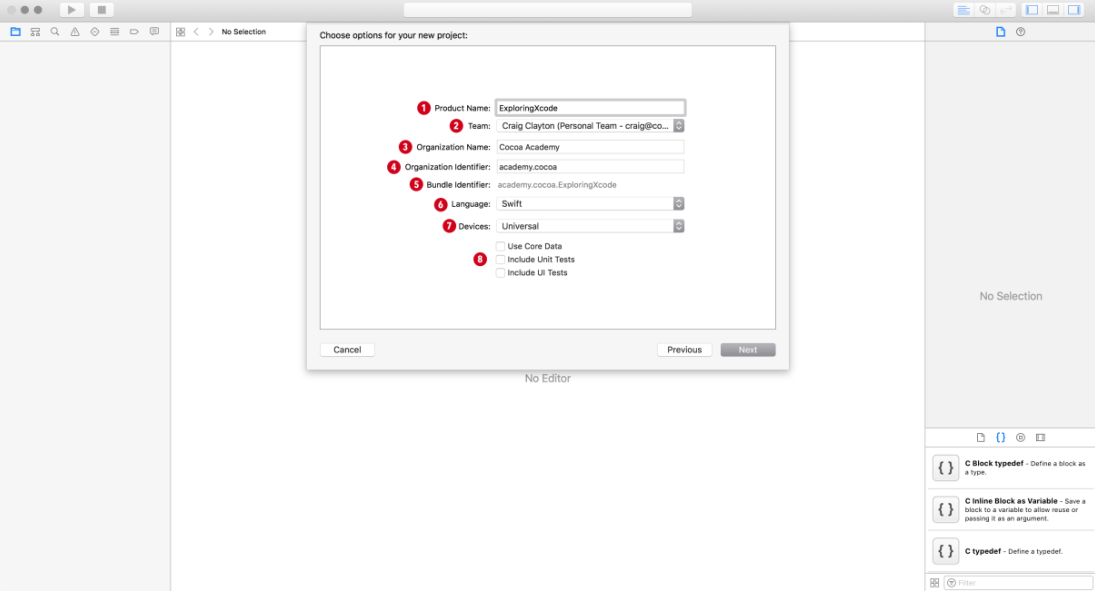
This option screen has the following seven items to complete or choose:
- Product Name: The product name is your app. We are going to set ours as ExploringXcode.
- Team: The team connects to your Apple account. We are going to ignore this for now, because we do not need the Team for this chapter. If you already have a team set up, leave it as is. We will cover this in greater detail later in this book.
- Organization Name: You can set the organization name to your company name, or just use your name.
- Organizer Identifier: You will set the organizer identifier to be your domain name in reverse. For example, my website URL is cocoa.academy, and therefore, my identifier is academy.cocoa. Since URLs are unique, it will ensure that no one else will have your identifier. If you do not have a domain, then use your first and last names for now. However, you will eventually have to purchase a domain if you want to submit your app to the Apple Store.
- Bundle Identifier: When you create a new project, Apple will combine your Product Name with your Organizer Identifier to create your unique bundle identifier. So, even if 10,000 people create this project, each person will have a different bundle identifier.
- Language: Set language to Swift.
- Checkboxes: You can uncheck Use Core Data, Include Unit Tests, and Include UI Tests, as these are things that we will not use in this chapter.
Now, select Next, and Xcode will prompt us to save our project. I have a dedicated folder for all my projects, but you can save it on your desktop for easy access.