

NetBeans comes pre-configured with a number of sample applications. To make sure everything is configured correctly, we will now deploy one of the sample applications to the integrated GlassFish application server that comes with NetBeans.
To open the sample project, we need to go to File | New Project, then select Samples | Web | Visual JSF from the categories list in the resulting pop-up window. Once we have selected Visual JSF from the categories list, a list of projects is displayed in the Projects list. For this example we need to select the Corporate Travel Center project.

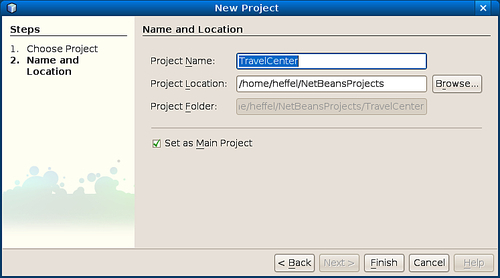
Clicking on the Next> button, we are prompted to enter a Project Name and Project Location. Typically the defaults are sensible.
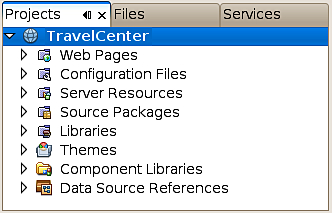
Once we click the Finish button, our new project is displayed in the Projects tab.
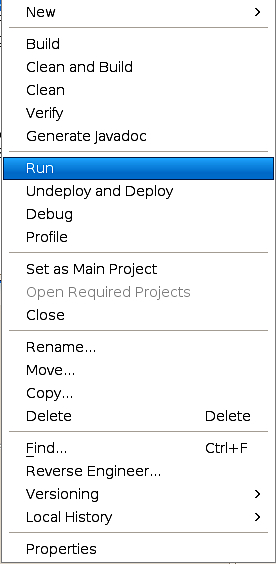
We can compile, package, and deploy our project all in one shot by right-clicking on it and selecting Run from the resulting pop-up menu.
At this point we should see the output of the build script. Also, both the integrated GlassFish application server and the integrated JavaDB RDBMS system should automatically start. The application server and RDBMS will only be started the first time we deploy our project, therefore the delay due to their initialization will not occur in subsequent deployments.

Once the project is deployed we should see NetBean's HTTP monitor. The HTTP monitor is a tool that helps us better develop web applications by providing values of request parameters, request, session and application attributes, request headers, and so on. The HTTP monitor will be discussed in detail in the next chapter.

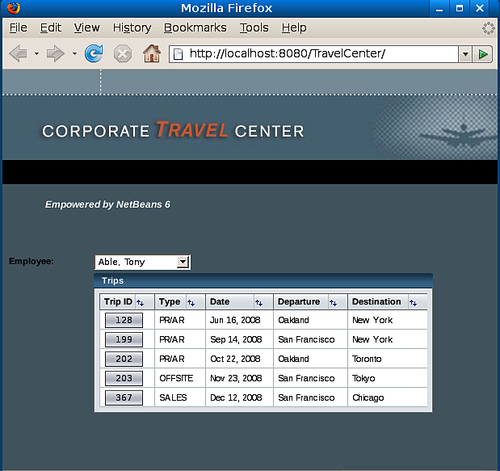
As soon as our application was deployed, a new browser should have automatically started, displaying the default page for our new application. We can select the browser that NetBeans will use by going to Tools | Options, then selecting the appropriate browser from the Web Browser drop-down in the General tab.
The sample web application we just deployed is a Visual JSF application. The application uses a JDBC connection to the sample travel database included with NetBeans. The application uses the Woodstock JSF components that are bundled with NetBeans, and interacts with data stored in the sample travel database included with NetBeans.
Note
Visual JSF Development, a NetBeans feature that allow us to build JSF applications graphically, is covered in detail in Chapter 6, Visual Web JSF Development.
If our browser is displaying a page similar to the one above, then we can be certain that NetBeans, GlassFish, and JavaDB are all working properly and we are ready to start developing our own Java EE applications.