

We now want to add the Silverlight RIA to a SharePoint site. This Silverlight application doesn't interact with the SharePoint services. It displays information about projects saved in the same .xap file.
In this case, we can add a Silverlight Web Part to a SharePoint site.
First, follow these steps to add the Silverlight RIA as a shared document in a SharePoint site:
1. Open your default web browser, view the SharePoint site, and log in with your username and password.
2. Click Site Actions | View All Site Content and SharePoint will display all sites, lists, and libraries in the active site.
3. Click on Shared Documents under Documents on the panel located at the left of the web page. SharePoint will display the shared documents library. These are the documents shared with the team.
4. Click on Add new document. The Upload Document dialog box will appear. Click on the Browse... button and enter the full path for the
SilverlightProjects.xapfile. Then, click Open and the document's name will be the.xapfile and its path, as shown in the next screenshot:
5. Click OK. Once the file finishes the upload process, the dialog box to define its properties as a shared document will appear. Enter
Silverlight projectsin Title andSilverlightin Managed Keywords.
6. Click on Save in the ribbon or on the button located at the bottom of the dialog box. The
.xapfile will appear in the Shared Documents list.
7. Right-click on the new document name,
SilverlightProjects, and select Copy Shortcut from the context menu that appears. This way, you will copy the URL for this shared document in the clipboard and you will be able to paste it when SharePoint asks you for its URL. In this case, the copied URL ishttp://xpsgaston/Shared%20Documents/SilverlightProjects.xap.
The .xap file is available as a shared document. Now, follow these steps to add a Silverlight Web Part to display the Silverlight RIA in a SharePoint site:
1. Click Site Actions | New Page and SharePoint will display a new dialog box requesting a name for the new page. Enter
Projects Gridand click on Create. SharePoint will display the Editing Tools for the new page.
2. Click Insert | Web Part in the ribbon and a new panel will appear. Select Media and Content in Categories and then Silverlight Web Part in Web Parts, as shown in the following screenshot:

3. Click Add. The Silverlight Web Part dialog box will appear. Paste the previously copied URL for the shared document, the
.xapfile. In this case, it ishttp://xpsgaston/Shared%20Documents/SilverlightProjects.xap, as shown in the next screenshot:
Note
If you don't have the URL for the the
.xapfile copied to the clipboard, you can open a new tab or a new browser window and access the shared documents as previously explained. Then, you can right-click on the desired document name and select Copy Shortcut from the context menu that appears. This way, you will be able to paste the URL in the Silverlight Web Part dialog box.Note
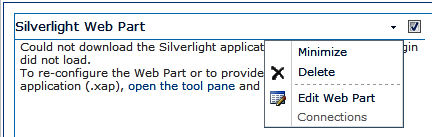
In certain SharePoint 2010 pre-release versions, the following error message could appear, Could not download the Silverlight application or the Silverlight Plugin did not load. To re-configure the Web Part or to provide a different Silverlight application (.xap), open the tool pane and then click Configure.
5. If the error appears, click on open the tool pane or click on the down arrow, located at the top and then select Edit Web Part.
6. The Silverlight Web Part pane will appear on the right. It will enable us to define many properties that affect the appearance and behavior for the Silverlight UI.
7. Enter
Projects List Viewerin Title.8. Click on Yes in Should the Web Part have a fixed height? and enter
600in Pixels.9. Click on Yes in Should the Web Part have a fixed width? and enter
800in Pixels.
10. Click OK. The title for the Web Part will change but the same error message will appear. Don't worry about that.
11. Click on the Save button in the ribbon. Now, the new page will appear displaying the previously created Silverlight RIA. However, the title won't appear as expected, as shown in the next screenshot:

12. Click Site Actions | Edit Page. This time, SharePoint will display the Silverlight RIA alive in the editing mode instead of the previously shown error message.
13. Click on the down arrow, located at the top, and then select Edit Web Part. The Silverlight Web Part pane will appear on the right.
14. Click on No. Adjust width to fit zone. in Should the Web Part have a fixed width?
15. Click OK and then on the Save button in the ribbon. Now, the new page will appear displaying the previously created Silverlight RIA with the title appearing as expected.

16. The Silverlight Web Part added to the page holds a running and active Silverlight application. Click on one of the grid rows and you will see the gradient animations for the selected theme. Click on a column header and the rows will be sorted according to it.

Following the previously explained steps, we can upload many Silverlight RIAs as shared documents and then add various Silverlight Web Parts to a single page. For example, we can rename the .xap file for the previous version of the SilverlightProjects application, without the application of the theme, to SilverlightProjectsNoTheme.xap. Then, we can follow the necessary steps to edit the page and add it as a new Silverlight Web Part to allow the users to choose between the different looks-and-feels to display the list of active projects.

This way, you can make many Silverlight applications available to SharePoint users by following very simple steps. SharePoint 2010 added the new Silverlight Web Part to simplify adding Silverlight applications as part of SharePoint pages.
When the user moves the slider, the font size for the data grid will change, as previously experienced with the Silverlight RIA running in a simple web page. However, this time, the application is running as a Silverlight Web Part in a SharePoint site, as shown. Each Silverlight Web Part offers a very responsive application to the user because they don't have to wait for server responses to refresh the Web Part.

It is easy for a SharePoint user to consume a Silverlight Application. Now, all the users that have access to the new page will be able to interact with the Silverlight UIs added to this page.
It is possible to add Silverlight applications to SharePoint through many different alternatives:
As a Silverlight Web Part
Included in a SharePoint Module
Included in a SharePoint Visual Web Part
The previous steps explained how to work with the first alternative. In the next chapters we will analyze the other two alternatives.
As previously explained, when we integrate Silverlight with SharePoint, there is going to be code running on both the client and the server. The Silverlight applications appear on the SharePoint pages. However, once the .xap files are downloaded, their code runs on the client. Each client will require the Silverlight 4 client runtime installed in order to be able to run the application. If it isn't installed, a message will appear indicating that it requires Silverlight.
When you see an animation in a Silverlight RIA, it is consuming processing power found in the client and it is not adding load to the SharePoint server. When you add code to interact with the SharePoint server, the requests consume processing power from the server. However, when the Silverlight application processes the results from a request this code is running on the client.
All the code that presents graphics on the screen runs on the client. When you move the mouse cursor over an element, the animations and the events run on the client. Therefore, you don't add huge processing power from the server when adding Silverlight applications to a SharePoint solution.