

Unless weird exceptions arise, Maven features are fully integrated within the three major IDEs of the market: Eclipse, IntelliJ IDEA, and NetBeans. So, on this side, nothing special needs to be done. However, integrating Android SDK to the IDEs may need some additional operations.
In this section, we will go through the steps you need to follow in order to set up Maven and Android SDK to be used with Eclipse IDE. Some months ago, Eclipse was Google's first choice for creating the Android Studio but recently IntelliJ won the battle. Users that want to use Eclipse Luna for Android development need to follow some steps that we will describe in the following section.
First of all, we need to manually install the Google plugin. Go to Help | Install new software. In the dialog that appears, enter the update site URL into the work with text box:
https://dl.google.com/eclipse/plugin/4.4
Add a name to remember the URL subscription and click OK. Then, wait for the list of modules to be retrieved. At the end, you should see something like the following screenshot:
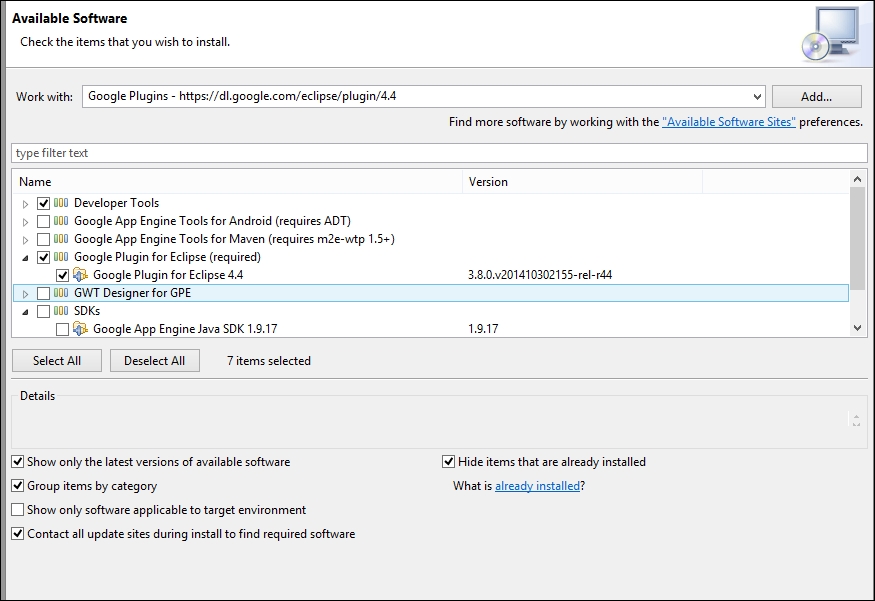
Check the boxes for the Developer Tools and the Google Plugin for Eclipse and then click on Next and finally accept the license agreement.
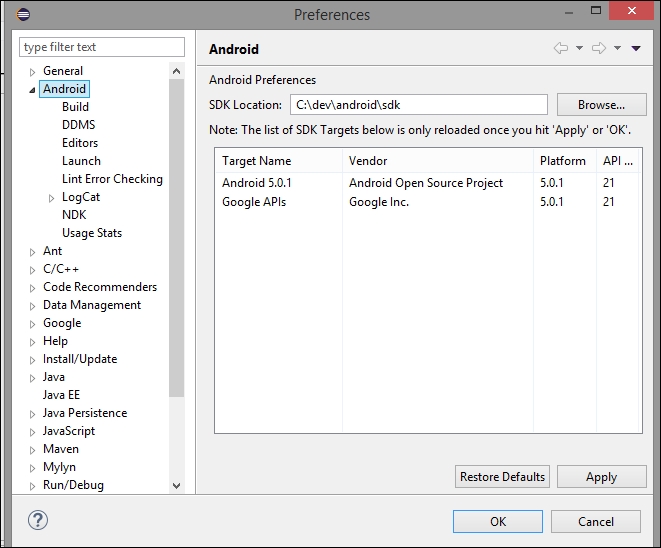
Then, set up the Android SDK: Window | Preferences | Android |. Browse to set the SDK Location field value | OK:
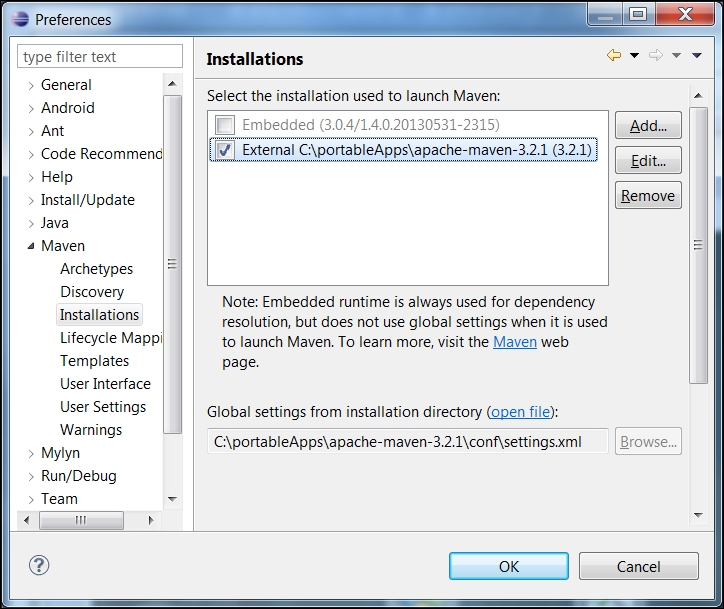
Besides, Eclipse embeds a built-in version of Maven (3.2.1 with Eclipse 4.4 Luna). Yet, you can use a specific version of Maven: go to Window | Preferences | Maven | Installations | Add and browse to the right location | OK, as shown in the following screenshot:
Open New (Alt+Shift+N) | Project | Maven |Maven Project. Click Next on the first window that is displayed and you see the following screenshot:
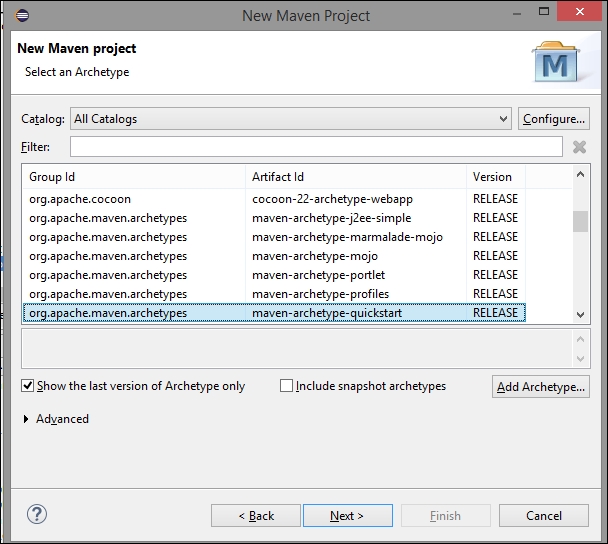
If you try to filter the catalog with the keyword "android", the list will probably show nothing; so, we need to add the archetype we want to use for the project creation. Click on the Add Archetype button and fill in the archetype details as shown in the next screenshot and click on the OK button:
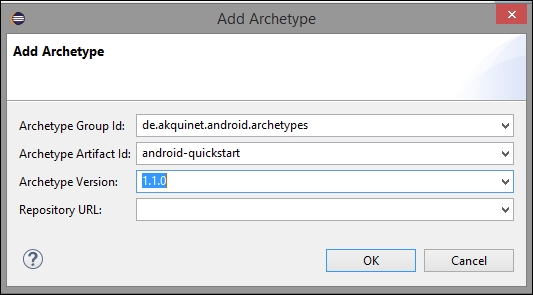
Now, the archetype should be available and selected in the dialog box we are looking at. Click again on Next and enter the same data we have specified to maven when we created the project using command line—see the following screenshot. Don't forget to change the platform property value to 21 as this is the SDK version we have installed so far. The default, which is 16, will cause the maven goals to fail because the corresponding SDK is not yet installed in our environment:

Now, you can open a terminal window and run the following command:
mvn clean install
You can also run the same goal using Eclipse and that's all. We have achieved the same result using our favorite IDE with just a few steps and we are now ready to start developing, testing, and running our first android application with Maven.
IntelliJ IDEA is an IDE designed for Java development.
Android Studio is promoted by Google as IDE for Android projects. Actually, Android Studio can be seen as a fork of main IntelliJ IDEA tool. Therefore, installation and configuration for both of them looks very similar or identical.
For pure Android projects, IntelliJ IDEA Community is sufficient: it includes core features such as Maven, Git, and Android support. Anyway, if you intend to develop enterprise projects linked with other Java/JEE frameworks and multitier architecture, you should consider installing the Ultimate version. Besides, beware that, at least so far, Android Studio is proposed as the suggested IDE from Google to develop Android applications.
Download IntelliJ IDEA from the page http://www.jetbrains.com/idea/download/ and/or Android Studio from this one: https://developer.android.com/sdk/index.html
On first launch, IntelliJ IDEA and Android Studio will ask you whether you already have an install. If you do, then hint at the location of the settings as shown in the following screenshot:
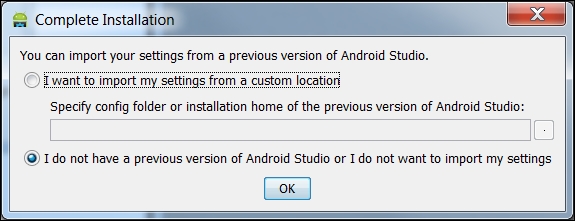
Of course, settings of an IntelliJ IDEA install can be used for Android Studio and vice versa. The next steps of setup differ for IntelliJ IDEA and Android Studio.
Go to the settings (Ctrl+Alt+S) and then Plugins. Verify that the Maven plugins are installed.
Unlike, do uncheck Gradle plugin as shown in the following screenshot:
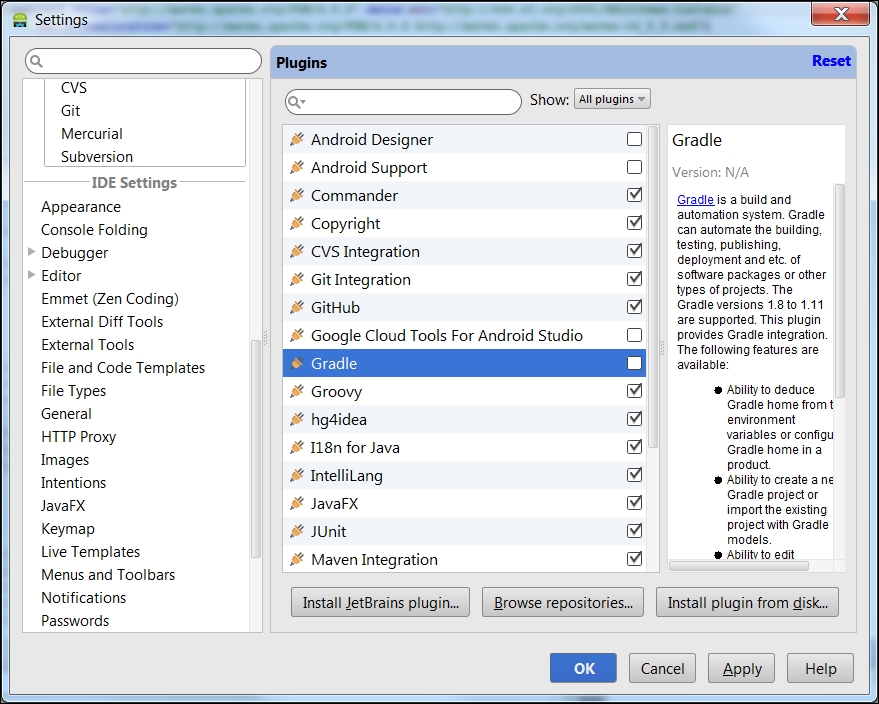
One might wonder why we need to disable Gradle to support Maven for Android development? Actually, by default, Android Studio considers Android/Maven projects as Eclipse-Android projects that are to be imported as regular Eclipse projects and then migrated to Gradle. This is the reason why we need to disable Gradle. Yet, this disables Android support, too. Don't worry, we will restore it later.
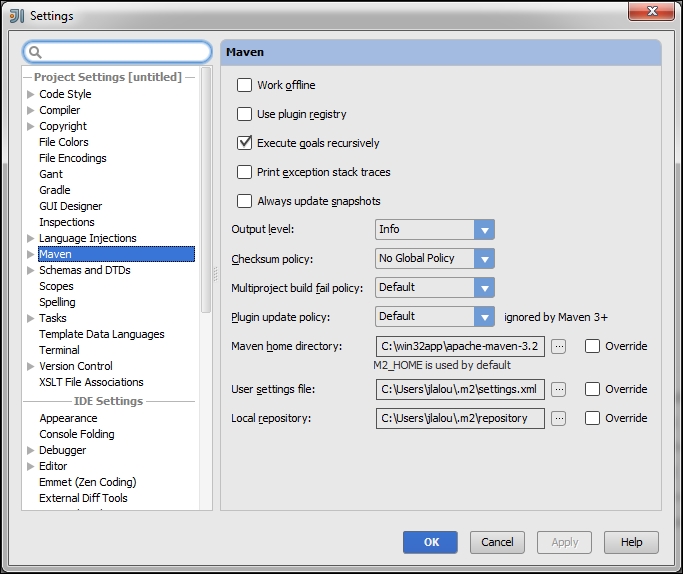
Besides, Android Studio should retrieve the Maven install location (based on the environment variable M2_HOME). If it does not, or if you need to use a custom location or version, you can navigate to Maven submenu inside the the settings (Ctrl+Alt+S) and override locations for Maven install, settings, and repository as shown in the following screenshot:

Importing the project with Android Studio requires a bit more work than with pure IntelliJ IDEA.
We will follow the following steps to import an existing Android Maven project to Android Studio and use this as our IDE to further development as follows:
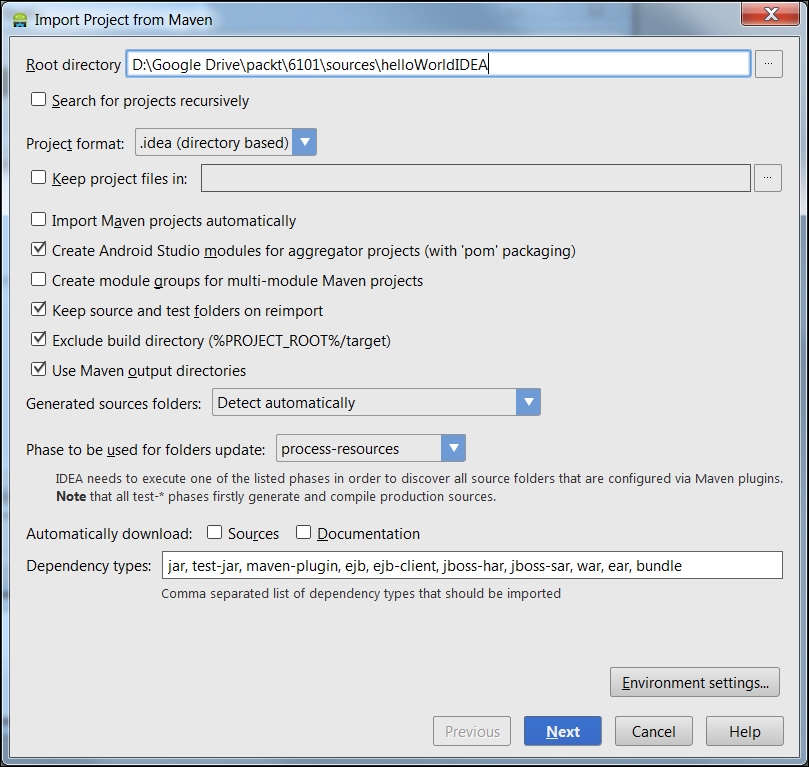
Go to File |Import Project as shown in the following screenshot:

Browse to the POM and select it. Click on OK. Accept default options:
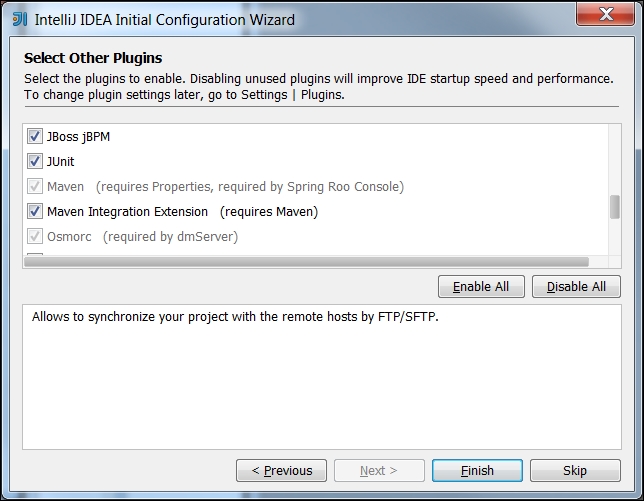
Confirm default options until Finish button. Android Studio displays the imported project, which is considered for the moment as a mere Java project, without any Android-specifics.
Go to the settings (Ctrl+Alt+S) | Plugins, restore the disabled plugins: Android Designer, Android Support, Google Cloud Tools for Android Studio, and Gradle.
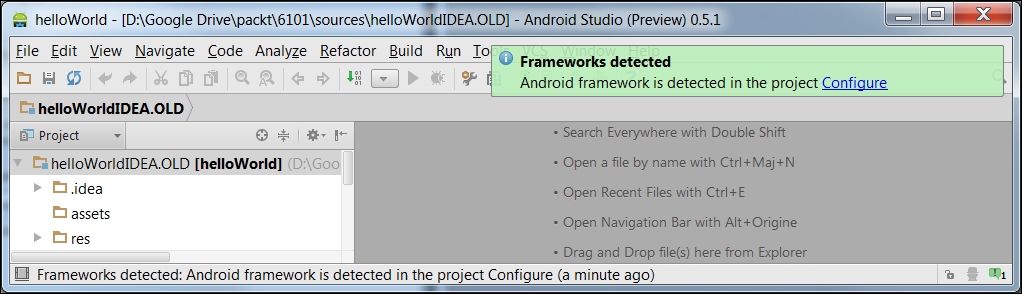
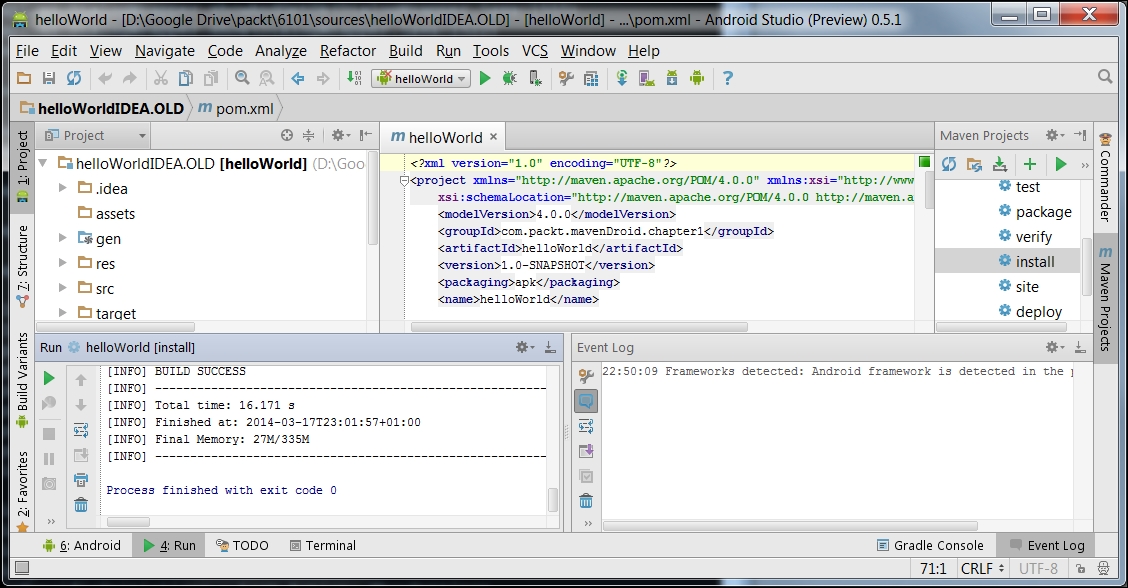
Restart Android Studio. The IDE informs you that the Android framework is detected. Click on Configure as shown in the following screenshot:
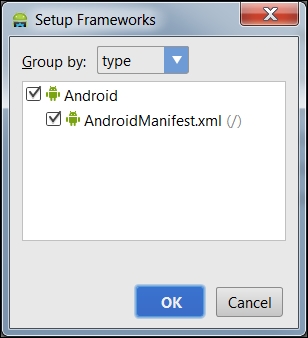
Check AndroidManifest.xml option and then click on OK:
Open the project structure (Ctrl+Alt+Shift+S) | SDKs. Click on the + sign (shortcut: Alt+Insert) | Add a new SDK | Select Android SDK | Browse to
ANDROID_HOMEvariable | OK | Confirm both Java SDK and Build target | OK: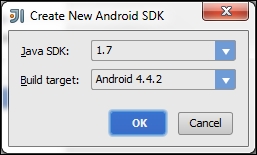
You can run Maven to build the project from Android Studio. You are now ready to develop!
NetBeans is the third commonly used IDE in Java development community. Originally maintained and promoted by Sun, now a division of Oracle, NetBeans still has features that fits the needs of Android development.
Download NetBeans from https://netbeans.org/downloads/. Install it.
Let's start the setup by following these steps:
Go to Tools | Plugins. In the fourth tab ,that is, Installed, check whether Maven plugin is installed. If needed, install or update it as shown in the following screenshot:

Like Eclipse, a default version of Maven is embedded; yet, you can override it: Tools | Options | Java | Maven | Executions | Maven Home.
Android plugin for NetBeans is NBAndroid. It is not available through default update centers. Besides, the features of free version are poor and limited. Anyway, a 1-month evaluation plan is offered.
Go to Settings tab. Add and enter the name and URL, respectively, NBAndroid and
http://nbandroid.org/updates/updates.xml, as shown in the following screenshot: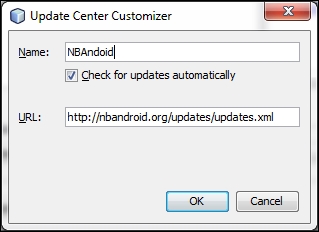
Go to Available Plugins, check Android and NBAndroid Extensions (NBAndroid Gradle Support is not needed, unless you think of using both Maven and Gradle), and then Install. Accept the license, dismiss the warning about nonsigned modules, and restart NetBeans.
Go to Tools | Options | Miscellaneous | Android | set Android SDK location as shown in the following screenshot:

Go to File | Open Project (Ctrl+Shift+O), browse until the folder containing the POM. You are ready to develop with Android.
Tip
Downloading the example code
You can download the example code files for all Packt books you have purchased from your account at http://www.packtpub.com. If you purchased this book elsewhere, you can visit http://www.packtpub.com/support and register to have the files e-mailed directly to you.