

Now that you have a good understanding of the overall architecture of JIRA, the basic system requirements, and the various installation options, we are ready to deploy our own JIRA instances.
In the following exercise, we will be installing and configuring a fresh JIRA instance for a small production team. We will perform our installation on a Windows platform with a MySQL database server. If you are planning to use a different platform or database, refer to the vendor documentation on installing the required software for your platform.
In this exercise, you will do the following:
Install a fresh instance of JIRA Software
Connect JIRA to a MySQL database
We will continue to use this JIRA instance in our subsequent chapters and exercises as we build our help desk implementation.
For our deployment, we will use the following:
JIRA standalone distribution 7.1.8
MySQL 5.7.13
Microsoft Windows 7
Since we will be using the installer package with Java bundled, you can skip this section. However, if you are using the ZIP archive or WAR distribution, you need to make sure that you have Java installed on your system.
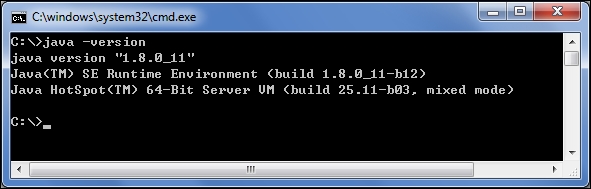
JIRA 7 requires JRE version 8 (1.8) or a newer run. You can verify the version of Java you have by running the following command in a Command Prompt:
java -version
The preceding command tells us which version of Java is running on your system, as shown in the following screenshot:
If you do not see a similar output, then chances are you do not have Java installed. You will need to perform the following steps to set up your Java environment. We will start by installing JDK on your system:
Download the latest JDK from http://www.oracle.com/technetwork/java/javase/downloads/index.html.
Double-click on the downloaded installation file to start the installation wizard.
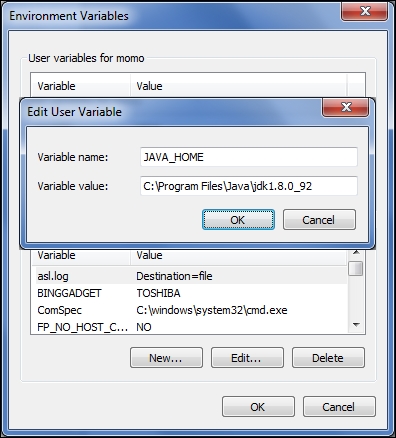
Select where you would like to install Java, or you can simply accept the default values. The location where you install JDK will be referred to as
JAVA_HOMEfor the rest of this book.Create a new environment variable named
JAVA_HOMEwith the value set to the full path of the location where you installed Java. You can do this as follows:Open the System Properties window by holding down your Windows key and pressing the Pause key on your keyboard.
Select the Advanced system settings option.
Click on the Environment Variable button from the new popup.
Edit the
PATHenvironment variable and append the following to the end of its current value:;%JAVA_HOME%\bin
Test the installation by typing the following command in a new Command Prompt:
java -version
This will display the version of Java installed, if everything is done correctly. In Windows, you have to start a new Command Prompt after you have added the environment variable to see the change.
The next step is to prepare an enterprise database for your JIRA installation. JIRA requires a fresh database. If, during the installation process, JIRA detects that the target database already contains any data, it will not proceed. If you already have a database system installed, then you may skip this section.
To install MySQL, simply perform the following steps:
Download MySQL from http://dev.mysql.com/downloads, select MySQL Community Server, and then select the MSI installer for Windows.
Double-click on the downloaded installation file to start the installation wizard.
Click on Install MySQL Products on the welcome screen.
Read and accept the license agreement and click on the Next button.
Select the Server only option on the next screen. If you are an experienced database administrator, you can choose to customize your installation. Otherwise, just accept the default values for all subsequent screens.
Configure the MySQL root user password. The username will be
root. Do not lose this password, as we will be using it in the next section.Complete the configuration wizard by accepting the default values.
Now that you have MySQL installed, you need to first create a user for JIRA to connect MySQL with, and then create a fresh database for JIRA to store all its data:
Start the MySQL Command Line Client by navigating to Start | All Programs | MySQL | MySQL Server 5.7 | MySQL 5.7 Command Line Client.
Enter the MySQL root user password you set during installation.
Use the following command to create a database:
create database jiradb character set utf8;Here, we are creating a database called
jiradb. You can name the database anything you like. As you will see later in this chapter, this name will be referenced when you connect JIRA to MySQL. We have also set the database to use UTF-8 character encoding, as this is a requirement for JIRA. Using the following command, you need to ensure that the database uses the InnoDB storage engine to avoid data corruption:grant all on jiradb.* to 'jirauser'@'localhost' identified by 'jirauserpassword';We are doing several things here. First, we create a user called
jirauserand assign the passwordjirauserpasswordto him. You should change the username and password to something else.We have also granted all the privileges to the user for the
jiradbdatabase that we just created so that the user can perform database operations, such as create/drop tables and insert/delete data. If you have named your database something other thanjiradb, then make sure that you change the command so that it uses the name of your database.This allows you to control the fact that only authorized users (specified in the preceding command) are able to access the JIRA database to ensure data security and integrity.
To verify your setup, exit the current interactive session by issuing the following command:
quit;Start a new interactive session with your newly created user:
mysql -u jirauser -pYou will be prompted for a password, which you have set up in the preceding command as
jirauser.Use the following command:
show databases;This will list all the databases that are currently accessible by the logged-in user. You should see
jiradbamong the list of databases.Examine the
jiradbdatabase by issuing the following commands:use jiradb; show tables;
The first command connects you to the
jiradbdatabase, so all of your subsequent commands will be executed against the correct database.The second command lists all the tables that exist in the
jiradbdatabase. Right now, the list should be empty, since no tables have been created for JIRA; but don't worry, as soon as we connect to JIRA, all the tables will automatically be created.
With the Java environment and database prepared, you can now move on to install JIRA. Normally, there are only two steps:
Download and install the JIRA application.
Run through the JIRA setup wizard.
The first step is to download the latest stable release of JIRA. You can download Atlassian JIRA from http://www.atlassian.com/software/jira/download.
The Atlassian website will detect the operating system you are using and automatically suggest an installation package for you to download. If you intend to install JIRA on a different operating system from the one you are currently on, make sure that you select the correct operating system package.
As mentioned earlier, with Windows there is a Windows installer package and a self-extracting ZIP package. For the purpose of this exercise, we will use the installer package (Windows 64-bit Installer):
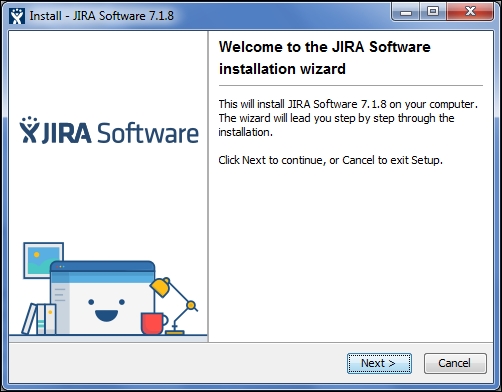
Double-click on the downloaded installation file to start the installation wizard and click on the Next button to continue.
Select the Custom Install option and click on the Next button to continue. Using the custom installation will let us decide where to install JIRA and will also provide many configuration options.

Select the directory where JIRA will be installed. This will become the
JIRA_INSTALLdirectory. Click on the Next button to continue.
Select where JIRA will store its data files, such as attachments and log files. This will become the
JIRA_HOMEdirectory. Click on the Next button to continue.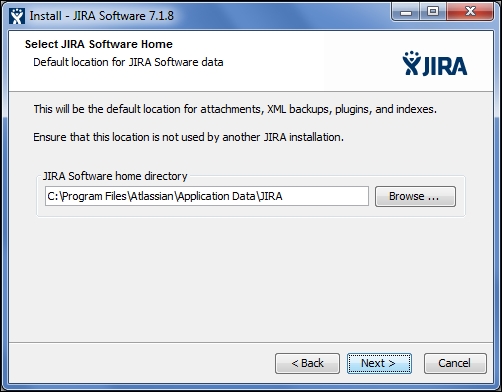
Select where you would like to create shortcuts to the start menu and click on the Next button to continue.
In the Configure TCP Ports step, we need to select the port on which JIRA will be listening for incoming connections. By default, JIRA will run on port
8080. If8080is already taken by another application or if you want JIRA to run on a different port such as port80, select the Set custom value for HTTP and Control ports option and specify the port numbers you want to use. Click on the Next button to continue.
Select whether you would like JIRA to run as a service. If you enable this option, JIRA will be installed as a system service and can be configured to start automatically with the server; see the Starting and stopping JIRA section for more details.
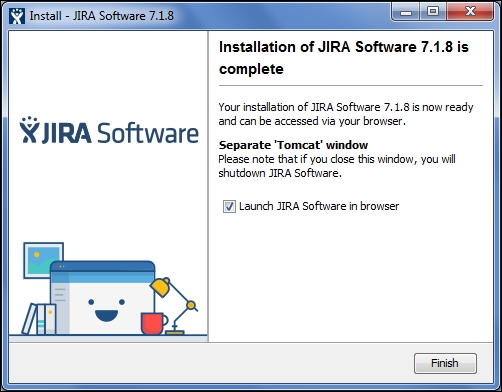
For the last step, review all the installation options and click on the Install button to start the installation.

Once the installation is complete, check the Launch JIRA Software in browser option and click on Finish. This will close the installation wizard and open up your web browser to access JIRA. This might take a few minutes to load as JIRA starts up for the first time.
JIRA does not come bundled with the MySQL database driver, so we have to install it manually. You can download the required driver from http://dev.mysql.com/downloads/connector/j/. Once downloaded, you can install the driver by copying the driver JAR file into the JIRA_INSTALL/lib directory. After that, you need to restart JIRA. If you have installed JIRA as a Windows service in step 9, refer to the Starting and stopping JIRA section.
JIRA comes with an easy-to-use setup wizard that will walk you through the installation and configuration process in six simple steps. You will be able to configure the database connections, default language, and much more. You can access the wizard by opening http://localhost:<port number> in your browser, where the <port number> is the number you have assigned to JIRA in step 6 of the installation.
In the first step of the wizard, we need to select how we want JIRA to be set up. Since we are installing JIRA for production use, we will select the I'll set it up myself option.

For the second step, we will need to select the database we want to use. This is where we configure JIRA to use the MySQL database we have created earlier in this chapter. If you select the Built In option, JIRA will use its bundled in-memory database, which is good for evaluation purposes. If you want to use a proper database, such as in our case, you should select the My Own Database option.

After you have selected the My Own Database option, the wizard will expand for you to provide the database connection details. If you do not have the necessary database driver installed, JIRA will prompt you for it, as shown in the preceding screenshot.
Once you have filled in the details for your database, it is a good idea to first click on the Test Connection button to verify that JIRA is able to connect to the database. If everything is set up correctly, JIRA will report a success message. You should be able to move onto the next step by clicking on the Next button. This may take a few minutes, as JIRA will now create all the necessary database objects. Once this is done, you will be taken to step 3 of the wizard.
In the third step, you will need to provide some basic details about this JIRA instance. Once you have filled in the required fields, click on Next to move on to step 4 of the wizard.

In the fourth step, we need to provide a license key for JIRA. If you have already obtained a license from Atlassian, you can paste it into the Your License Key text box. If you do not have a license, you can generate an evaluation license by clicking on the generate a JIRA trial license link. The evaluation license will grant you access to JIRA's full set of features for one month. After the evaluation period ends, you will lose the ability to create new issues, but you can still access your data.

In the fifth step, you will be setting up the administrator account for JIRA. It is important that you keep the account details somewhere safe and do not lose the password. Since JIRA only stores the hashed value of the password instead of the actual password itself, you will not be able to retrieve it. Fill in the administrator account details and click on Next to move on to the sixth step.

Tip
This account is important and it can help you troubleshoot and fix problems later on. Do not lose it!
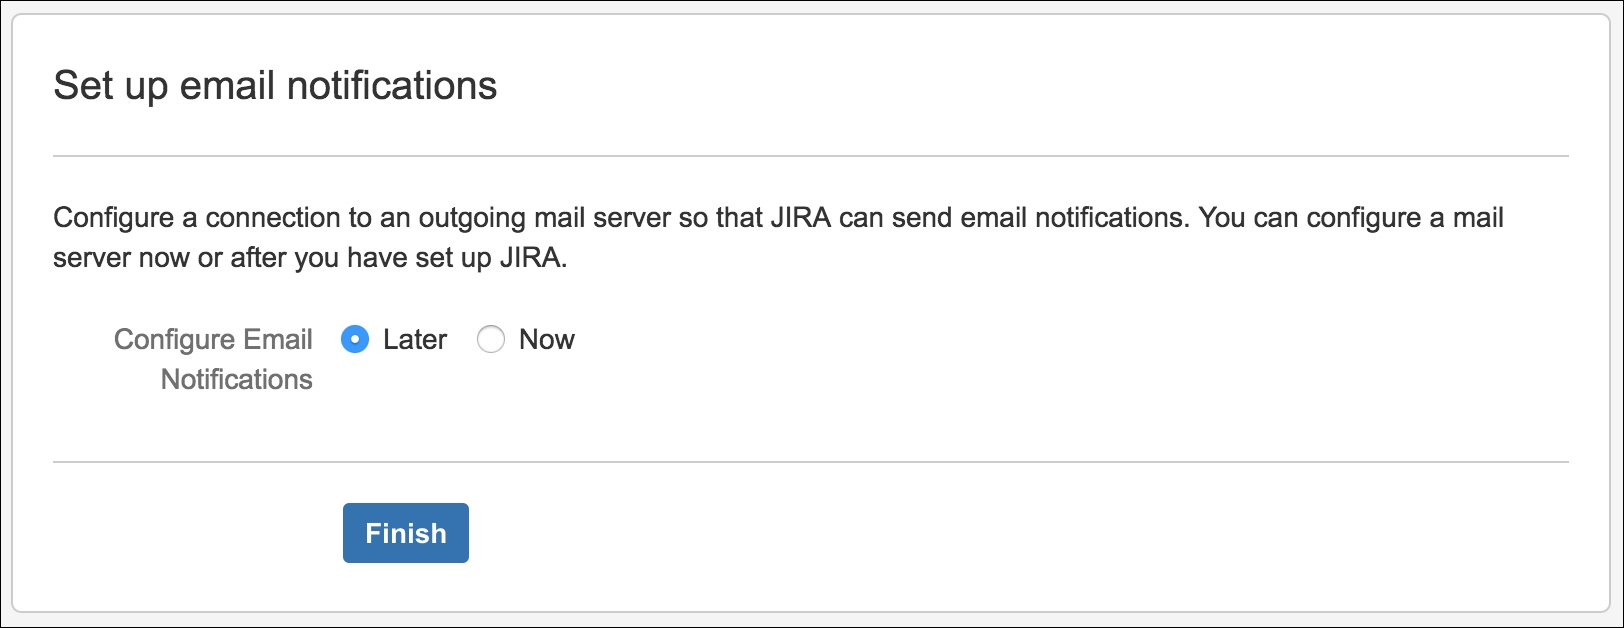
In the sixth step, you can set up your e-mail server details. JIRA will use the information configured here to send out notification e-mails. Notification is a very powerful feature in JIRA and one of the primary methods by which, JIRA communicates with users. If you do not have your e-mail server information handy, you can skip this step now by selecting the Later option and clicking on Finish. You can configure your e-mail server settings later, as you will see in Chapter 7, E-mails and Notifications.
Congratulations! You have successfully completed your JIRA setup. JIRA will then ask you to configure your new account, such as the default language and profile picture. Follow the onscreen prompts to set up your account, and once you are done, you should be presented with the JIRA dashboard, as shown in the following screenshot:

Since JIRA is installed as a Windows service, you can start, stop, and restart it via the Windows services console by navigating to Start | Control Panel | Administrative Tools | Services. In the services console, look for Atlassian JIRA, and you will be able to stop and start the application, as shown in the following screenshot:
