

Dynamics 365 allows you to edit an existing Business Process Flow. In this section, we will edit the Business Process Flow already created before, and add an out-of-the-box workflow to the Business Process Flow to send emails:
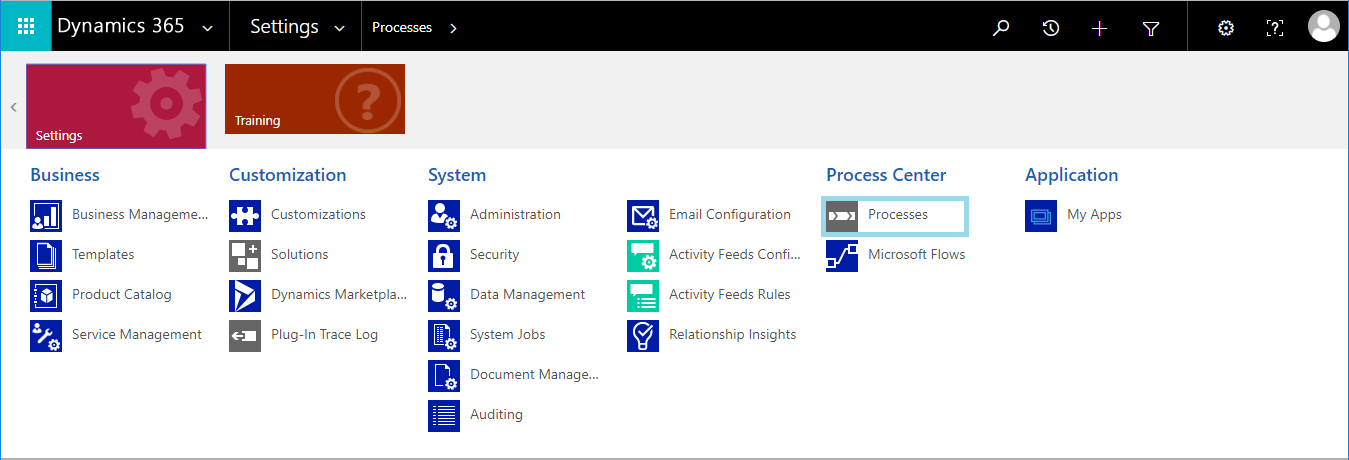
- Go to
Settings|Processes:
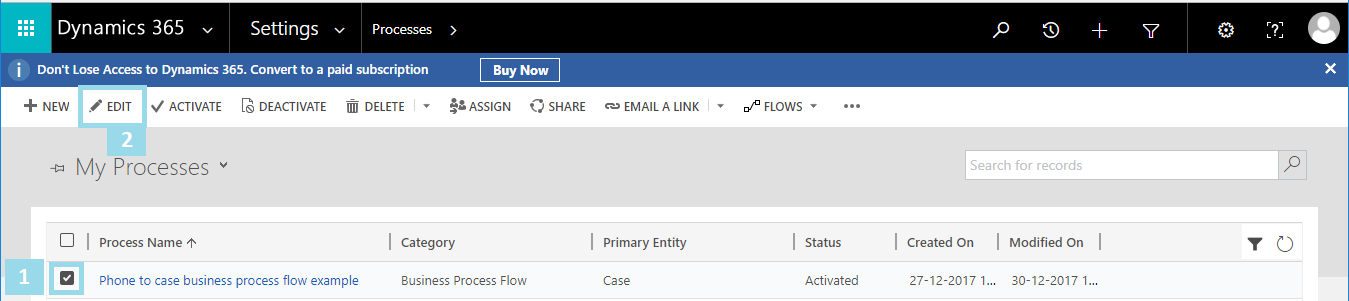
- Select the existing Business Process Flow that you want to edit. Next, click on the
EDITbutton on the action bar:
- The Business Process Flow designer will open. Expand the first stage of the Business Process Flow and select the
Addworkflow component:
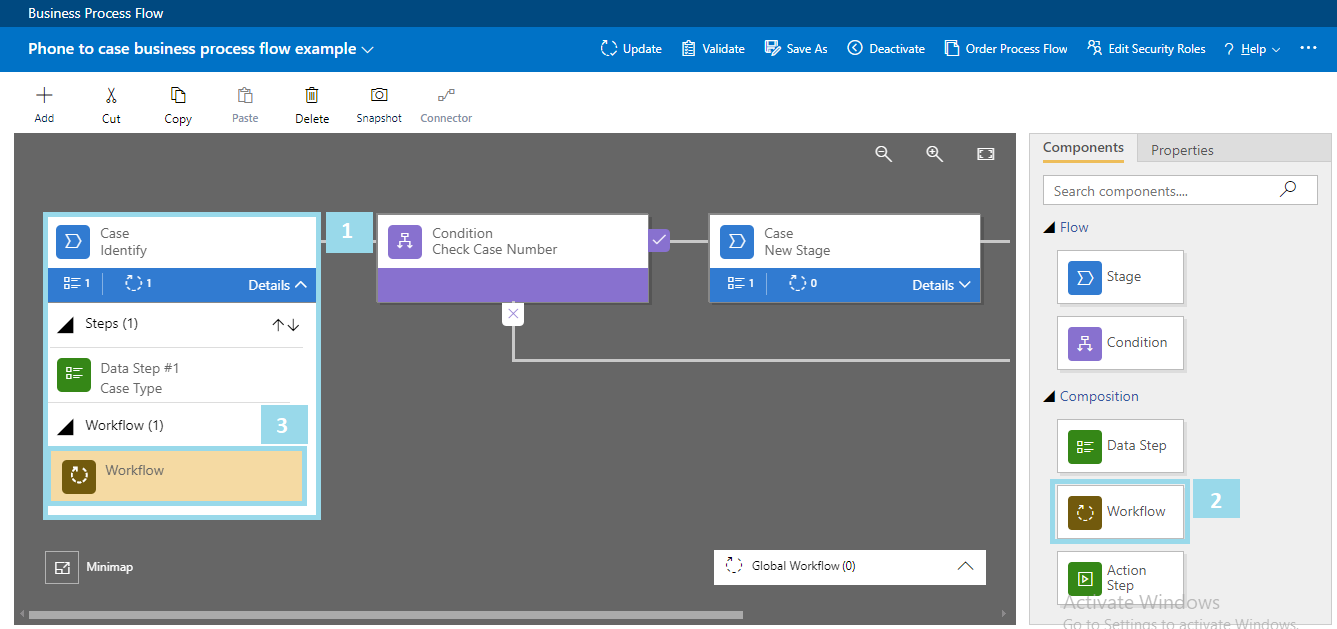
- Click on the
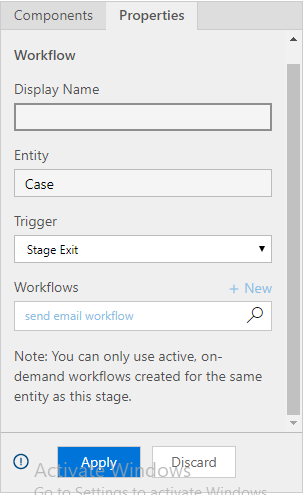
Workflowcomponent on the canvas and set its properties. Set the trigger condition toStage Exit, select workflow, and selectSend email workflow. To save and apply changes on the component, click on theApplybutton, as shown next:
Note
Note: Send Email workflow is a pre-configured out-of-the-box workflow to send an email created on a Case entity separately using the standard out-of-the-box workflow editor.
- Optionally, for adding new fields on the first...