

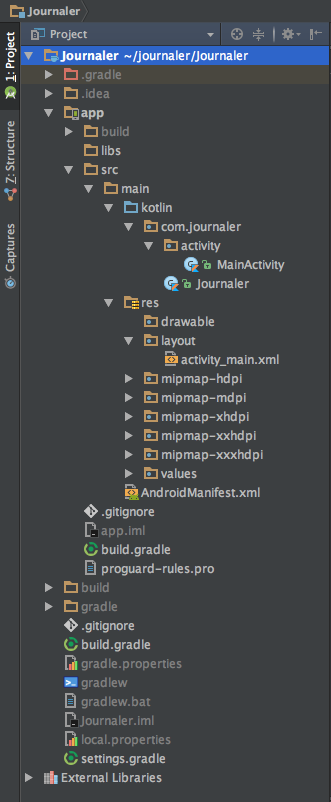
Android Studio contains everything you need to build an application. It contains source code and assets. All directories are created by the wizard we used to create our project. To see it, open the Project window on the left side of the IDE (click on View | ToolWindows | Project), as shown in the following screenshot:
A project module represents a collection of source files, assets, and build settings that divide projects into discrete functionality parts. The minimal number of modules is one. There is no real limit on the maximal modules number your project can have. Modules can be built, tested, or debugged independently. As you saw, we defined the Journaler project with only one module named app.
To add a new module, following these steps:
Go to File | New | New Module.
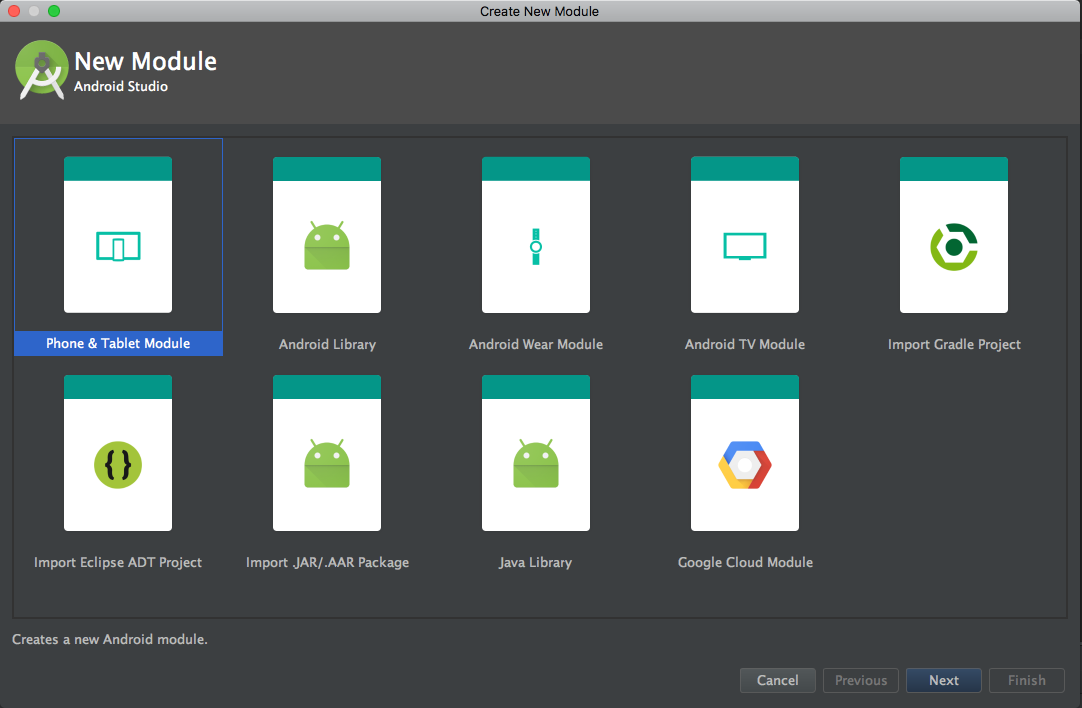
It's possible to create the following modules:
- Android Application Module represents a container for your application source code, resources, and settings. The default module name is app, like in our created example.
- Phone & Tablet Module.
- Android Wear Module.
- Glass Module.
- Android TV module.
- Library module represents a container for reusable code--a library. The module can be used as a dependency in other application modules or imported into other projects. When it's built, the module has an AAR extension--Android Archive instead of having an APK extension.
The Create New Module window offers the following options:
- Android Library: All types are supported in an Android project. The build result of this library is an Android Archiver (AAR).
- Java Library: Only supports pure Java. The build result of this library is a Java Archiver (JAR).
- Google Cloud Module: This defines a container for the Google Cloud backend code.
It is important to understand that Gradle refers to modules as individual projects. If your application code depends on the code for the Android library called Logger then in build.config, you use must include the following directive:
    dependencies {
      compile project(':logger')
    }
Let's navigate through the project structure. The default view Android Studio uses to display your project files is Android view. It doesn't represent the actual file hierarchy on disk. It hides certain files or directories that are not often used.
Android view presents the following:
- All the build-related configuration files
- All manifest files
- All other resource files in a single group
In each application, the module content is presented in these groups:
- Manifests and AndroidManifest.xml files.
- Java and Kotlin source code for application and tests.
- The res and Android UI resources.
- To see the real file structure of the project, choose Project view. To do this, click on Android view and, from the drop-down menu, choose Project.
By doing this, you will see a lot more files and directories. The most important of them are as follows:
- module-name/: This is the name of the module
- build/: This holds build outputs
- libs/: This holds private libraries
- src/: This holds all code and resource files for the module organized in the following subdirectories:
- main: This holds the main source set files--source code and resources shared by all build variants (we will explain build variants later)
- AndroidManifest.xml: This defines the nature of our application and each of its components
- java: This holds the Java source code
- kotlin: This holds the Kotlin source code
- jni: This holds the native code using the Java Native Interface (JNI)
- gen: This holds the Java files generated by Android Studio
- res: This holds application resources, for example, drawable files, layout files, strings, and so on
- assets: This holds files that should be compiled into an .apk file with no modification
- test: This holds the test source code
- build.gradle: This is the module level build configuration
- build.gradle: This is the project level build configuration
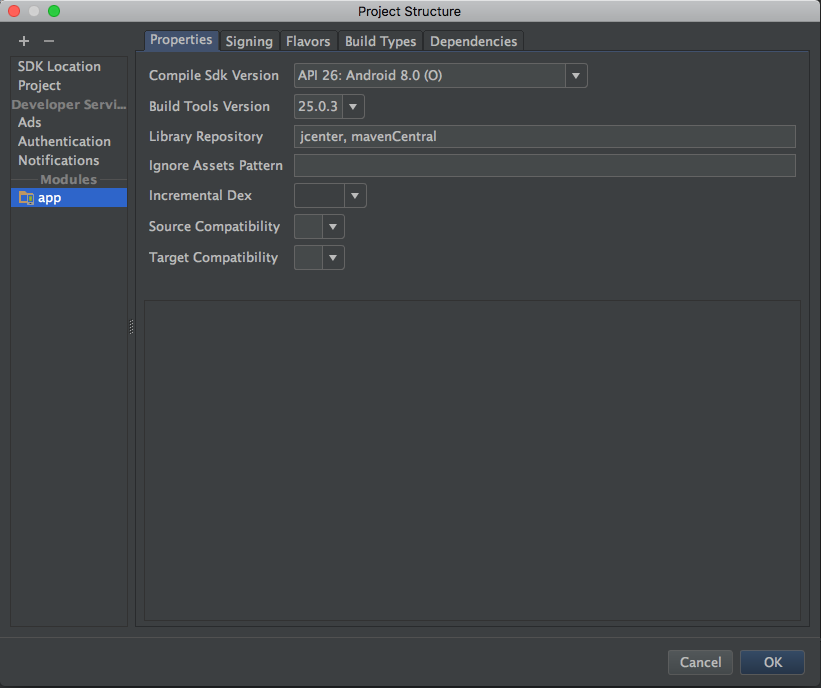
Choose File | Project Structure to change settings for the project in the following screenshot:

It contains the following sections:
- SDK Location: This sets the location of the JDK, Android SDK, and Android NDK that your project uses
- Project: This sets Gradle and Android Gradle plugin versions
- Modules: This edits module-specific build configurations
The Modules section is divided in the following tabs:
- Properties: This sets the versions of the SDK and build tools for module building
- Signing: This sets the certificate for APK signing
- Flavors: This defines flavors for the module
- Build Types: This defines build types for the module
- Dependencies: This sets dependencies needed by the module
Please refer to the following screenshot: