
In this recipe, we are going to build a simple C# class library. This library will have a simple public method that takes a parameter and returns a string. Also, we will be creating a blank Visual Studio solution and adding the library project. This solution will be used in later recipes.
Make sure you have installed a flavor of Visual Studio 2017 and its latest updates. At the time of writing, the latest Visual Studio 2017 version is 15.3.5.
- Open Visual Studio 2017.
- Click
File|New|Projectand, in theNew Projecttemplate dialog box, selectVisual Studio Solutionsunder theOther Project Typesnode in the left-hand pane, and selectBlank Solutionin the right-hand pane:


- Now you have a blank solution. Let's add a C# class library project to the solution. Click
Project|Add NewItem...or you can right-click on theChapter1.Librarysolution label in theSolution Explorer, and selectAdd|New Project.... - In the
Add New Projecttemplate dialog box, selectVisual C#in the left side, pane and selectClass Library (.NET Framework)in the right-hand pane:


- Now we have a brand new .NET Framework-based class library. In the
Solution Explorer(press Ctrl + Alt + L if you don't see theSolution Explorer), the default structure should look like this:
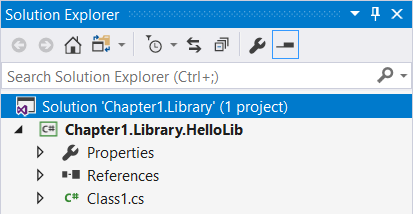
- Now we have a default template for a class library project. Let's rename
Class1.csto something more meaningful. Rename itHelloWorld.cs. You can simply soft click on the label of the file in theSolution Explorerand type the new name (or click on the filename label and press F2). ClickYesin the confirmation box to confirm the renaming. - Type the following code snippet in the
HelloWorldclass body:
      public string SayHello(string name)
      {
          return $"Hello {name}, congratulations !!!,
          this message is from the class library you created.";
}- Let's build our code to check that everything is fine. Click
Build|Build Solution, or press Ctrl + Shift + B, and the solution should build successfully. Let's test our class library in the next recipe. - Click
File|Save All, or press Ctrl + Shift + S, to save the solution and the class library project.
Let's see what we have done so far in this recipe and how it works. In steps 1 to 3, you have created a blank solution. Blank solutions are a very good starting point for any size of project. It gives you a whole new solution to start with. Later on, you can add more bits and pieces to your solution. Even though this is a simple introduction to class libraries, it is good practice to stick with proper naming conventions. It's not a must, but good practice. As you can see, we have given a name Chapter1.Library, so the name is meaningful and it says what our solution is about.
In the next steps, from 4 to 8, we have added a class library project to our blank solution. Now you have an idea how a solution will grow over time, from start to end. The template we have chosen is a full .NET Framework class library. We renamed the default Class1.cs template provided by Visual Studio. It's good practice to give a meaningful name to classes and the files we work with.
In steps 9 and 10, we added code to our class and checked all the syntax was correct by building the solution. It is also good practice to check for typos and other errors in syntax once in a while.