Book Image

OSWorkflow: A guide for Java developers and architects to integrating open-source Business Process Management

Book Image

OSWorkflow: A guide for Java developers and architects to integrating open-source Business Process Management

Overview of this book

OSWorkflow is an open-source workflow engine written entirely in Java with a flexible approach and a technical user-base target. It is released under the Apache License. You can create simple or complex workflows, depending on your needs. You can focus your work on the business logic and rules. No more Petri Net or finite state machine coding! You can integrate OSWorkflow into your application with a minimum of fuss. OSWorkflow provides all of the workflow constructs that you might encounter in real-life processes, such as steps, conditions, loops, splits, joins, roles, etc.This book explains in detail all the various aspects of OSWorkflow, without assuming any prior knowledge of Business Process Management. Real-life examples are used to clarify concepts.
Table of Contents (13 chapters)
OSWorkflow
Credits
About the Author
About the Reviewers
Introduction

Using the Design Studio to Create our First Chart


In this section, we will create a new Pentaho solution step by step.

Pentaho Design Studio is an IDE based on the popular Eclipse IDE. You can create and test a Pentaho solution from the Design Studio, visually or by editing the Action Sequence XML file manually.

Action Sequence files are much like a business process; you start with an input and a series of steps to generate content, in our case an HTML report, PDF, or an information chart. Action Sequence.XML files describe this process completely with the help of input and outputs.

We will begin by creating a new project in the IDE's workspace. This project will point to the samples included in Pentaho and we will add a new sample. Right-click the left window pane and select New Project, and the following dialog box will appear:

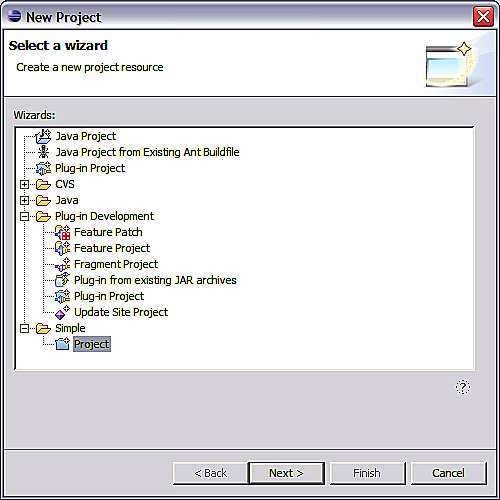
Click on the plus sign of Simple, select the leaf node Project, and then click the Next button to get the following window:

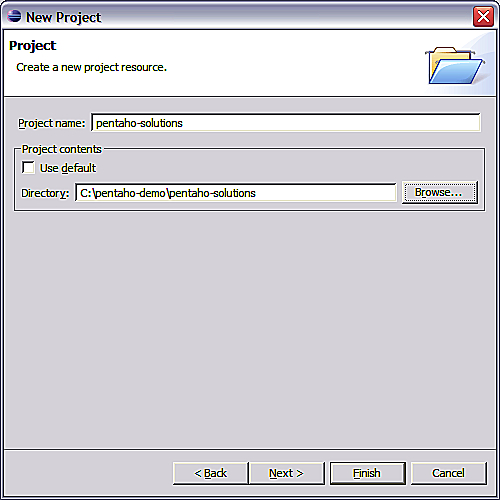
Put the project name you want in the...