

The PhoneGap API provides developers with the ability to receive coordinate and heading information from the device. We can use this information to build a custom compass tool that responds to the device movement.
Create the HTML layout for our page, including the
cordova-2.0.0.jsreference.<!DOCTYPE html> <html> <head> <meta name="viewport" content="user-scalable=no, initial-scale=1, maximum-scale=1, minimum-scale=1, width=device-width;" /> <title>Compass</title> <script type="text/javascript" src="cordova-2.0.0.js"></script> </head> <body> </body> </html>In this example, we will be referencing certain elements within the DOM by class name. For this we will use the XUI JavaScript library (http://xuijs.com/). Add the
scriptreference within theheadtag of the document to include this library.Let's also create the
scripttag block that will hold our custom JavaScript for interaction with the PhoneGap API, as shown in the following code:<head> <meta name="viewport" content="user-scalable=no, initial-scale=1, maximum-scale=1, minimum-scale=1, width=device-width;" /> <title>Compass</title> <script type="text/javascript" src="cordova-2.0.0.js"></script> <script type="text/javascript" src="xui.js"></script> <script type="text/javascript"> // PhoneGap code will go here </script> </head>Add a new
divelement within thebodytag and give this theclassattribute ofcontainer. This will hold our compass elements for display.The compass itself will be made up of two images. Both images will have an individual
classname assigned to them, which will allow us to easily reference each of them within the JavaScript. Add these two within thecontainerelement.Next, write a new
divelement below the images with theidattribute set toheading. This will hold the text output from the compass response:<body> <div class="container"> <img src="images/rose.png" class="rose" width="120" height="121" alt="rose" /> <img src="images/compass.png" class="compass" width="200" height="200" alt="compass" /> <div id="heading"></div> </div> </body>
With the initial layout complete, let's start writing our custom JavaScript code. First, let's define the
devicereadyevent listener. As we are usingXUI, this differs a little from other recipes within this chapter:Var headingDiv; x$(document).on("deviceready", function () { });When we have a result to output to the user of the application, we want the data to be inserted into the
divtag with theheadingidattribute.XUImakes this a simple task, and so we'll update theheadingDivglobal variable to store this reference:x$(document).on("deviceready", function () { headingDiv = x$("#heading"); });Let's now include the requests to the PhoneGap compass methods. We'll actually call two requests within the same function. First we'll obtain the current heading of the device for instant data, then we'll make a request to watch the device heading, making the request every tenth of a second thanks to the use of the
frequencyparameter. This will provide use with continual updates to ensure the compass is correct:navigator.compass.getCurrentHeading(onSuccess, onError); navigator.compass.watchHeading( onSuccess, onError, {frequency: 100});Both of these requests use the same
onSuccessandonErrormethod to handle output and data management. TheonSuccessmethod will provide us with the returned data in the form of aheadingobject.We can use this returned data to set the HTML content of the heading element with the generated message string, using the
headingDivvariable we defined earlier.Our visual compass also needs to respond to the heading information. Using the
CSSmethod fromXUI, we can alter thetransformproperties of the rose image to rotate using the returnedmagneticHeadingproperty. Here we reference the image by calling its individual class name,.rose:// Run after successful transaction // Let's display the compass data function onSuccess(heading) { headingDiv.html( 'Heading: ' + heading.magneticHeading + '° ' + convertToText(heading.magneticHeading) + '<br />' + 'True Heading: ' + heading.trueHeading + '<br />' + 'Accuracy: ' + heading.headingAccuracy ); // Alter the CSS properties to rotate the rose image x$(".rose").css({ "-webkit-transform": "rotate(-" + heading.magneticHeading + "deg)", "transform": "rotate(-" + heading.magneticHeading + "deg)" }); }With the
onSuccesshandler in place, we now need to add ouronErrormethod to output a user-friendly message, should we encounter any problems obtaining the information, as shown in the following code:// Run if we face an error // obtaining the compass data function onError() { headingDiv.html( 'There was an error trying to ' + 'locate your current bearing.' ); }When creating our message string in the
onSuccessfunction we made a call to a new function calledconvertToText. This accepts themagneticHeadingvalue from theheadingobject and converts it into a text representation of the direction for display. Let's include this function outside of theXUIdevicereadyblock:// Accept the magneticHeading value // and convert into a text representation function convertToText(mh) { var textDirection; if (typeof mh !== "number") { textDirection = ''; } else if (mh >= 337.5 || (mh >= 0 && mh <= 22.5)) { textDirection = 'N'; } else if (mh >= 22.5 && mh <= 67.5) { textDirection = 'NE'; } else if (mh >= 67.5 && mh <= 112.5) { textDirection = 'E'; } else if (mh >= 112.5 && mh <= 157.5) { textDirection = 'SE'; } else if (mh >= 157.5 && mh <= 202.5) { textDirection = 'S'; } else if (mh >= 202.5 && mh <= 247.5) { textDirection = 'SW'; } else if (mh >= 247.5 && mh <= 292.5) { textDirection = 'W'; } else if (mh >= 292.5 && mh <= 337.5) { textDirection = 'NW'; } else { textDirection = textDirection; } return textDirection; }Let's provide some CSS to position our two images on the screen and ensure the rose image is overlaying the compass image. Create a new file called
compass_style.cssand insert the following styles into it:.container { position: relative; margin: 0 auto; width: 200px; overflow: hidden; } #heading { position: relative; font-size: 24px; font-weight: 200; text-shadow: 0 -1px 0 #eee; margin: 20px auto 20px auto; color: #111; text-align: center; } .compass { padding-top: 12px; } .rose { position: absolute; top: 53px; left: 40px; width: 120px; height: 121px; }Finally, include the reference to the
compass_style.cssfile in theheadtag of the HTML document:<title>Compass</title> <link href="compass_style.css" rel="stylesheet" /> <script type="text/javascript" src="cordova-2.0.0.js"></script> <script type="text/javascript" src="xui.js"></script>
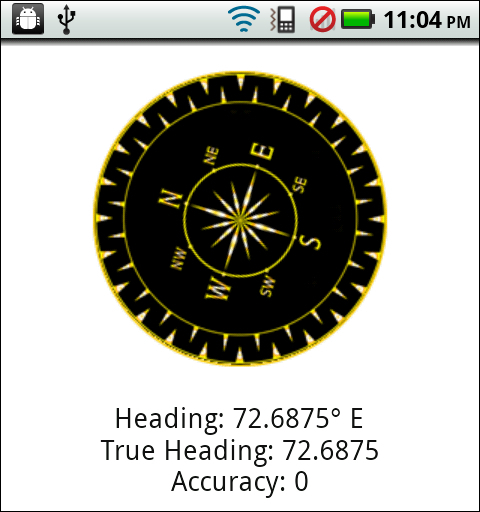
Running the application on the device, the output will look something like the following screenshot:
The watchHeading method from the PhoneGap API compass functionality retrieves periodic updates containing the current heading of the device at the interval specified as the value of the frequency variable passed through. If no interval is declared, a default value of 100 milliseconds (one-tenth of a second) is used.
With every successful request made on the continuous cycle, the onSuccess method is executed and formats the data for output onto the screen, as well as making a change to the transform property of the graphical element to rotate in accordance with the heading.
The onSuccess method returns the obtained heading information in the form of the compassHeading object, which contains the following properties:
magneticHeading: ANumbervalue ranging from 0 to 359.99 that specifies a heading in degrees at a single moment in time.trueHeading: ANumbervalue ranging from 0 to 359.99 that specifies the heading relative to the geographic North Pole in degrees.headingAccuracy: ANumbervalue that indicates any deviation in degrees between the reported heading and the true heading values.timestamp: The time in milliseconds at which the heading was determined.
Chapter 6, Working with XUI