

The following screenshot shows the Sales Transaction Entry window with several window elements highlighted:
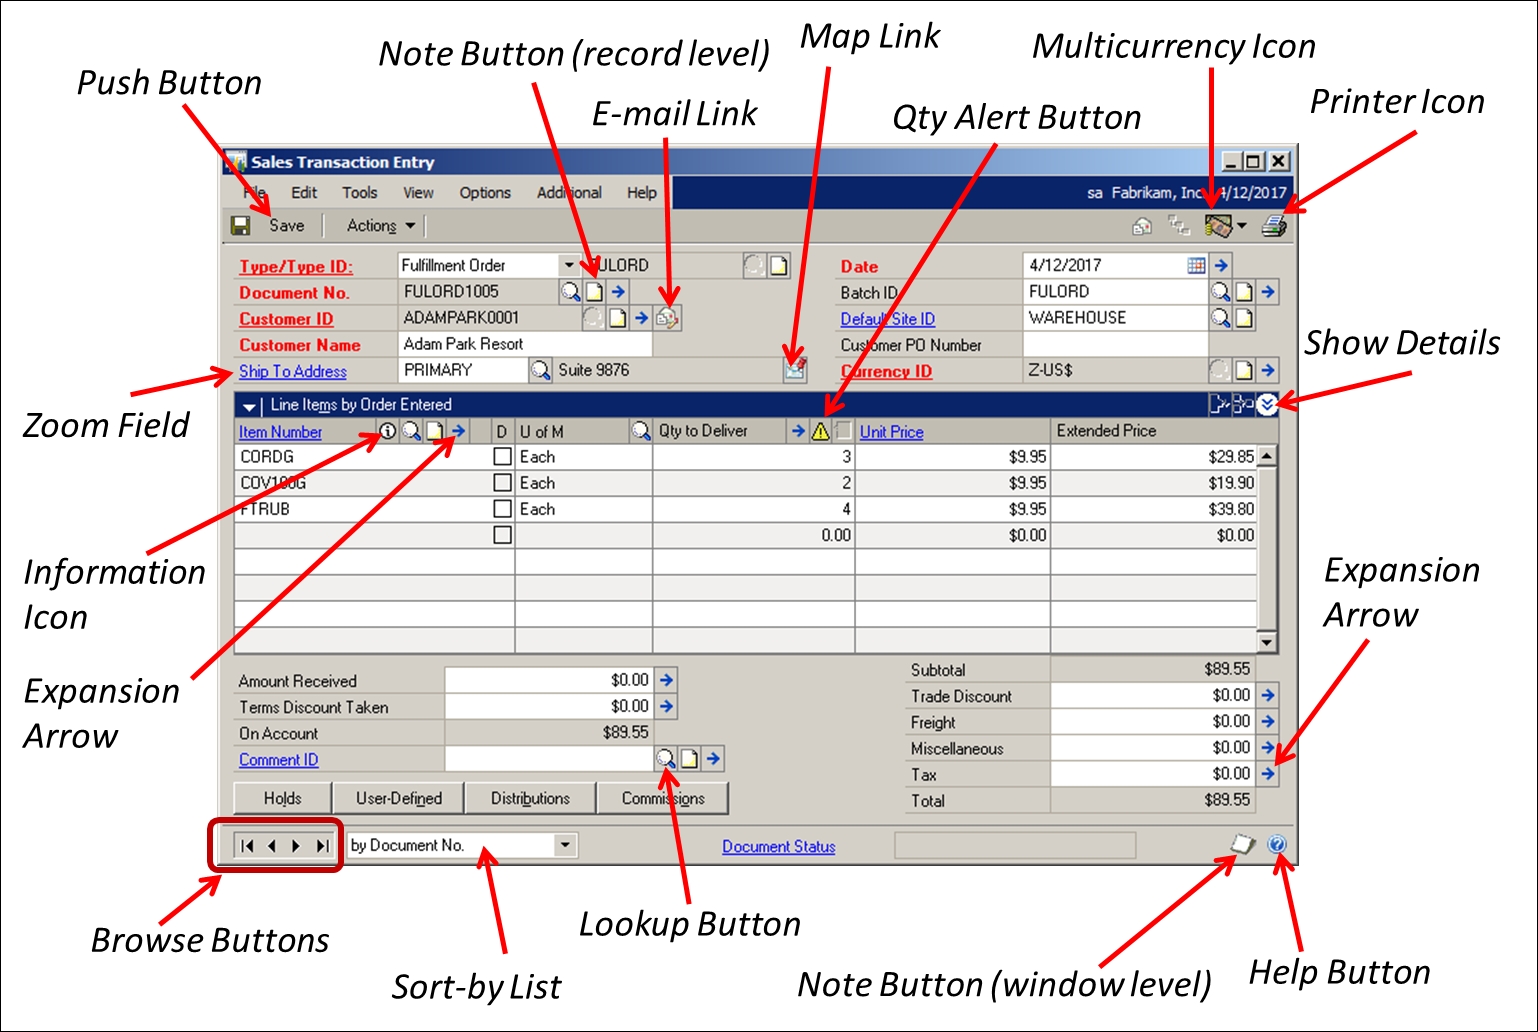
A description of the selected controls is as follows:
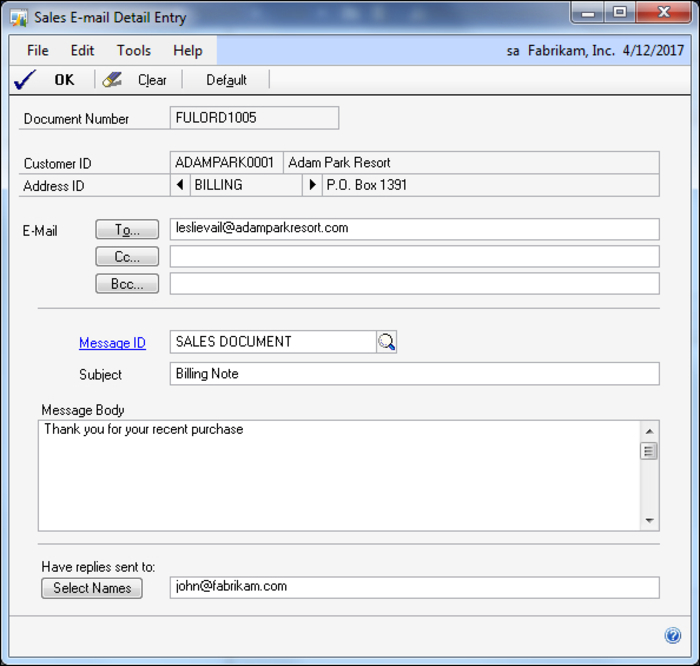
Selecting the E-mail Link button opens the Sales E-mail Detail Entry window as shown in the following screenshot:
Pushing the Map Link button will launch Bing Maps and throw it the address listed on the window. This is a very handy feature. If you use an address in your application, it should include this behavior, as it is an expected piece of functionality.
You do not have to use Bing Maps if you don't want to. Mariano Gomez has an article on his blog regarding how to change the default map services. Use this URL to access the article: http://tinyurl.com/c6vosoy.
The quantity alert icon will appear next to a line-item quantity if you still have a process to complete regarding that quantity amount. For instance, if you have not fully allocated the quantity on an invoice, the icon will show up on that line. By selecting that line and then pushing the Quantity Alert button, you will be greeted with a message telling you what the system is unhappy about.
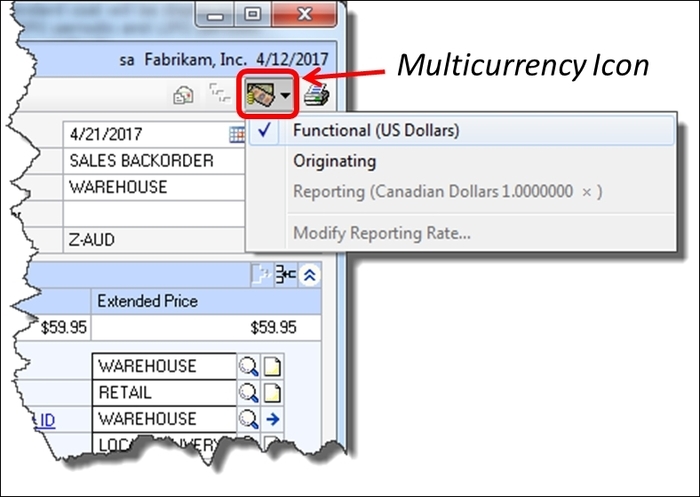
By pressing the multicurrency button, you can switch the display between the originating and functional currency. You can also modify the reporting currency rate if applicable. The following screenshot shows you what the window looks like when the multicurrency button is pressed:
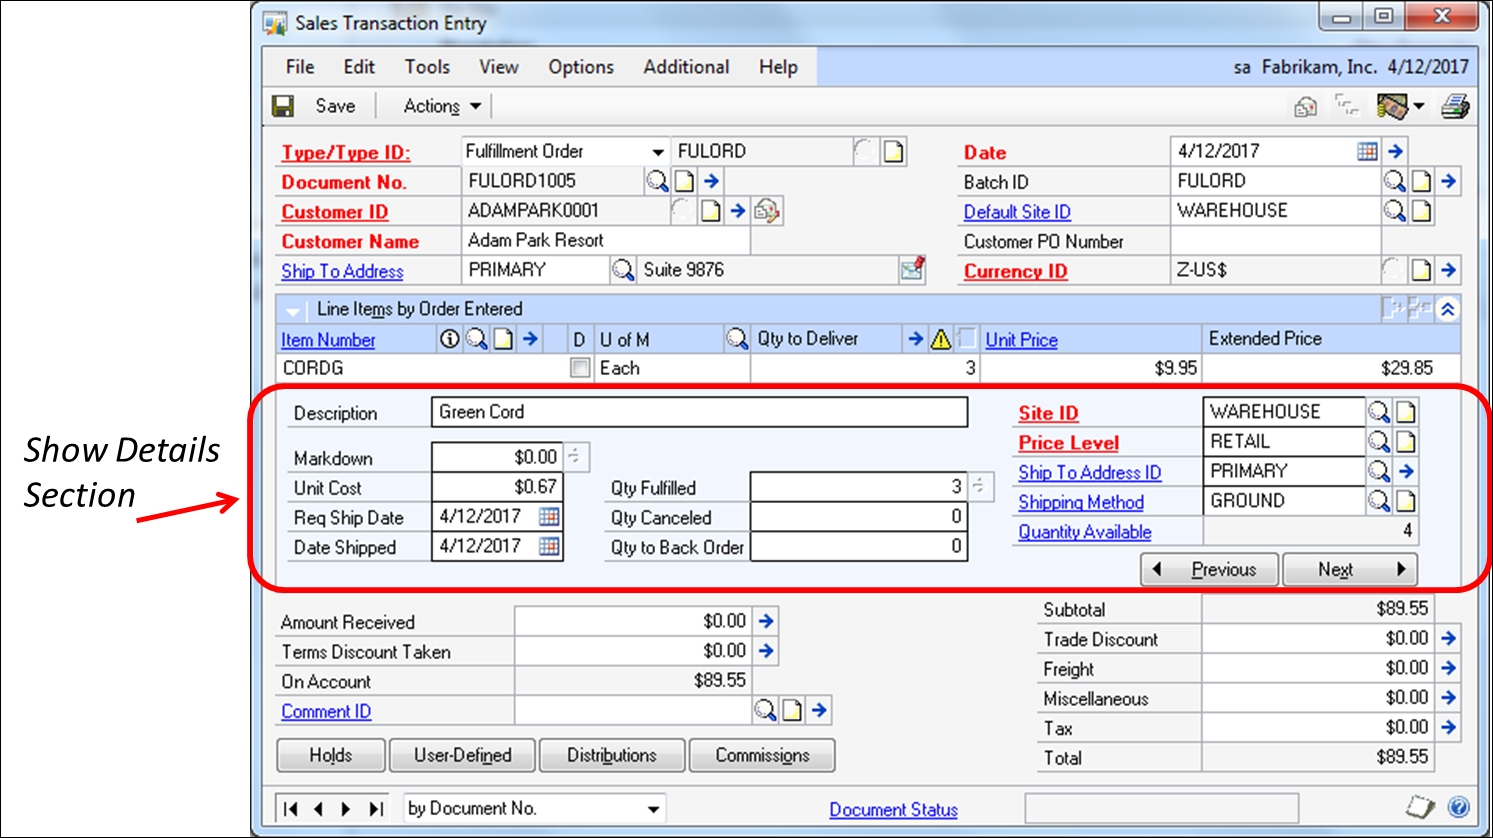
The Show Details button always shows additional information about the line item selected. These buttons are used to expand and shrink the view of a scrolling window. Sometimes the grid view is just expanded to show more lines of information for a single record. Other times, you'll see a larger area that doesn't look anything like a scrolling window.
In the case of the Sales Transaction Entry window, much more than just another row of information is revealed, as shown in the following screenshot. Lately, the Show Details view has been used in this way to deliver information using a more attractive layout.
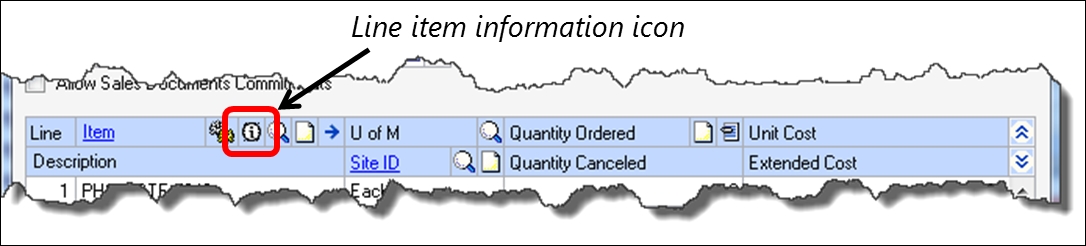
This button is more fully described as the "line-item information" button. It's used on the Sales Transaction Entry and Purchase Order Entry windows. This button is identified in the following screenshot:
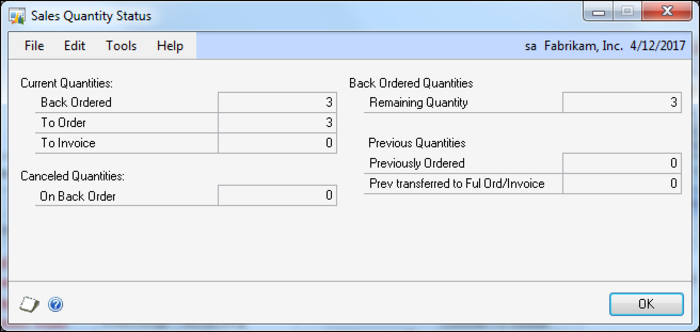
Pressing this button on the Sales Transaction Entry window or the Purchase Order Entry window opens a Sales Quantity Status window with information pertaining to the line item selected. The following is a screenshot of both the Sales Quantity Status window and the Purchasing Quantity Status window.
Expansion arrows can reveal a whole host of information. You can take a straightforward-looking window such as the Sales Transaction Entry window and stuff a massive amount of information in it via the use of expansion arrow buttons. Indeed, the Sales Transaction Entry window contains thirteen expansion arrow buttons.
If you need a lot more information about a particular record and want to keep your user interface clean, expansion arrow buttons are a good solution for you.
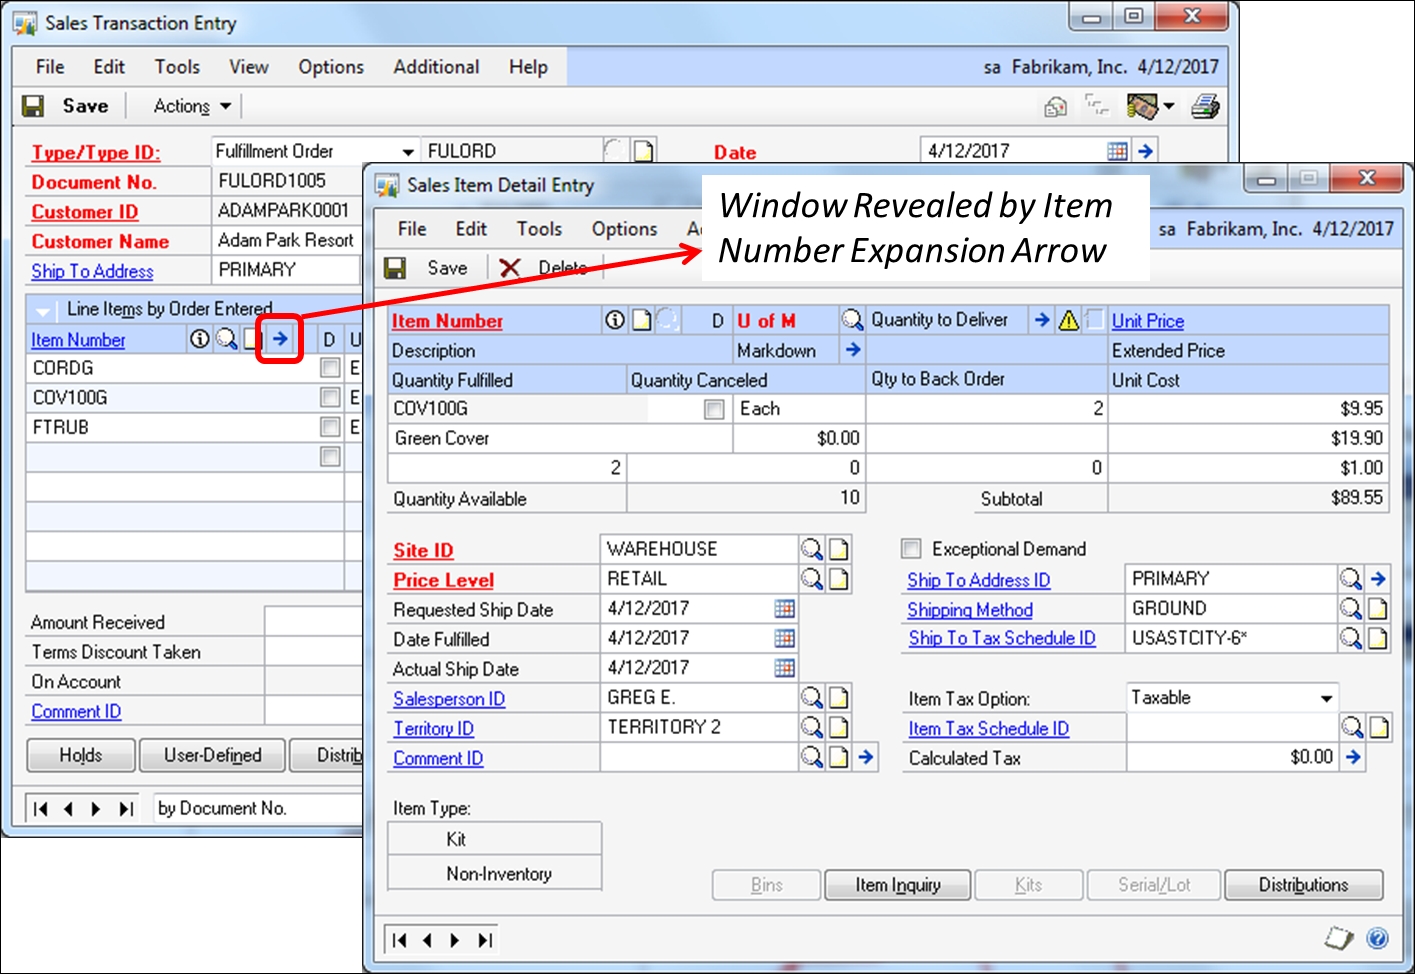
The following screenshot shows the window that you open when you press the Item Detail expansion arrow on the Sales Transaction Entry window:
By pressing the Help button in the lower right-hand corner of the window (or F1), you launch a context-sensitive help screen, as shown in the following screenshot:
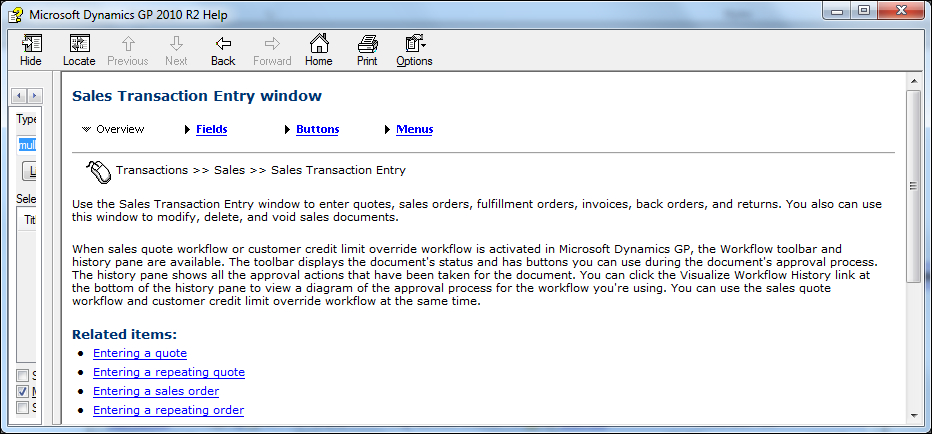
The Help window includes four sections: Overview, Fields, Buttons, and Menus. Each of these sections reveals information specific to the selected window. For example, the Fields section of the Sales Transaction Entry window defines, in alphabetical order, each field that appears on the window.
Your help file should also be context sensitive and include similar information.