
To work with Android NDK, we need to check and install some system packages and utilities:
First, Glibc (the GNU C standard library, in version 2.7 or later) must be installed. It is usually shipped with Linux systems by default. Check its version using the following command:
$ ldd -–version
We also need the Make build tool for native code. Installation can be performed using the following command:
$ sudo apt-get install build-essentialAlternatively, Make can be installed through Ubuntu Software Center. Look for build-essential in the dedicated search box and install the packages found:

Package
build-essentialcontains a minimal set of tools for compilation and packaging on Linux Systems. It also includes GCC (the GNU C Compiler), which is not required for standard Android development as Android NDK already packages its own version.To ensure that Make is correctly installed, type the following command. If correctly installed, the version will be displayed:
$ make --version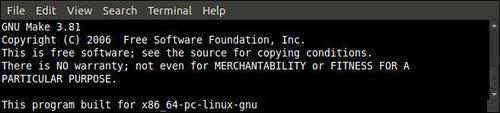
Tip
Special note for 64-bit Linux owner
We also need 32-bit libraries installed to avoid compatibility problems. This can be done using the following command (to execute in a command-line prompt) or again the Ubuntu Software Center:
sudo apt-get install ia32-libs
To run Eclipse and allow compilation of Android Java code to bytecode, Java Development Kit is required. We need to download and install Oracle Sun Java Development Kit. On Ubuntu, this can be performed from the Synaptic Package Manager:
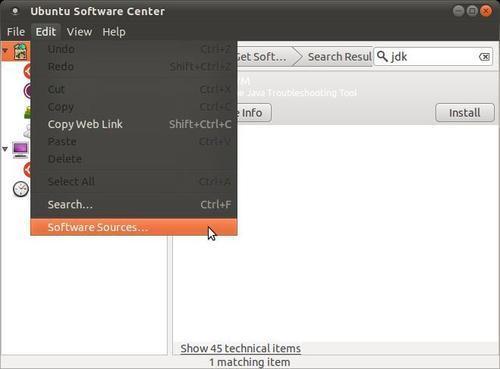
Open Ubuntu System/Administration menu and select Synaptic Package Manager (or open your Linux package manager if you use another Linux distros).
Go to the Edit | Software Sources menu.
In the Software Sources dialog, open the Other Software tab.
Check the Canonical Partners line and close the dialog:

Package cache synchronizes automatically with the Internet, and after a few seconds or minutes some new software is made available in the Canonical Partners section.
Find Sun Java™ Development Kit (JDK) 6 (or later) and click on Install. You are also advised to install Lucida TrueType fonts (from the Sun JRE), the Java(TM) Plug-in packages.
Accept the license (after reading it carefully of course!). Be careful as it may open in the background.
When installation is finished, close Ubuntu Software Center.
Although Sun JDK is now installed, it is not yet available. Open JDK is still used by default. Let’s activate Sun JRE through the command line. First, check available JDK:
$ update-java-alternatives –l
Then, activate the Sun JRE using the identifier returned previously:
$ sudo update-java-alternatives –s java-6-sunOpen a terminal and check that installation is OK by typing:
$ java –version
The Android SDK supports Ant, a Java-based build automation utility, to compile projects from the command line. Let’s install it.
Install Ant with the following command or with the Ubuntu Software Center:
$ sudo apt-get install antCheck whether Ant is properly working:
$ ant --version
We have prepared our Linux operating system with the necessary utilities to host Android development tools.
We have installed a Java Development Kit in version 1.6 and checked if it is properly working from the command line. Because Android SDK uses generics, the JDK in version 1.5 is the least required for Android development.
You may wonder why we bothered with the installation of Sun JDK while Open JDK is already ready to use. The reason is simply that Open JDK is not officially supported by Android SDK. If you want to avoid any possible interaction with Open JDK, think about removing it entirely from your system. Go to the Provided by Ubuntu section in the Ubuntu Software Center and click on Remove for each OpenJDK line. For more information, look for the official Ubuntu documentation: http://help.ubuntu.com/community/Java.
Finally, we have installed Ant utility that we are going to use in the next chapter to build projects manually. Ant is not required for Android development but is a very good solution to set up a continuous integration chain.