

To change the Mac OS X deployment target for our project we need to do the following:
In the project navigator, click the folder icon to show the project navigator.
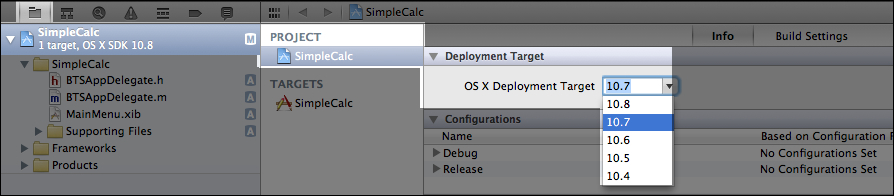
In the project navigator, click on the very top item, just under the icons, named SimpleCalc.
Under PROJECT, click on SimpleCalc.
Under Deployment Target, click on the drop-down menu beside Mac OS X Deployment Target and select the oldest version of Mac OS X on which we want our App to run as shown in the following screenshot:
Change TARGETS setting for the Organization of the Project Document to our name or the name of our company as shown in the following screenshot:

Before we continue to configure our Xcode target, we need to take a small detour and create an App Icon. We are going to need our App Icon as part of the process of configuring an Xcode target.
The first thing we need to do is create the icon. We can do this in any image editing program, from Illustrator, to Photoshop, to Gimp. The program that we use does not matter. What matters is that the image has a transparent background and that the image size is 512 x 512 pixels. We need to export our image in PNG format and it may look like the following image, which has been created in Photoshop Elements:

Once we have the image that we want to use as our icon, we need to save it in a folder named
SimpleCalc.iconsetwith the nameicon_512x512.png.Note
The filename must be exact. If you name it anything other than
icon_512x512.pngthe icon will not be correctly updated and you will see a generic icon instead of your App Icon.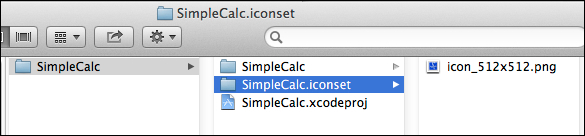
Once we have our PNG image saved in the
iconsetfolder, we simply drag that folder to the App Icon section of our project target and Xcode will automatically convert it to a suitable.icnsfile as shown in the following screenshot:
Because we have not provided all the required image sizes, Xcode will warn us that some image sizes are missing. For the purposes of our SimpleCalc App we can ignore these warnings but if we planned to deploy our App to the Mac OS X App Store we would create a PNG file for each required icon size and place it in our
iconsetfolder prior to dragging the folder in to the App Icon section of the Target as shown in the following screenshot:
When we set up the Deployment Target and App Icon, we made changes to our Xcode project. Xcode will use those changes and apply them to the App when we build it so that the App is ready to run on the versions of Mac OS X that we need and the Finder will display our unique icon to identify our App on the desktop.
Create your own 512 x 512 bitmapped image, save it in .png format, and put it in the iconset folder for the SimpleCalc App. You can use any image editing software that you like. You may want to create all of the required image sizes so that you don't get warnings from Xcode. The following screenshot shows the images of all required sizes present in the SimpleCals.iconset folder:

If you need a free bitmap editor take a look at Gimp for Mac OS X: