

In this recipe, you will learn how to create helpers with the extension method as well as with the declarative @helper syntax. In addition to this, we will see a list of the most frequently used standard helpers such as input helpers, link helpers, form helpers, label helpers, and validation message helpers.
The previous versions of MVC introduced an extension method of the HtmlHelper class that allowed you to define new helpers. In MVC 3 you have an option to continue doing that, however you can also use a declarative helper using the @helper syntax within a Razor view. So, first you will look at the extension method approach and then we will look at the @helper syntax approach, and at the end we will also look at the other standard helpers.
This recipe is going to focuses completely on helpers so let's begin by creating a helper with the extension method.
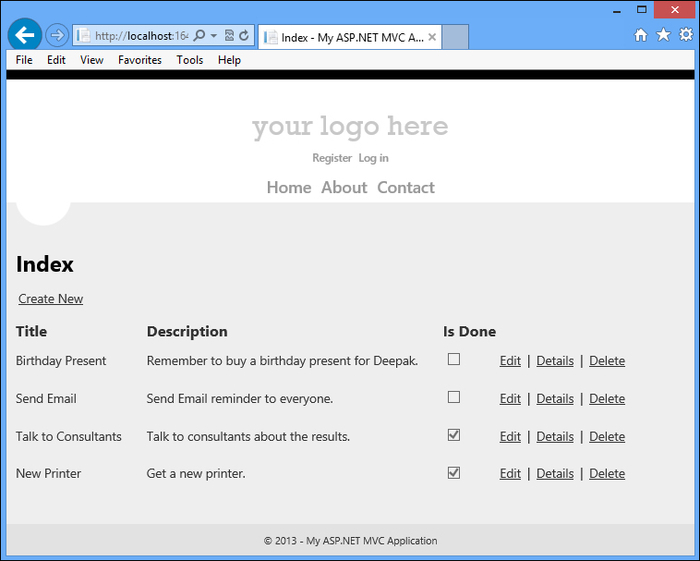
The new HTML helpers created by the extension method of the HtmlHelper class work just like the standard HTML helpers (at the end of this recipe you will learn about standard HTML helpers). Let's recall, in the last recipe we created a To-Do list, shown in the following screenshot:
I need to safeguard myself when the Description area gets very long, which can break the look of my page. Thus, I need to truncate the description message by setting the maximum length, say, to 40 characters to be displayed, and when the maximum length is crossed it should display …more at the end. To see more of the description, the user should click on the Details link. The following screenshot shows the output screen:

In the preceding screenshot you can see the …more character is truncated at the end of the first To-Do item description. This can be done using the extension methods. Let's develop this by adding a new class named HtmlHelpers.cs.

In the preceding screenshot, we added an extension method to the HtmlHelper class named Truncate(). There are a couple of things that you should notice about this class. First, notice that the class is a static class. You must define an extension method with a static class. Second, notice that the first parameter of the Truncate() method is preceded by the keyword this. The first parameter of an extension method, which is this HtmlHelper helper, indicates the class that the extension method extends to and it is derived from the namespace System.Web.Mvc. This Truncate() method will accept two parameters, the input string and length. In the method body, We need to check if the length of the input string is less than or equal to the length. If it is then keep it as it is, or else return the substring of the input string by concatenating …more in the string. Let's see how the view page will utilize this extension method:

To bring the scope of the newly-added extension methods on a view page we have added the MvcApplication1.Helpers namespace; alternatively, we can also add this namespace directly into web.config to use it in a whole application. Now, instead of using @Html.DisplayFor(), I would use my extension method @Html.Truncate() and pass two parameters item.Description, which is string and 40, which is a int value and I'm done.
Now, what if I want to display …more in red color? The extension method returns a string value so we can embed the HTML markups in that string.

In Razor, the @ character is HTML encoded by default for better protection against XSS attacks. Thus, on the view page we will use the @Html.Row() helper:

Now, you will have the desired output on your screen.

All this can be done by simply using declarative @helper syntax, let's learn it.
In Razor, we can declare the @helper syntax on the same view page or create it in a separate file. First we will see how to declare it on the same view page.

In the previous screenshot, I declared @helper by the name Truncate, which will accept only two parameters, the input string and length. To call this @helper Truncate(), you just have to use @Truncate(item.Description, 40). That's all.
Now, if you want to move @helper Truncate() into a separate file, we can do this by adding a new .cshtml view page file inside the App_Code folder and paste all the @helper Truncate() code, and at the end call @helper Truncate() using @HtmlHelpers.Truncate(item.Description, 40).

If you run this application, you will have the same output.

So far in this recipe you learned how to create HTML helpers with the extension method and with declarative @helper syntax. Now, let's learn about some standard HTML helpers.
The HTML helpers that we have seen so far in this recipe return a string, and that string can represent any type of content that you want on the view page. The main purpose of any HTML helper is to create small blocks of HTML, and that can be categorized into input helpers, link helpers, form helpers, validation messages helpers, label helpers, and more.
Razor includes a set of standard HTML input helpers; I have listed some of them in the following table:
|
HTML helper |
HTML element |
Short description |
|---|---|---|
|
|
|
Returns a checkbox input element. |
|
|
|
Returns a checkbox input element for the model. |
|
|
|
Returns a single-selection select element. |
|
|
|
Returns a single-selection select element for the model. |
|
|
|
Returns a hidden input element. |
|
|
|
Returns a hidden input element for the model. |
|
|
|
Returns a multi-select select element. |
|
|
|
Returns a multi-select select element for the model. |
|
|
|
Returns a password input element. |
|
|
|
Returns a password input element for the model. |
|
|
|
Returns a radio button input element. |
|
|
|
Returns a radio button input element for the model. |
|
|
|
Returns the specified textarea element. |
|
|
|
Returns the specified textarea element for the model. |
|
|
|
Returns a text input element. |
|
|
|
Returns a text input element for the model. |
If you look at the list of Input helpers, you will notice that each helper has two versions such as CheckBox and CheckBoxFor, TextBox and TextBoxFor, TextArea and TextAreaFor.
Helpers such as CheckBox, TextBox, and TextArea work fine but they don't allow coding in the strongly-typed fashion and you need to hardcode whatever name you want as the first argument:
@Html.TextArea("Description")So, in Razor we have a model version of helpers such as CheckBoxFor, TextBoxFor, and TextAreaFor that require a strongly-typed view and use the view model:
@Html.TextAreaFor(model => model.Description)
The helpers will use the lambda expression to infer the name and the value of the view model passed to the view. And because it is a good practice to use strongly-typed views and view models, you should always use the @Html.TextBoxFor helper.
By default, the Create and Edit scaffolds now use the @Html.EditorFor helper instead of the @Html.TextBoxFor helper. The @Html.EditorFor helper works by examining the model type passed to it; for instance, if the model type is Boolean, EditorFor will generate a checkbox; if model type is text, EditorFor will generate an input box. EditorFor also improves the support for metadata on the model in the form of data annotation attributes.
In Razor, sometimes we also use another model version of helpers such as DisplayForModel(), DisplayNameForModel(), EditorForModel(), NameForModel, LabelForModel, and ValueForModel that return HTML markup for every property in the model. Let's look at an example of DisplayForModel():
@*<div class="display-label">
        @Html.DisplayNameFor(model => model.Title)
</div>
<div class="display-field">
    @Html.DisplayFor(model => model.Title)
</div>

<div class="display-label">
        @Html.DisplayNameFor(model => model.Description)
</div>
<div class="display-field">
    @Html.DisplayFor(model => model.Description)
</div>*@

@Html.DisplayForModel()
In this code, I commented all the <div> blocks and instead of writing four <div> elements we can achieve the same with the @Html.DisplayForModel() helper, and it works great.
Razor also includes a set of standard HTML form helpers; I have listed some of them in the following table:
|
HTML helper |
HTML element |
Short description |
|---|---|---|
|
|
|
Generates a hidden |
|
|
|
Writes an opening |
|
|
|
Writes an opening |
|
|
|
Renders the closing |
|
|
|
Converts the specified string to an HTML-encoded string. |
|
|
|
Converts the specified string to an HTML-encoded string. |
The AntiForgeryToken helper is used to prevent Cross Site Request Forgery (CSRF) or XSRF attacks. We put the user-specific token as a hidden field on the form, as given in the following code:
@using (Html.BeginForm())
{
    @Html.ValidationSummary(true)
    @Html.AntiForgeryToken()
    <fieldset>
        <legend>Profile</legend>
        <div class="editor-label">
            @Html.LabelFor(model => model.Name)
        </div>
Then, an attribute is applied to the controller action, which checks the right value submitted with each Post request.
[HttpPost]
[ValidateAntiForgeryToken]
public ActionResult Edit(Profile profile)
{
    if (ModelState.IsValid)
    {
If you view the view source you will notice the following hidden input field with a very long token value.
<input name="__RequestVerificationToken" type="hidden" value="cUcTSMC6k4jcDPan1J-qyv--Tcot4Cu8Nma57-NrbkHc6aaV-TkQeQChgSRWSEplMRtj-bliGHFj6UuwrvpLu6-S8qiWci8yyHusroPuWzciNmLRw5YbyGsp_orI4F_q5XouPcbD0F_keLfbKXdMnqS1ZHce-pars_kMxN-flEI1" />
When the form Post occurs, it compares the issued verification token value on the server and ensures that they match.
Razor also includes a set of standard HTML validation helpers; I have listed some of them in the following table:
|
Helper |
Short description |
|---|---|
|
|
Retrieves the validation metadata for the specified model and applies each rule to the data field. |
|
|
Retrieves the validation metadata for the specified model and applies each rule to the data field. |
|
|
Displays a validation message if an error exists for the specified field in the |
|
|
Returns the HTML markup for a validation-error message for each data field that is represented by the specified expression, using the specified message and HTML attributes. |
|
|
Returns an unordered list of validation messages that are in the |
Razor also includes a set of standard HTML link helpers; I have listed some of them in the following table:
|
HTML helper |
HTML element |
Short description |
|---|---|---|
|
|
|
Creates an anchor tag to a link for a specific action. |
|
|
|
Returns an anchor element that contains the virtual path of the specified action. |
|
|
|
Returns an anchor element that contains the virtual path of the specified action. |
|
|
|
Returns the result as an HTML string. |
|
|
|
Returns the result as an HTML string. |
Razor also includes a set of standard HTML label helpers; I have listed some of them in the following table:
|
Helper |
HTML element |
Short description |
|---|---|---|
|
|
|
Returns an HTML label element and the property name of the property that is represented by the specified expression. |
|
|
|
Returns an HTML label element and the property name of the property that is represented by the specified expression. |
|
|
|
Returns an HTML label element and the property name of the property that is represented by the specified expression using the |
Most of the Razor helpers we learned in this section generate HTML elements on the form, we saw some helpers that do not generate HTML element, rather they bring the HTML content from other partial views. In the next recipe, we will look at the partial views.
We learned enough about Razor helpers in this recipe, however, there are a few more helpers. You can find them at http://goo.gl/Ov4DQ.