

In this recipe, you will transfer data from a sample RDBMS to a MongoDB database. The sample data is called SteelWheels and is available in the Pentaho BA server, running on the Hypersonic Database Server.
Start the Pentaho BA Server by executing the appropriate scripts located in the BA Server's home folder. It is start-pentaho.sh for Unix/Linux operating systems, and for the Windows operating system, it is start-pentaho.bat. Also in Windows, you can go to the Start menu and choose Pentaho Enterprise Edition, then Server Management, and finally Start BA Server.
Start Pentaho Data Integration by executing the right scripts in the PDI home folder. It is spoon.sh for Unix/Linux operating systems and spoon.bat for the Windows operating system. Besides this, in Windows, you can go to the Start menu and choose Pentaho Enterprise Edition, then Design Tools, and finally Data Integration.
Start MongoDB. If you don't have the server running as a service, you need execute the mongod –dbpath=<data folder> command in the bin folder of MongoDB.
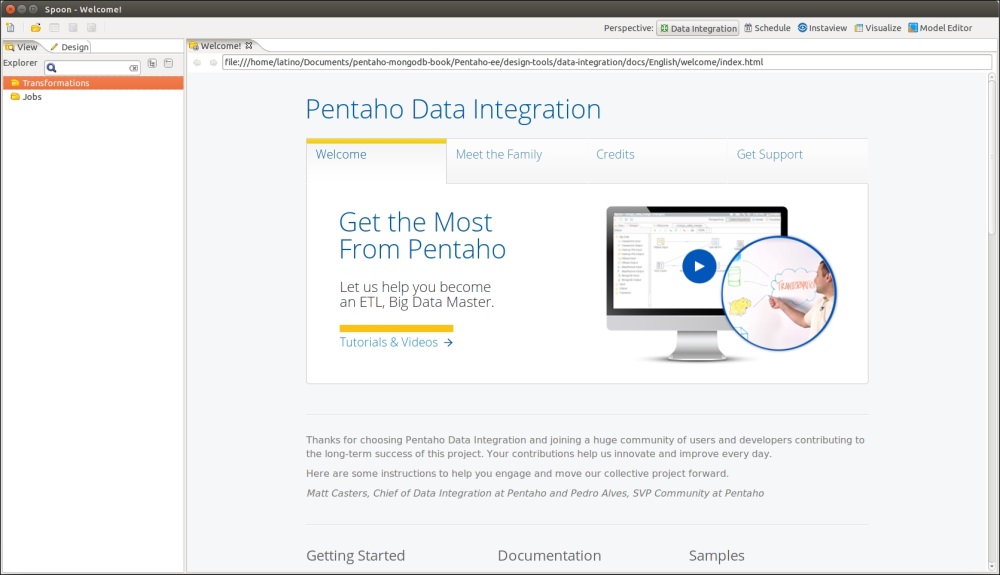
To make sure you have the Pentaho BA Server started, you can access the default URL, which is http://localhost:8080/pentaho/. When you launch Spoon, you should see a welcome screen like the one pictured here:
After you have made that sure you are ready to start the recipe, perform the following steps:
Create a new empty transformation.
As was explained in the first recipe of this chapter, set the name of this transformation to Migrate data from RDBMS to MongoDB.
Save the transformation with the name chapter1-rdbms-to-mongodb.
Select a customer's data from the SteelWheels database using Table Input step.
Select the Design tab in the left-hand-side view.
From the Input category folder, find the Table Input step and drag and drop it into the working area in the right-hand-side view.
Double-click on the Table Input step to open the configuration dialog.
Set the Step Name property to Select Customers.
Before we can get any data from the SteelWheels Hypersonic database, we will have to create a JDBC connection to it.
To do this, click on the New button next to the Database Connection pulldown. This will open the Database Connection dialog.
Set Connection Name to SteelWheels. Next, select the Connection Type as Hypersonic. Set Host Name to localhost, Database Name to SampleData, Port to 9001, Username to pentaho_user, and finally Password to password. Your setup should look similar to the following screenshot:

You can test the connection by clicking on the Test button at the bottom of the dialog. You should get a message similar to Connection Successful. If not, then you must double-check your connection details.
Click on OK to return to the Table Input step.
Now that we have a valid connection set, we are able to get a list of customers from the SteelWheels database. Copy and paste the following SQL into the query text area:
SELECT * FROM CUSTOMERs
Click on the Preview button and you will see a table of customer details.
Your Table Input step configuration should look similar to what is shown in the following screenshot:

Click on OK to exit the Table Input configuration dialog.
Now, let's configure the output of the customer's data in the MongoDB database.
Under the Design tab, from the Big Data category folder, find the MongoDB Output step and drag and drop it into the working area in the right-hand-side view.
As we want data to flow from the Table Input step to the MongoDB Output step, we are going to create a Hop between the steps. To do this, simply hover over the Table Input step and a popup will appear, with some options below the step. Click on Right Arrow and then on the MongoDB Output step. This will create a Hop between the two steps.

It's time to configure the MongoDB Output step. Double-click on it.
Set Step Name to Customers Output.
As we're running a default MongoDB instance, we only have to set some simple properties in this step. Set Hostname to localhost and Port to 27017.
Select the Output options tab. In this tab, we can define how the data will be inserted into MongoDB.
Set the Database property to SteelWheels. Don't worry if this database doesn't exist in MongoDB, as it will be created automatically.
Set the Collection property to Customers. Again, don't worry if this collection doesn't exist in MongoDB, as it will be created automatically.
Leave the Batch insert size property at 100. For performance and/or production purposes, you can increase it if necessary. If you don't provide any value to this field, the default value will be 100.
We are going to truncate the collection each time before we load data. In this way, if we rerun the transformation many times, we won't get duplicate records. Your Output options page should look like what is shown in this screenshot:

Now, let's define the MongoDB documents structure. Select the Mongo document fields tab.
Click on the Get fields button, and the fields list will be populated with the SteelWheels database fields in the ETL stream.
By default, the column names in the SteelWheels database are in uppercase. In MongoDB, these field names should be in camel case. You can manually edit the names of the MongoDB document paths in this section also. Make sure that the Use Field Name option is set to No for each field, like this:

By clicking on Preview document structure, you will see an example of what the document will look like when it is inserted into the MongoDB Customers collection.
Click on the OK button to finish the MongoDB Output configuration.
The transformation design is complete. You can run it for testing purposes using the Run button, as illustrated here:

As you can see, this is a basic transformation that loads data from the RDBMS database and inserts it into a MongoDB collection. This is a very simple example of loading data from one point to another. Not all transformations are like this. That is why PDI comes with various steps that allow you to manipulate data along the way.
In this case, we truncate the collection each time the transformation is run. However, it is also possible to use other combinations, such as Insert&Update or just Insert or Update individually.
Now that we have designed a transformation, let's look at a simple way of reusing the MongoDB connection for future transformations.
If you have to create MongoDB connections manually for each transformation, you are likely to make mistakes and typos. A good way to avoid this is to store the MongoDB connection details in a separate .properties file on your filesystem. There is a file called kettle.properties that is located in a hidden directory called .kettle in your home directory. For example, in Linux, the location will be /home/latino/.kettle. In Windows, it will be C:\Users\latino\.kettle. Navigate to and open this .properties file in your favorite text editor. Then, copy and paste the following lines:
MONGODB_STEELWHEELS_HOSTNAME=localhost
MONGODB_STEELWHEELS_PORT=27017
MONGODB_STEELWHEELS_USERNAME=
MONGODB_STEELWHEELS_PASSWORD=
Save the .properties file and restart Spoon.
Now, where can we use these properties?
You will notice that when you are setting properties in certain PDI steps, you can see the following icon:

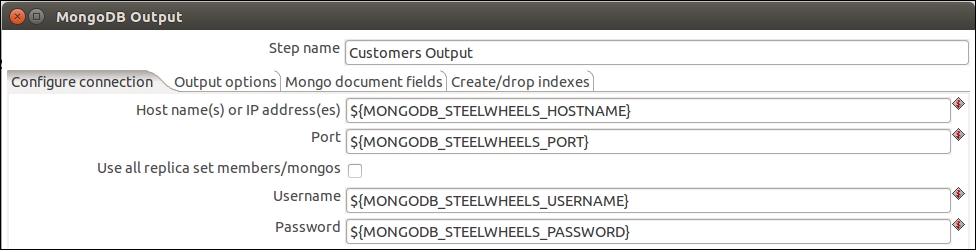
This icon denotes that we can use a variable or parameter in place of a static value. Variables are defined using the following structure: ${MY_VARIABLE}. You will notice that the variables are encapsulated in ${}. If you are not sure what the name of your variable is, you can also press Ctrl and the Spacebar; this will open a drop-down list of the available variables. You will see the MongoDB variables that you defined in the .properties file earlier in this list. With this in mind, we can now replace the connection details in our steps with variables as shown in this screenshot:
You can find out more about the MongoDB Output step on this documentation website: http://wiki.pentaho.com/display/EAI/MongoDB+Output