Book Image

Working with Odoo

Book Image

Working with Odoo

Overview of this book

With this practical guide, you will cover the essential modules to get Odoo up and running for your company. After installing Odoo, you will use its sales management application to enter quotes, create sales orders, and invoice customers. You will then learn how to integrate the CRM application to manage your leads and convert them into lucrative opportunities and sales. Next, you will set up your own purchase management system, assigning products to suppliers and tracking orders with the new warehouse management and routing system. Finally, you will learn how to use analytics to track project expenses and keep your accounts simple and easy to maintain and build an Odoo module to extend its functionality and make it work for you. Working with Odoo covers all the core installation and usage functionalities of this popular tool, helping you to fully implement a working ERP system through practical, advanced, real-world examples.
Table of Contents (25 chapters)
Working with Odoo
Credits
About the Author
Acknowledgments
About the Reviewers
www.PacktPub.com
Preface
Index

Adding a field to an existing view


After adding our fields to the sale.order model and displaying them on the Sales Order form, it would be nice to include these fields in our sales order listing. This way, users can see at a glance when orders are due and know whether they are rush orders.

We begin by going to the Sales Order list view and choosing Manage Views. Next, click on Edit to bring up the View Editor for the sales order list:

You will notice that this list is far less complex than the one for the Order Sales form view. This is simply because a list view (also known as a tree view) has much fewer options and fields on it than a form that edits and manages the data for just one record at a time.

Click on the + to the right of the date_order field. This will pop open the Properties window:

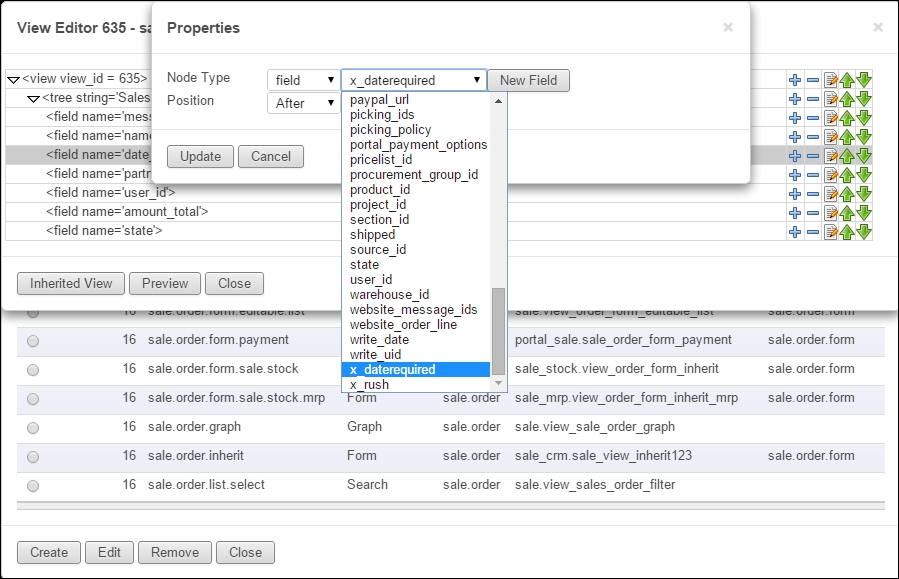
After selecting x_daterequired in the list, click on the two Update buttons. Then, you can follow the same process to add the x_rush field to the list view. Finally, click on the Close buttons to shut...