
It is good practice to create a custom Splunk app to isolate the configurations you add to Splunk. You may never have created an app before, but you will quickly see it is not very difficult. Here, we will create a basic app called Destinations that we will use throughout this book:
- Let's access the Manage Apps page. There are two ways to do this; you can either click on the Apps icon at the home page as shown in the following screenshot:
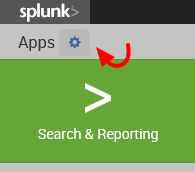
- Or, select Manage Apps from the app dropdown in the top navigation bar of the Search & Reporting app:
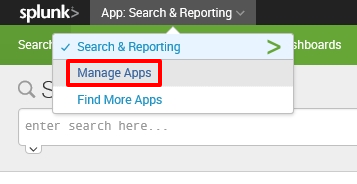
- At the Manage Apps page, click on the Create app icon shown in the following screenshot:
- Finally, populate the forms with the following information to complete app creation. When you are done, click on the Save button to create your first Splunk app:

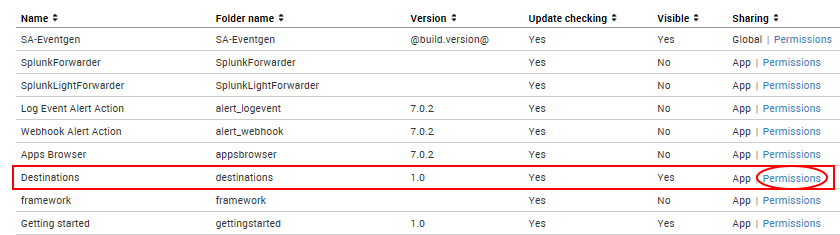
- You have just created your very first Splunk app. Notice that it now appears in the list of apps and it has a status of Enabled, meaning it is ready to be used:
We will use this app to complete the exercises in this book, but first we need to make a few important changes:
- Click on the Permissions link shown in the preceding screenshot
- In the next window, under the Sharing for config file-only objects section, select All apps
These steps will ensure that the application will be accessible to the Eventgen add-on, which will be installed later in the chapter. Use the following screenshot as a guide:
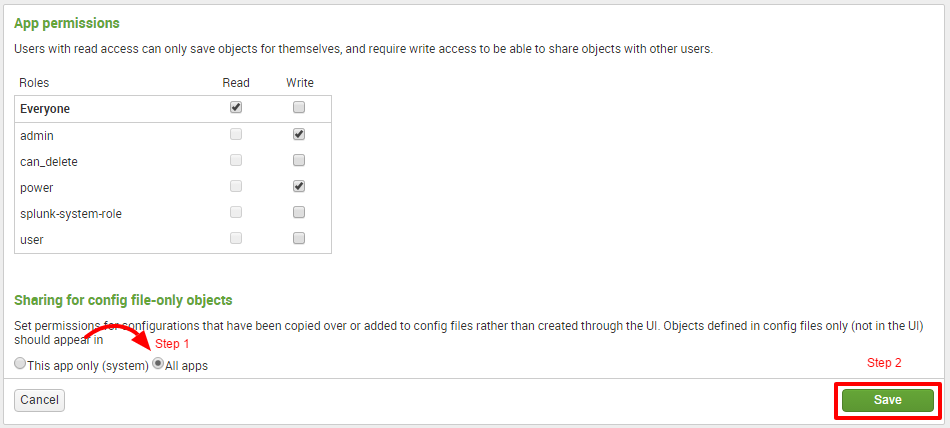
Splunk permissions are always composed of three columns: Roles, Read, and Write. A role refers to certain authorizations or permissions that can be taken on by a user. Selecting Read for a particular role grants the set of users in the role permission to view the object. Selecting Write will allow the set of users to modify the object. In the preceding screenshot, everyone (all users) will have access to view the Destinations app, but only the admin (you) and a power user can modify it.