Book Image

Splunk 7 Essentials - Third Edition

By : J-P Contreras, Steven Koelpin, Erickson Delgado, Betsy Page Sigman
Book Image

Splunk 7 Essentials - Third Edition

By: J-P Contreras, Steven Koelpin, Erickson Delgado, Betsy Page Sigman

Overview of this book

Splunk is a search, reporting, and analytics software platform for machine data, which has an ever-growing market adoption rate. More organizations than ever are adopting Splunk to make informed decisions in areas such as IT operations, information security, and the Internet of Things. The first two chapters of the book will get you started with a simple Splunk installation and set up of a sample machine data generator, called Eventgen. After this, you will learn to create various reports, dashboards, and alerts. You will also explore Splunk's Pivot functionality to model data for business users. You will then have the opportunity to test-drive Splunk's powerful HTTP Event Collector. After covering the core Splunk functionality, you'll be provided with some real-world best practices for using Splunk, and information on how to build upon what you've learned in this book. Throughout the book, there will be additional comments and best practice recommendations from a member of the SplunkTrust Community, called "Tips from the Fez".
Table of Contents (10 chapters)

Populating data with Eventgen

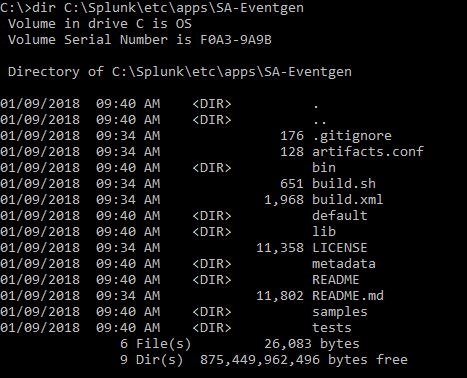
Machine data is produced by the many functions carried out by computers and other mechanical machines. If you work in an environment that is rich in machine data, you will most likely have many sources of readily available data inputs for Splunk. However, to facilitate learning in this book, we will use a Splunk add-on called the Splunk Eventgen to easily build real-time and randomized web log data. This is the type of data that would be produced by a web-based e-commerce company.

If you need more detailed information about Eventgen, you can follow the project's GitHub repository at https://github.com/splunk/eventgen/.

Using the CLI to configure Eventgen

Here's an important tip for Windows users. Make it a habit to always launch your Command Prompt in administrator mode. This allows you to use commands that are unhindered by Windows security:

  1. Right-click on the Windows start menu icon and select Search. In Windows 7, you can click on the Windows icon and the search window will be directly above it. In Windows 10, there is a search bar named Cortana next to the Windows icon that you can type into. They both have the same underlying function.
  2. In the search bar, type cmd.
  3. In the search results, look for command.exe (Windows 7) or Command Prompt (Windows 10), right-click on it, and then select Run as administrator.
Familiarize yourself with this step. Throughout the rest of the book, you will be frequently asked to open Command Prompt in administrator mode. You will know if you are in administrator mode, as it will say administrator: Command Prompt in the title of the Command Prompt window.

Installing the Eventgen add-on (Windows and Linux)

A Splunk add-on extends and enhances the base functionality of Splunk. An add-on typically enriches data using prebuilt rules for a specific source to enable faster analysis. In this section, you will be installing your first add-on, called Splunk Eventgen, which will help us pre-populate Splunk with real-time simulated web data:

  1. Download the ZIP file from the Eventgen public repository, http://github.com/splunk/eventgen. Click on the green Clone or download button. For Linux users, we've placed a copy of the Eventgen files used in this book at our download site: https://github.com/PacktPublishing/Splunk-7-Essentials-Third-Edition.
  2. Extract the ZIP file to the root location for your environment.
  3. Rename the extracted folder to SA-Eventgen. In Windows, this can be done with the Windows GUI, or via the mv command in Linux.
  4. Open an administrator Command Prompt or Linux shell and execute the following command (the slashes are important):
Windows: C:> xcopy SA-Eventgen C:\Splunk\etc\apps\SA-Eventgen /O /X /E /H /K
Linux:
mv SA-Eventgen /$SPLUNK_HOME/etc/apps/
  1. In the prompt, type the following directory command to verify that the copy works properly and the contents are in the folder:
Windows: C:> dir C:\Splunk\etc\apps\SA-Eventgen
Linux:
ls -l /$SPLUNK_HOME/etc/apps/

These are the contents of the recently copied SA-Eventgen folder, as shown in the following (Windows) screenshot, the same as what would appear in the similar location on Linux:

  1. Return to the Splunk interface in your web browser and restart Splunk by selecting the Settings dropdown; under the SYSTEM section, click on Server controls:

  1. On the Server controls page, click on the Restart Splunk button. Click on OK when asked to confirm the restart.
  2. The web interface will first notify you that Splunk is restarting in the background, then it will tell you that the restart has been successful. Every time Splunk is restarted, you will be prompted to log in with your credentials. Go ahead and log in.
  3. After logging in, you will now see the Eventgen app in the Splunk Enterprise landing page. Go to the Manage Apps page and confirm that the SA-EventGen application is installed:

You have successfully installed a Splunk add-on.