

Solr is available for download as an archive that, once uncompressed, contains a fully working instance within a Jetty servlet engine. So the steps here should be pretty easy.
In this section, we will describe a couple of prerequisites for the machine where Solr needs to be installed.
First of all, Java 6 or 7 is required: the exact choice depends on which version of Solr you want to install. In general, regardless of the version, make sure you have the latest update of your Java Virtual Machine (JVM). The following table describes the association between the latest Solr and Java versions:
|
Solr version |
Java version |
|---|---|
|
4.7.x |
Java 6 or greater |
|
4.8.x |
Java 7 (update 55) or greater; Java 8 is verified to be compatible |
|
4.9.x |
Java 7 (update 55) or greater; Java 8 is verified to be compatible |
|
4.10.x |
Java 7 (update 55) or greater |
Java can be downloaded from http://www.oracle.com/technetwork/java/javase/downloads/index.html.
Other factors such as CPU, RAM, and disk space strongly depend on what you are going to do with this Solr installation. Nowadays, it shouldn't be hard to have a couple of GB available on your workstation. However, bear in mind that at this moment I'm playing on Solr 4.9.0 installed on a Raspberry PI (its RAM is 512 MB). I gave Solr a maximum heap (-Xmx) of 256 MB, indexed about 500 documents, and executed some queries without any problem. But again, those factors really depend on what you want to do: we could say that, assuming you're using a modern PC for a study instance, hardware resources shouldn't be a problem.
Instead, if you are planning a Solr installation in a test or in a production environment, you can find a useful spreadsheet at https://svn.apache.org/repos/asf/lucene/dev/trunk/dev-tools/size-estimator-lucene-solr.xls.
Although it cannot encompass all the peculiarities of your environment, it is definitely a good starting point for RAM and disk space estimation.
The latest version of Solr at the time of writing is 4.10.3, but a lot of things we will discuss in the book are valid for previous versions as well.
You might already have Solr somewhere and might not want to redownload another instance, your customer might already have a previous version, or, in general, you might not want the latest version. Therefore, I will try to refer to several versions in the book—from 4.7.x to 4.10.x—as often as possible. Each time a feature is described, I will indicate the version where it appeared first.
The download bundle is usually available as a tgz or zip archive. You can find that at https://lucene.apache.org/solr/downloads.html.
Once the Solr bundle has been downloaded, extract it in a folder. We will refer to that folder as $INSTALL_DIR. Type the following command to extract the Solr bundle:
# tar -xvf $DOWNLOAD_DIR/solr-x.y.z.tar.gz -C $INSTALL_DIR
or
# unzip $DOWNLOAD_DIR/solr-x.y.z.zip -d $INSTALL_DIR
depending on the format of the bundle.
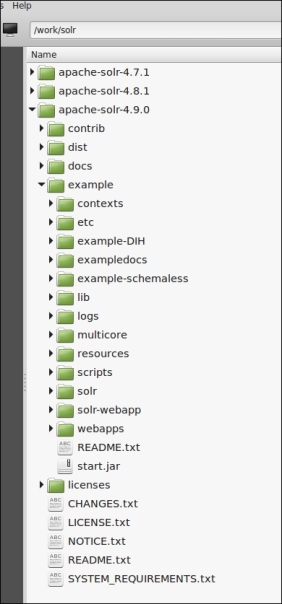
At the end, you will find a new solr-x.y.z folder in your $INSTALL_DIR folder. This folder will act as a container for all Solr instances you may want to play with. Here is a screenshot of the solr-x.y.z folder on my machine, where you can see I have three Solr versions:
The solr-x.y.z directory contains Jetty, a fast and small servlet engine, with Solr already deployed inside. So, in order to start Solr, we need to start Jetty. Open a new shell and type the following commands:
# cd $INSTALL_DIR/solr-x.y.z/example
# java -jar start.jar
You should see a lot of log messages ending with something like this:
...
[INFO]  org.eclipse.jetty.server.AbstractConnector  – Started [email protected]:8983
...
[INFO] org.apache.solr.core.SolrCore  – [collection1] Registered new searcher Searcher@66b664d7[collection1] main{StandardDirectoryReader(segments_2:3:nrt _0(4.9):C32)}
These messages tell you Solr is up-and-running! Open a web browser and type http://127.0.0.1:8983/solr.
You should see the following page:

This is the Solr administration console.