
This part is if you want to leverage GPUs for deep learning. The CUDA toolkit is specially designed for GPU-accelerated applications, where the compiler is optimized for using math operations. In addition, the cuDNN library—short for CUDA Deep Neural Network library—is a library that accelerates deep learning routines such as convolutions, pooling, and activation on GPUs.
Make sure you've registered for Nvidia's Accelerated Computing Developer Program at https://developer.nvidia.com/cudnn before starting with this recipe. Only after will you have access to the files needed to install the cuDNN library.
- We start by downloading NVIDIA with the following command in the terminal (adjust the download link accordingly if needed; make sure you use 8 and not 9 for now):
curl -O http://developer.download.nvidia.com/compute/cuda/repos/ubuntu1604/x86_64/cuda-repo-ubuntu1604_8.0.61-1_amd64.deb- Next, we unpack the file and update all all packages in the package lists. Afterwards, we remove the downloaded file:
sudo dpkg -i cuda-repo-ubuntu1604_8.0.61-1_amd64.deb
sudo apt-get update
rm cuda-repo-ubuntu1604_8.0.61-1_amd64.deb
- Now, we're ready to install CUDA with the following command:
sudo apt-get install cuda-8-0- Next, we need to set the environment variables and add them to the shell script
.bashrc:
echo 'export CUDA_HOME=/usr/local/cuda' >> ~/.bashrc
echo 'export PATH=$PATH:$CUDA_HOME/bin' >> ~/.bashrc
echo 'export LD_LIBRARY_PATH=$LD_LIBRARY_PATH:$CUDA_HOME/lib64' >> ~/.bashrc
- Make sure to reload the shell script afterwards with the following command:
source ~/.bashrc- You can check whether the 8.0 driver and toolkit are correctly using the following commands in your terminal:
nvcc --version
nvidia-smi
The output of the last command should look something like this:
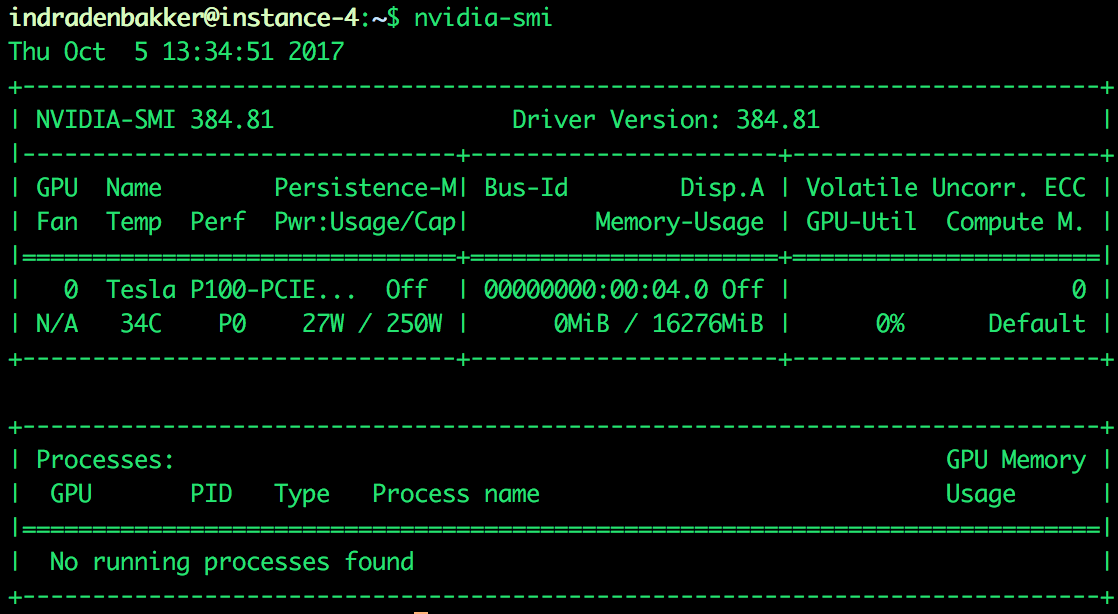
Figure 1.2: Example output of nvidia-smi showing the connected GPU
- Here, we can see that an NVIDIA P100 GPU with 16 GB of memory is correctly connected and ready to use.
- We are now ready to install
cuDNN. Make sure the NVIDIAcuDNNfile is available on the machine, for example, by copying from your local machine to the server if needed. For Google cloud compute engine (make sure you've set upgcloudand the project and zone are set up correctly), you can use the following command (replace local-directory and instance-name with your own settings):
gcloud compute scp local-directory/cudnn-8.0-linux-x64-v6.0.tgz instance-name- First we the file before copying to the right as root:
cd
tar xzvf cudnn-8.0-linux-x64-v6.0.tgz
sudo cp cuda/lib64/* /usr/local/cuda/lib64/
sudo cp cuda/include/cudnn.h /usr/local/cuda/include/
- To clean up our space, we can remove the files we've used for installation, as follows:
rm -rf ~/cuda
rm cudnn-8.0-linux-x64-v5.1.tgz