Book Image

Guide to NoSQL with Azure Cosmos DB

By : Gaston C. Hillar, Daron Yöndem
Book Image

Guide to NoSQL with Azure Cosmos DB

By: Gaston C. Hillar, Daron Yöndem

Overview of this book

Cosmos DB is a NoSQL database service included in Azure that is continuously adding new features and has quickly become one of the most innovative services found in Azure, targeting mission-critical applications at a global scale. This book starts off by showing you the main features of Cosmos DB, their supported NoSQL data models and the foundations of its scalable and distributed architecture. You will learn to work with the latest available tools that simplify your tasks with Cosmos DB and reduce development costs, such as the Data Explorer in the Azure portal, Microsoft Azure Storage Explorer, and the Cosmos DB Emulator. Next, move on to working with databases and document collections. We will use the tools to run schema agnostic queries against collections with the Cosmos DB SQL dialect and understand their results. Then, we will create a first version of an application that uses the latest .NET Core SDK to interact with Cosmos DB. Next, we will create a second version of the application that will take advantage of important features that the combination of C# and the .NET Core SDK provides, such as POCOs and LINQ queries. By the end of the book, you will be able to build an application that works with a Cosmos DB NoSQL document database with C#, the .NET Core SDK, LINQ, and JSON.
Table of Contents (13 chapters)
Title Page
Packt Upsell
Contributors
Preface
Index

Creating a new collection


Now we will create a new collection for the database.

  1. Hover on the database name (Competition) and click on the ellipses at the right-hand side (...) to display a context menu, as shown in the next screenshot:
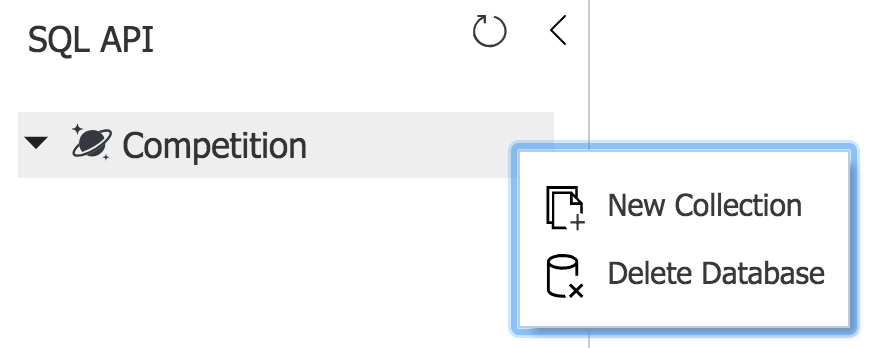
  1. Click on New Collection in the context menu. The Add Collection panel will appear.
  2. Enter VideoGames1 in Collection Id.
  3. Select Fixed (10 GB) in Storage capacity. This way, the maximum storage size for the collection will be 10 GB. In this case, we won't configure a partition key.
  4. Enter 1000 in Throughput (400 - 10,000 RU/s). This way, Azure will provision 1,000 request units per second for this collection. Note that based on the value we enter, the portal displays the estimated spend below this field.
  5. Click + Add unique key and a new textbox will be added below Unique keys. Enter /name in this textbox to specify that we want the name value to be unique per partition key. In this case, there is only one partition, and therefore, the data integrity layer will make...