Book Image

Sage ACT! 2011 Dashboard and Report Cookbook

Book Image

Sage ACT! 2011 Dashboard and Report Cookbook

Overview of this book

Sage ACT! is the top selling CRM software application, and it helps businesses to centralize contact information, organize their calendars and notes, and ultimately maximize contact relationships to optimize business efficiency and profitability. In ACT! 2011, a variety of new dashboards and reports are available for producing graphical representations of client information and for measuring the success of your sales force. This cookbook is full of practical and immediately applicable recipes that will take you from being an ACT! report and dashboard novice to a report-writing pro in no time. The recipes will show you how to create custom dashboards and reports, as well as utilize the new templates available in recent ACT! versions. You will learn to use ACT!'s Report Editor and Dashboard Designer so that you will be able to easily view important information about your business and your sales force. The recipes begin by covering the most basic elements of the ACT! reports and continue to include several recipes that will guide you through creating brand-new reports. If you have an ACT! database, you need to be able to access it quickly and logically; this book will help you do just that.
Table of Contents (16 chapters)
Sage ACT! 2011 Dashboard and Report Cookbook
Credits
About the Authors
About the Reviewer
www.PacktPub.com
Preface

Presetting filters for most used option


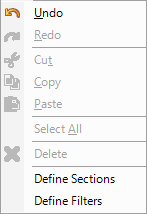
In the previous tasks, we always specified setting all the filter options on the General tab and any secondary tabs. For each of those tasks there were filter options already set, some that we used and some that we had to change. If you always run a specific report with most or all of the same filter settings, it would be an advantage to have those or most of these option settings preset in the report. This is how to do that.

How to do it…

  1. 1. From any screen in the ACT! program, click on Reports in the navigation bar on the left-hand side of the screen.

  2. 2. In the Report List, right-click on the Notes - Histories report.

  3. 3. Click on the Edit menu and then on the Define Filters option.

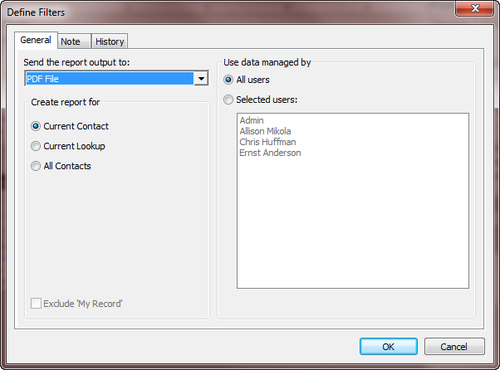
  1. 4. In Create report for, click on the radio button for Current Contact.

  2. 5. Click on the dropdown for Send the report output to and choose PDF File.

  3. 6. In Use data managed by, click the radio button next to All users.

  1. 7. Click on the Note tab and uncheck Notes checkbox.

  1. 8....