Overview of this book
One of the critical components of any workflow related to video production is a reliable tool to create and edit media such as video and audio. In most cases, you will find video producers using software that can only cut and mount video in a "traditional" way. What if you could use a software that offers not only options to edit and cut video, but also create 3D content and animation? With Blender, you can make use of a fantastic set of tools to edit and cut video, and also produce 3D content that will enable you to take your productions to the next level.
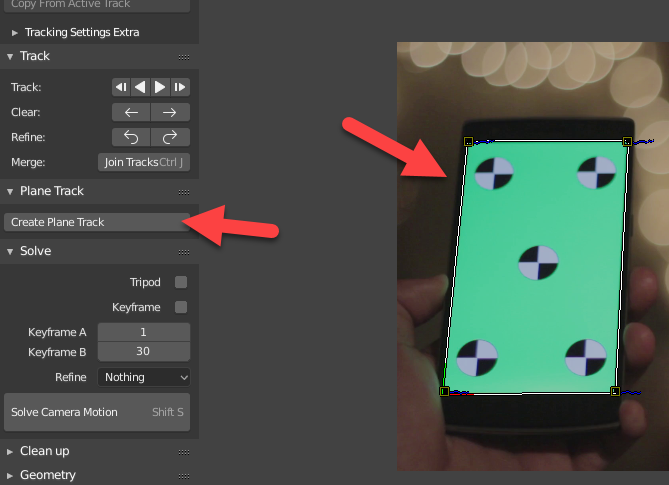
Do you want to take footage from a camera and cut or add sound and titles? This book will show you how Blender can do that for you! You will learn to add 3D virtual objects to the same footage that will help you to create a full 3D environment. Using some camera tricks, you can even turn Blender into a powerful 2.5D animation software to create compelling infographics to produce educational, marketing, and instructional videos. You will also learn how to work with motion tracking to mix live-action footage with virtual objects. You will then learn how to use the video editing capabilities of Blender and match 3D content to your project for YouTube or any other media.
Toward the end of the book, you will export the project to YouTube using optimal settings for the best performance in the platform.