
Web server configuration requires proper attention, because the setup must ensure security of the data sent over the Internet. This recipe will explain how to access your NAV Server from a web browser using a secure connection with the HTTPS protocol. In conclusion, we will see how to connect to NAV from a mobile device will simple additional steps.
Several prerequisites must be met before you can connect to your NAV server over the Web.
Microsoft Dynamics NAV Web Server must be installed and connected to the NAV Server instance which you want to be accessible from the phone client. Web server and NAV Server can be running on separate computers, but the web server must have access to the NAV instance.
To generate a self-signed security certificate you will need the
New-SelfSignedCertificateExPowerShell cmdlet that can be downloaded from Microsoft TechNet.To connect to the NAV server from a mobile device, as per the There's more section, NAV Phone Client must be installed on your device. The installation path depends on the OS version of your mobile device. For example, on an Android device, tap the Google Play icon and type Dynamics NAV in the Search window. Then choose the Dynamics NAV application from the search result and follow the on-screen installation instructions.
From the Start menu, run the Dynamics NAV Administration Shell or Windows Powershell and change the active directory to the folder where you saved the
New-SelfSignedCertificateEx.ps1cmdlet.Run the cmdlet with the following parameters, replacing
"<Server Name>"with the name of your computer hosting the web server:.\New-SelfSignedCertificateEx.ps1 -Subject "CN=<Server Name>" -IsCA $true -Exportable -StoreLocation LocalMachine -StoreName MyRun Microsoft Management Console. Open the Application menu and type
mmc.Click Add/Remove Snap -in in the File menu.
Select Certificates in the list of available snap-ins, click Add, then choose Computer Account, and then Local Computer.
Unfold the
Personal / Certificatesfolder under the Console Root and locate the certificate you just created. You can easily identify it by the Issued To and Issued By fields. They both will have the name of your computer.Right-click on the certificate, select All Tasks | Manage Private Keys. Add Read permission for NETWORK SERVICE account.
Copy the certificate from Personal | Certificates to Trusted Root Certification Authorities | Certificates.
Double-click on the certificate name or choose Open from the drop-down menu. Open the Details tab and scroll to the Thumbprint field.
Copy it to a text editor and remove all white spaces from it. The correct certificate thumbprint must be a 40-digit hexadecimal number. For example:
0d64836e14b528488bcc64853088553705078969.Right-click on the certificate name and choose All Tasks | Export. Accept the default values for all options in the certificate export master: do not export the private key, choose the X.509 in DER encoding as the certificate format. Specify the file's location and name; this is the file you will need to copy to the client connecting to NAV.
In the Microsoft Management Console, click Add/Remove Snap-ins , choose Microsoft Dynamics NAV in the snap-ins list, and add it to the console root.
Right-click on the Microsoft Dynamics NAV snap-in and choose Add Instance.
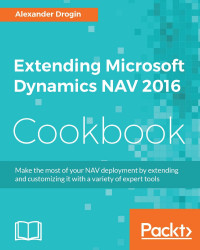
In the Server Instance window, specify the new instance name and services ports. For this demo, we will name the instance
WebLogin. When setting ports for services, make sure they are not used by other NAV instances.Select Network Service as the service account:
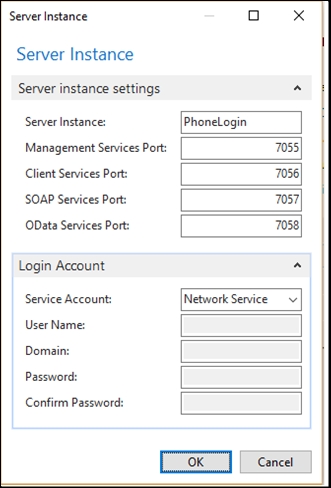
Click OK to accept the settings and create the service instance. Still in the management console, click the Edit button in the right pane to change the configuration setting of the new service:
The first parameter that should be changed is Credential Type. The default value is Windows; select NavUserPassword in the dropdown list.
You also need to provide the certificate thumbprint in the Certificate Thumbprint field. To obtain the thumbprint value, return to your certificate created in the first step and double-click on the certificate name or choose Open from the drop-down menu. Open the Details tab and scroll to the Thumbprint field.
Copy the thumbprint to the NAV service setup. Don't forget to remove all white spaces from it, or the value will not be accepted.
Add the Internet Information Services snap-in to the Microsoft Management Console. Click Add / Remove Snap-in and select Internet Information Services.
In the
Sitesfolder locateMicrosoft Dynamics NAV 2016 Web Client. Select the site root and click on Bindings in the Actions pane.Add site binding for HTTPS protocol: choose https for Type and leave the default port as
443for HTTPS connections. In the SSL certificate option choose the certificate you created in the first step, from the drop-down list.In the IIS management console, select the
DynamicsNAVfolder under theMicrosoft Dynamics NAV 2016 Web Clientsite and then click on Explore action in the Actions pane. This action will open the folder in which web site files are located. Alternatively, you can open this folder in a file manager. The default files location isC:\inetpub\wwwroot\DynamicsNAV90.Open the
web.configfile in a text editor, change the following three configuration keys, and save the file:ServerInstance. New value: WebLoginClientServicesCredentialType. New value: NavUserPasswordClientServicesPort. New value: 7056
Connect to the NAV server with the role-tailored client and open users setup:
Administration | IT Administration | General | Users.Create a new user. Enter a user name and set the password in the Microsoft Dynamics NAV Password Authentication tab. Leave the Windows User Name field blank.
Assign permission sets of your choice to the user. At least one user in the database must have the SUPER permission set.
Install the certificate on the client computer.
Run the web browser and open the page by typing this URL,
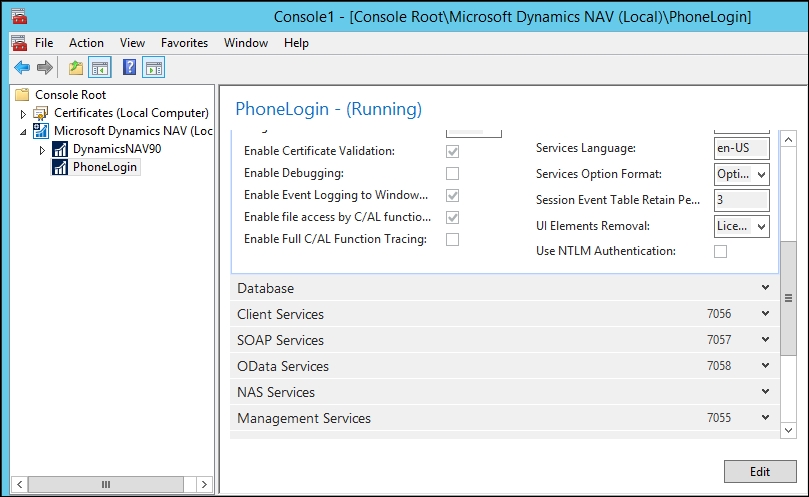
https://localhost:8080/DynamicsNAV90/.You will required to enter the user name and password:
After successful authentication, you will be redirected to the default role center:

In Step 1 through Step 8 we generate a self-signed SSL certificate the same way we did in the previous recipe of this chapter, Configuring NAV Server. The certificate is required whenever we need to establish a secure connection with authentication type other than Windows.
After running the New-SelfSignedCertificateEx cmdlet, your new certificate is created in the LocalMachine certificate store. A client computer connecting to the server must hold a copy of this certificate. To copy it to the client PC or mobile device, you need to export the certificate file. Step 9 exports the security certificate into a file that will be installed on client. A new NAV Server instance is created and configured in Step 10 to Step 17. We need two service instances here to redirect web requests to a separate service and leave Windows users unaffected. The user login type in NAV is defined by the server-side setup, and once a service is configured for NAVUserPassword credential type, it cannot authenticate users with the Windows credential type; they will receive a "Protocol mismatch" error. Since web users are outside of the corporate domain and cannot access the server with Windows credentials, we must change the authentication type they use. But we still want domain users to be able to login with their Windows domain account. And this is why we need the second service instance. Users within domain will be connecting to the service DynamicsNAV90, nothing will change for them. On the other hand, web requests will be redirected to the WebLogin service. Since both services point to the same database, all users will work with the same data and application.
Our front-end is the web server published by the Internet Information Services (IIS), and the IIS service must forward all incoming requests to the correct back-end service. Now let us configure the web service.
The final setup on the web server side is to configure authorization requests from IIS to the NAV instance that will serve them.
With the web server configuration complete, you can connect to the same service from a mobile device running NAV Tablet Client or Phone Client.
Your mobile device must have the SSL certificate registered, same as the Windows Role-Tailored Client. To install the certificate on the mobile device:
Copy the exported certificate file to the mobile device, locate it, and click on the file.
Give a name to the certificate when asked. This name is independent of the server or client name and can be any text as shown in the following screenshot:

After the certificate is successfully installed, you will see a confirmation. Then locate the Dynamics NAV phone client shortcut in your applications and click it. You will be prompted to enter the service name:
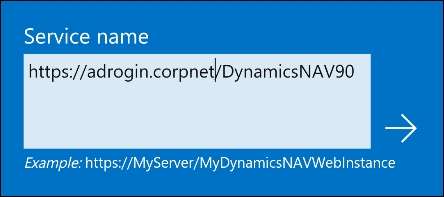
Enter the server name and the web instance name and connect to the server. You will be asked to enter a user name and password. These are the name and the password of the user created in the previous step.
Now you are connected to the NAV server:

Note
If you are configuring a web server inside your corporate network, it is possible that you won't be able to perform this step and connect to the server from a mobile phone. Corporate security policies often block connections to internal resources from outside. In this case, discuss possible solutions with your company's system administrators.