Book Image

Microsoft Dynamics GP 2016 Cookbook

By : Mark Polino, Ian Grieve
Book Image

Microsoft Dynamics GP 2016 Cookbook

By: Mark Polino, Ian Grieve

Overview of this book

The latest release of Dynamics GP 2016 offers a powerful, adaptable, and cloud enabled enterprise accounting software solution. The new version has experienced changes in serviced-based architecture, workflow, existing functionalities, and the introduction of plenty of new features. This book will help you get the most out of Dynamics GP quickly and effectively. This book picks up where implementation training leaves off. Whether you are new or experienced, you will find useful recipes to improve the way you use and work with Dynamics GP. The book starts with recipes designed to enhance the usefulness of Microsoft Dynamics GP by personalizing the look and feel of the application. Most of the recipes are designed to give you tips for a typical installation of Dynamics GP, including core financials and distribution modules. The book then moves through recipes that include automating Dynamics GP to allow users or administrators to focus on value adding tasks, connecting Dynamics GP to Microsoft Office, exposing hidden features in Dynamics GP, PowerBI, and much more!
Table of Contents (20 chapters)
Microsoft Dynamics GP 2016 Cookbook
Credits
About the Authors
About the Reviewers
www.PacktPub.com
Preface
Index

Tailoring SmartLists by adding fields


Default SmartLists contain predefined sets of fields. However, users always want to add additional fields or rearrange existing columns. Fortunately, Dynamics GP provides this functionality out of the box.

Users can add fields to SmartLists, remove fields or rearrange their order, allowing users to fine tune SmartLists to meet their needs. In this recipe, we'll look at adding and rearranging fields in SmartLists.

How to do it…

To add a field to a SmartList, follow these steps:

  1. Select the SmartList icon from the menu bar at the top or select Microsoft Dynamics GP menu from the top and click on SmartList.

  2. Select Financial then Account Transactions in the left pane.

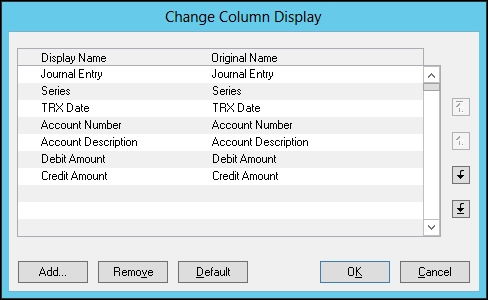
  3. Click Columns:

  4. Click Add. This exposes all of the available fields for a SmartList, not just the defaults:
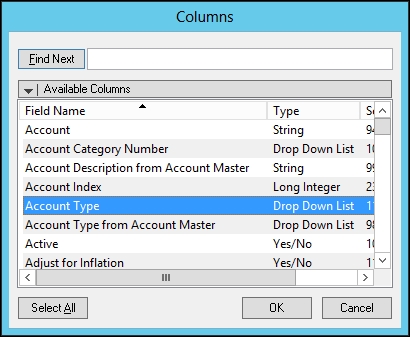
  5. Select Account Type and click OK to add this field to the SmartList:

To rearrange fields on a SmartList, follow these steps:

  1. Continue on the current screen and select Account Type.

  2. Click the up arrow...