
To get to the part of the admin center where the Office 365 Groups controls are, go to Office 365 Admin Center | Groups | Groups, as shown in the following screenshot:
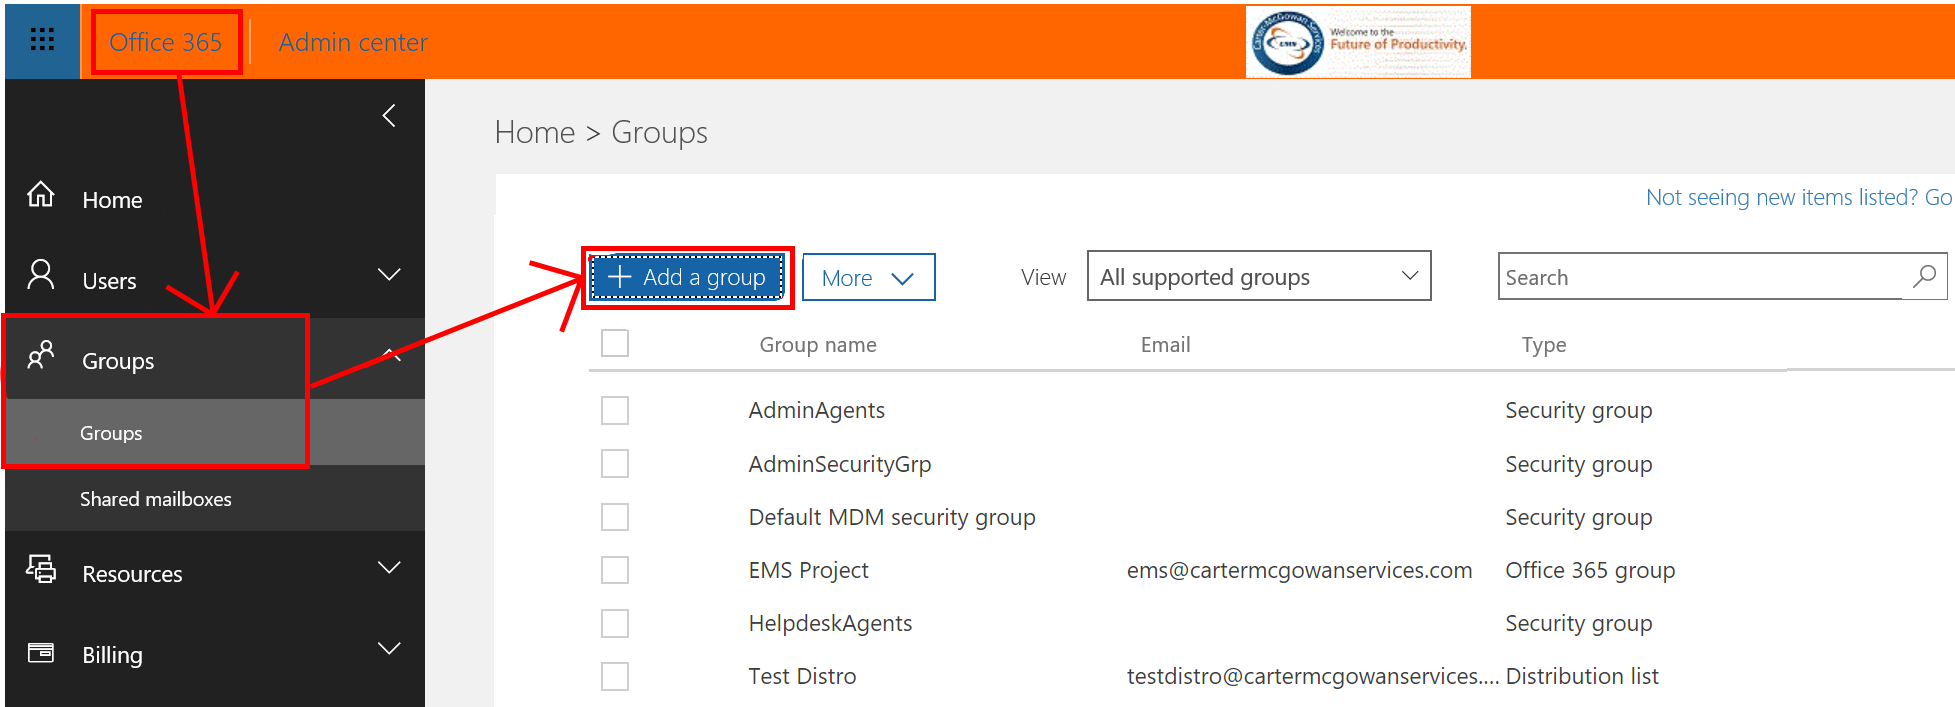
Click on the +Add a group button and fill out the form as follows:

Note
By default, Office 365 Group is the type of group that is created without clicking the drop-down list and choosing the Office 365 group option. If you want a distribution list or a different kind of Security group, you need to make sure you click on the drop-down menu.
Let's walk through what's needed in the form; the fields are as follows:
Group Id: This is the email address for the group. You can choose a domain based on those available from your tenants.Description: This is a description of your group.Privacy: With this, you can choose whether a group is public, where all can see it and its content, or private,where only members can see it and its content.